Disclosure: This trip was hosted by the local Tourism offices and ATTA. As you know: I’m keepin’ it real and tell you how it is - I maintain full editorial control of the content published on Hiking in Finland. Read the Transparency Disclaimer for more information on affiliate links & blogger transparency.
Meeting with friends and going on adventures with them is the best thing ever. Good thing I was on this trip on Cyprus with friends old and new, and that together we experienced all the wonderful things Cyprus has to offer - from great hikes to climbing and diving, delicious food which is plentiful and of course the friendly & kind Cypriots who were excited to show us the beauty of their island. Here’s a taster of what we saw on this island - more to come later this month!
An easy hike in the mountains with a new friend.
Taking in the view over the occupied area of Cyprus.
Tasty food!
Off for a bike ride.
Local cats.
Underwater scenery.
And more beautiful hikes - Cyprus has a lot to offer to the outdoor enthusiast who needs sunshine and warmth in December. There’s a long-distance trail running across the island, as well as hundreds of longer and shorter trails, dozens of climbing crags and even Downhill MTB trails, though road biking is a lot more popular. I’ll tell you more about the possibilities of this small island later this month, so maybe follow me on Instagram to not miss any updates!
If you enjoyed this article buy me a coffee. You also could follow along on Instagram and Youtube for more outdoorsy updates!
]]>Disclosure: This trip was hosted by the local Tourism offices and ATTA. As you know: I’m keepin’ it real and tell you how it is - I maintain full editorial control of the content published on Hiking in Finland. Read the Transparency Disclaimer for more information on affiliate links & blogger transparency.
]]>Disclosure: This trip was supported financially by the local tourism office. As you know: I’m keepin’ it real and tell you how it is - I maintain full editorial control of the content published on Hiking in Finland. Also, there are Affiliate links in this article which are marked with an ∞ Infinity Sign 😊 Read the Transparency Disclaimer for more information on affiliate links & blogger transparency.
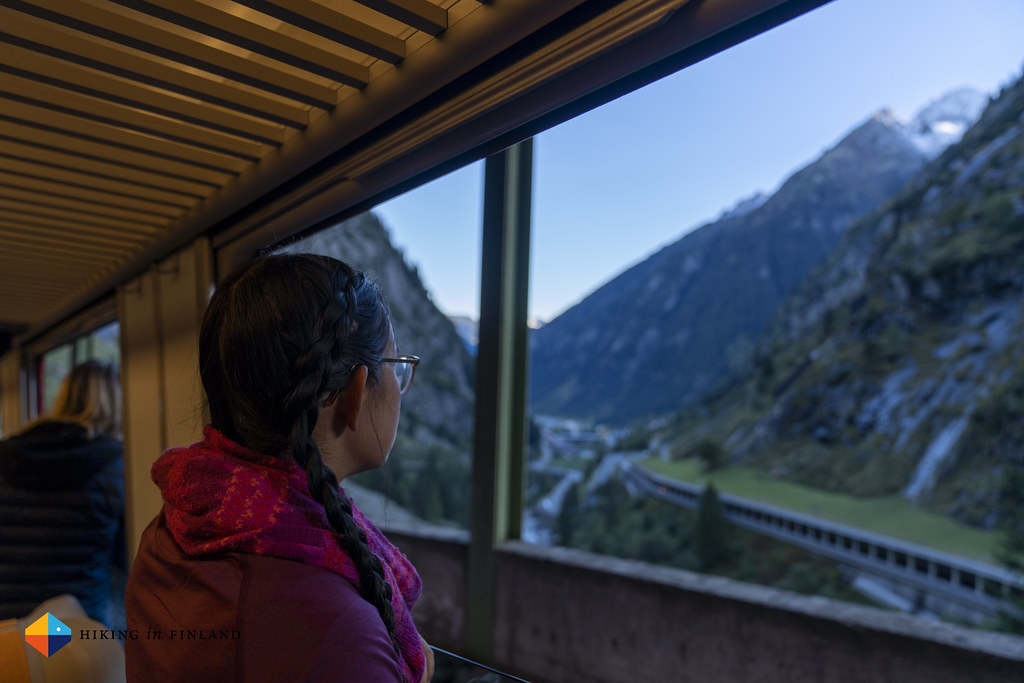
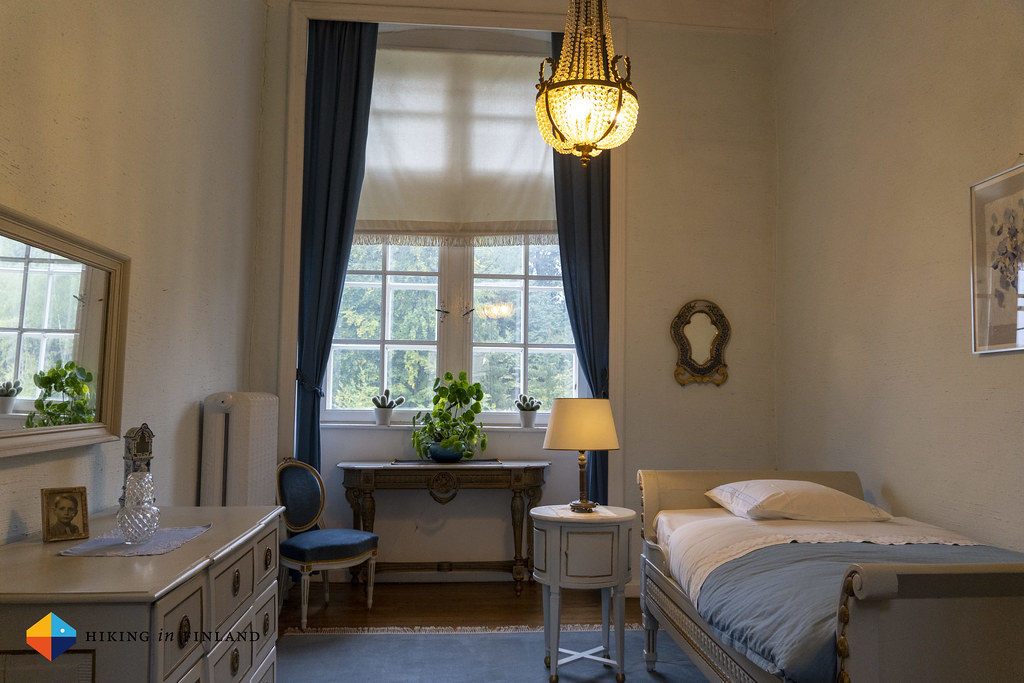
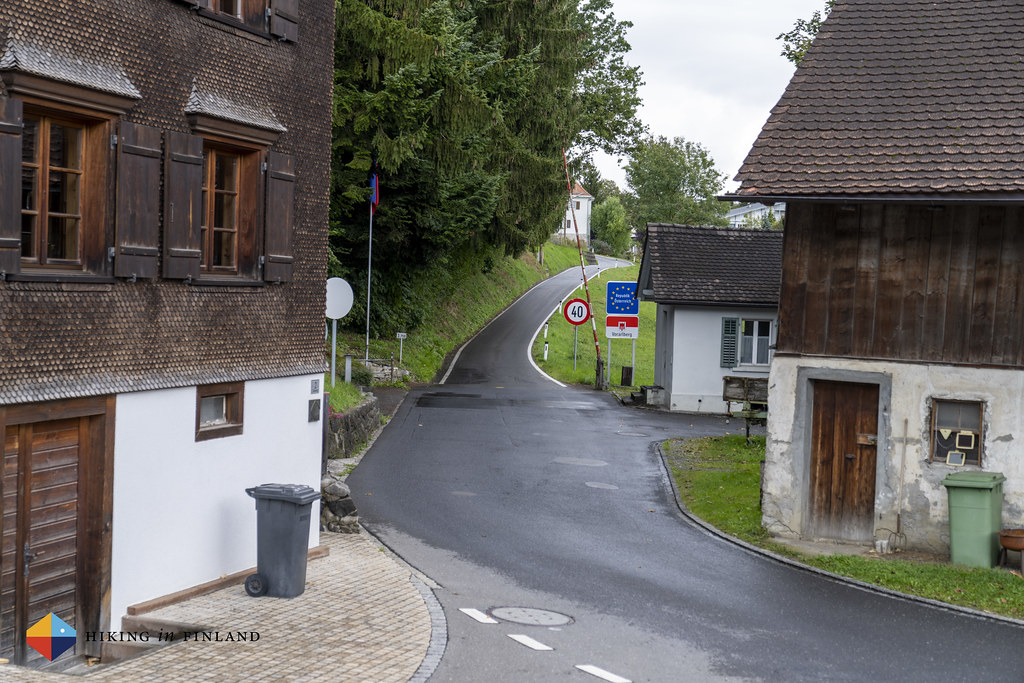
We meet in Switzerland at a railway station. It’s been again a year since we met, and much has happened since our hike in autumn 2020. We board a bus to Vaduz, the capital of Liechtenstein, where we arrive twenty-five minutes later. The capital of Liechtenstein is small - you can stroll through it easily. Above the town sits the castle of the Prince of Liechtenstein. It’s not a hiking day yet for us, so we drop our gear in our Hotel and go for lunch. On the way we are reminded that he-who-shall-not-be-named is still on the lose:
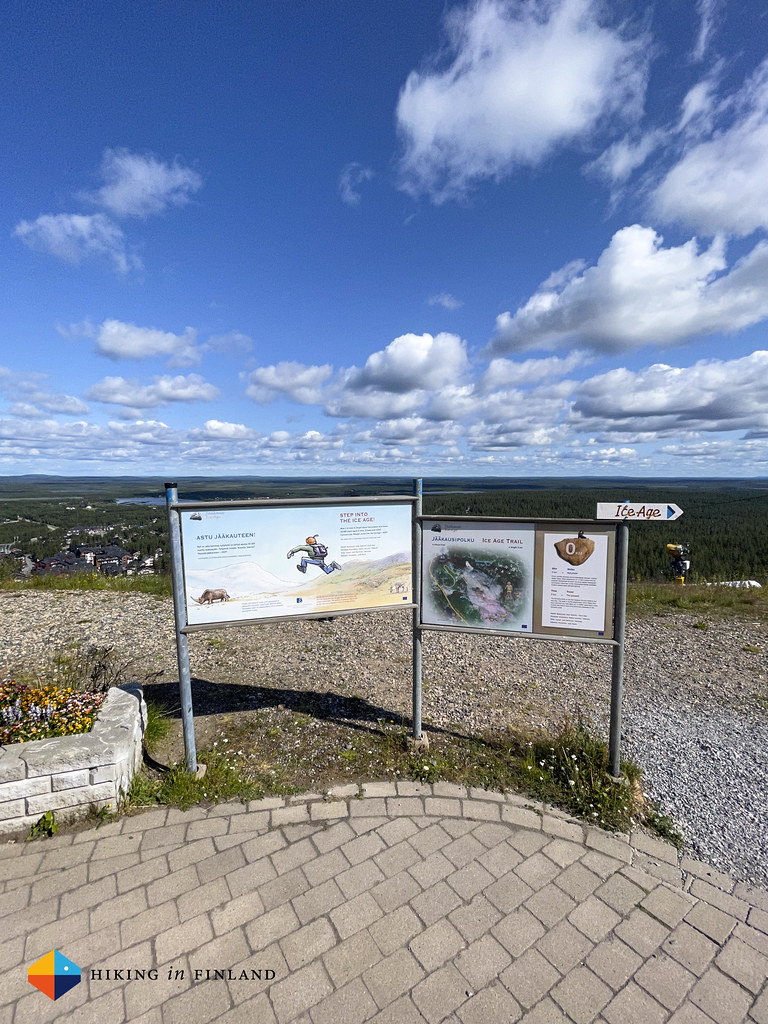
After a tasty lunch we decide to go and explore Vaduz. The trail which we want to hike the next few days, the Route 66, goes high above Vaduz through the mountains, but down here the Liechtenstein-Weg as well as a few more trails go through town. We decide to follow the trail up to the castle of the Prince, which gives some nice views over the town and over to Switzerland, which lays just behind the Upper Rhine, which is one of the natural borders of Liechtenstein.
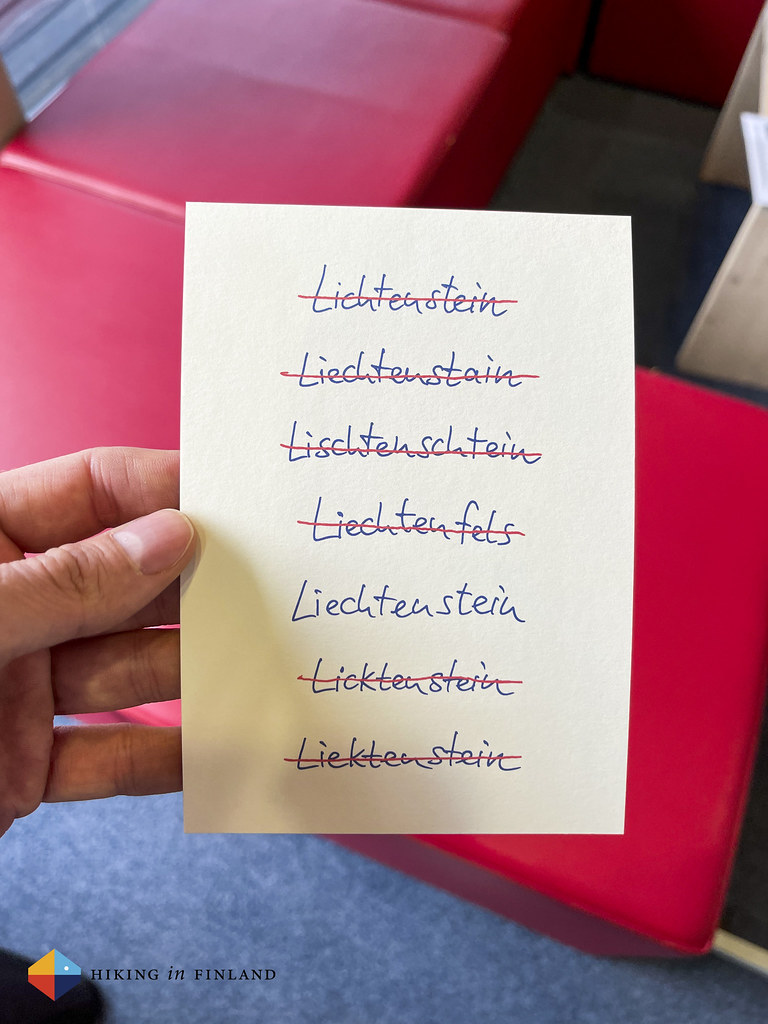
After our stroll up to the castle we took the same way back to town, where we explored a couple of the Museums and made sure to spell Liechtenstein correctly.
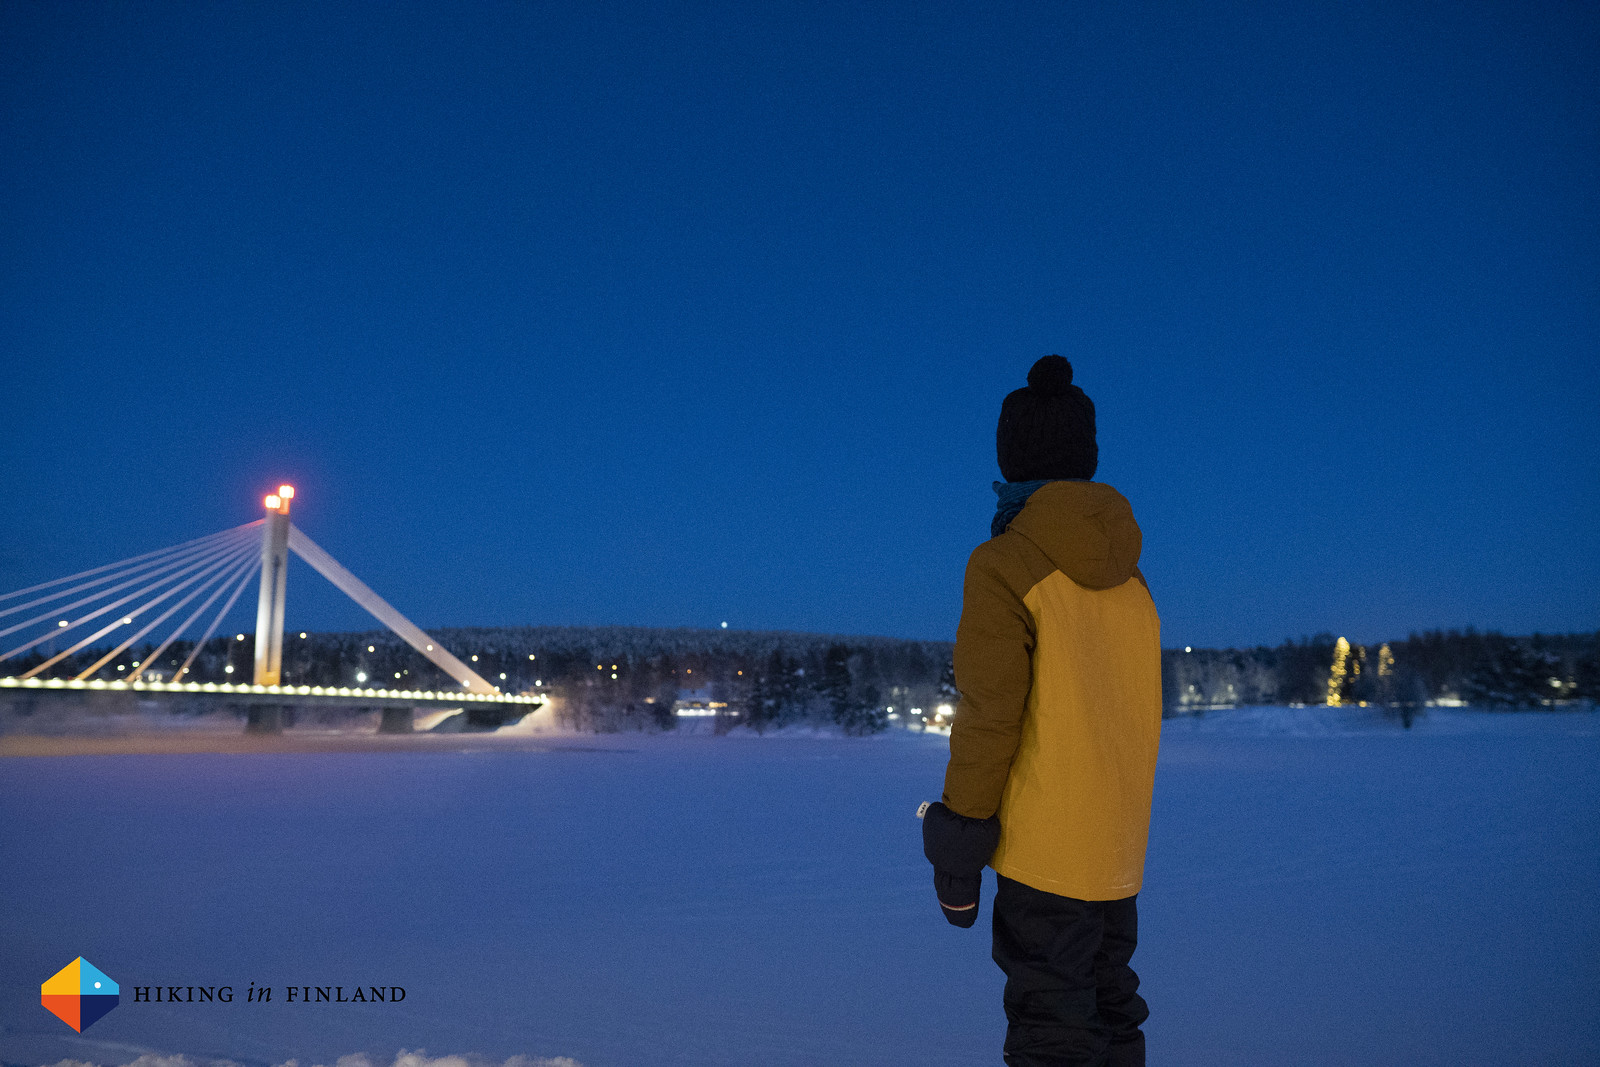
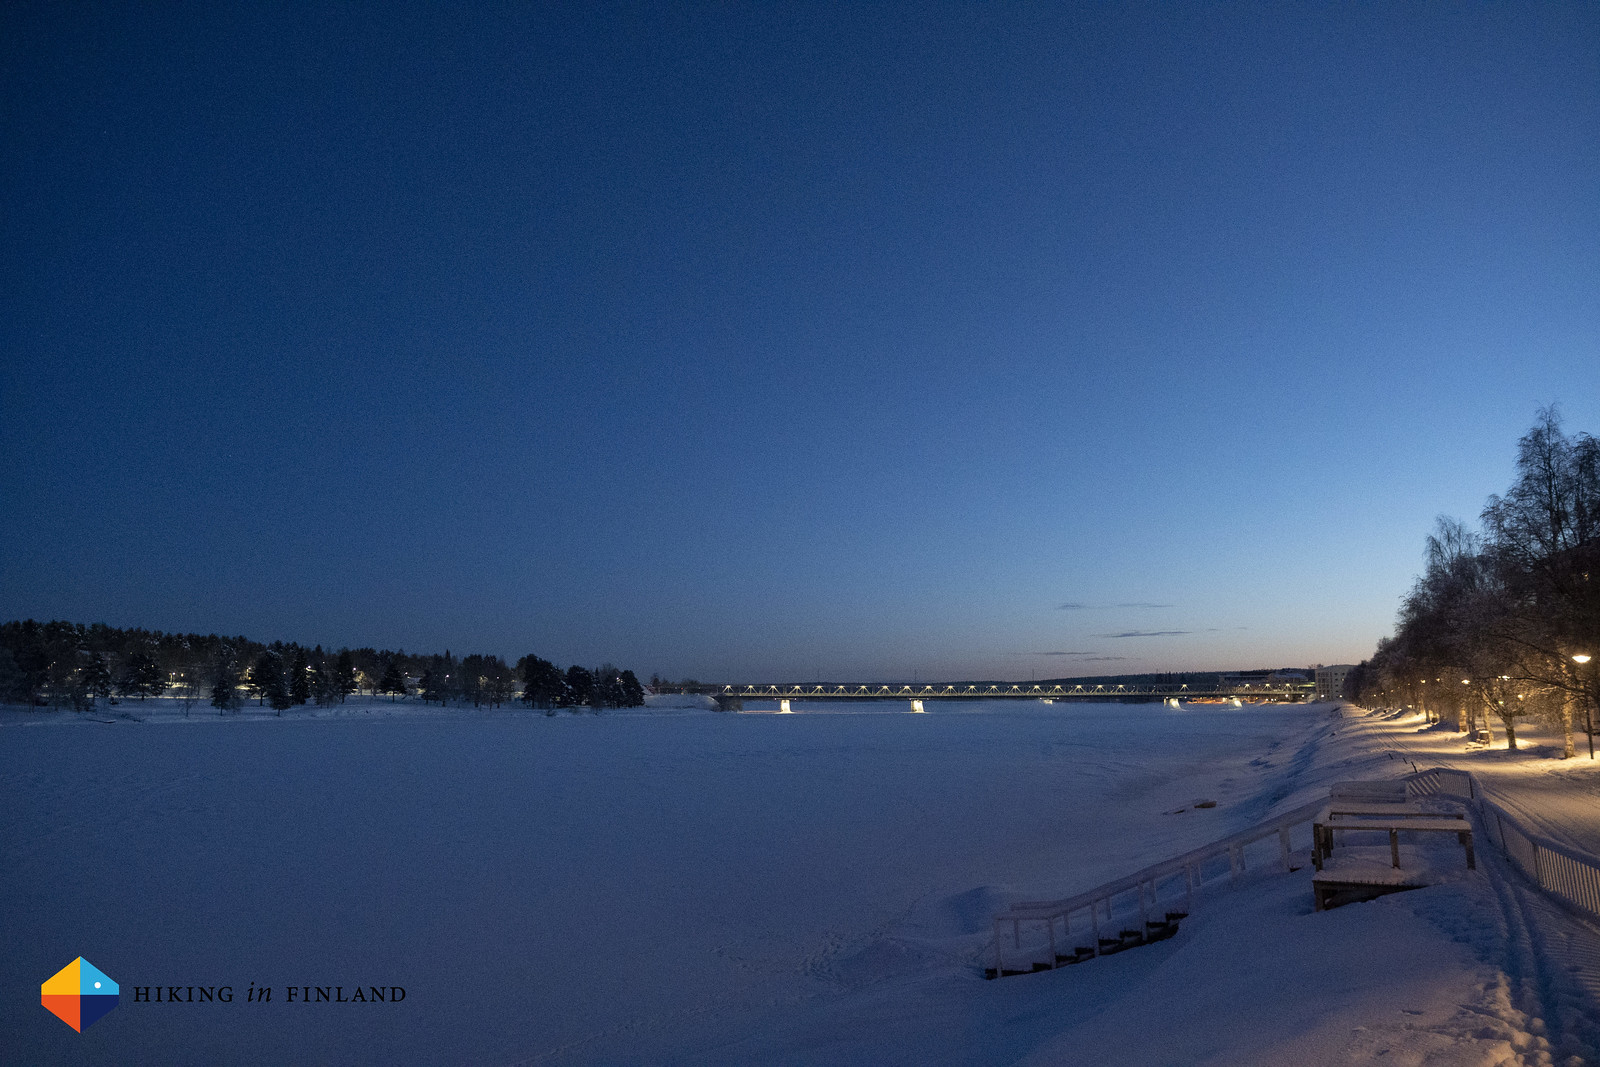
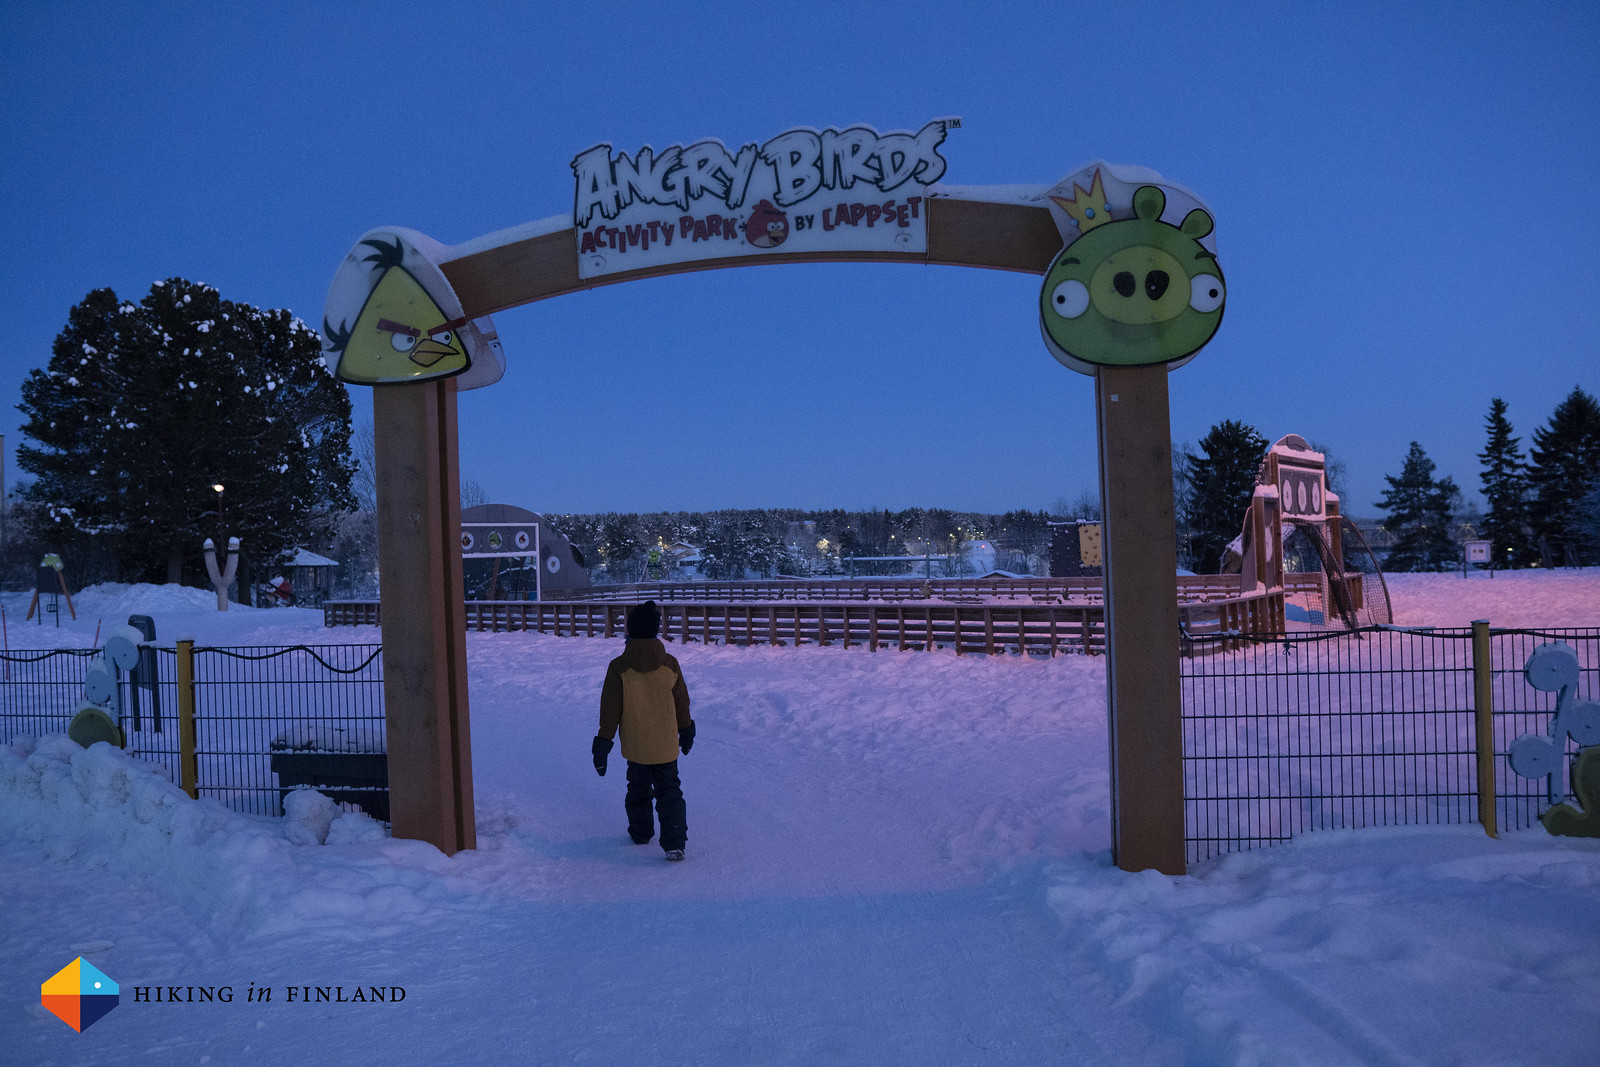
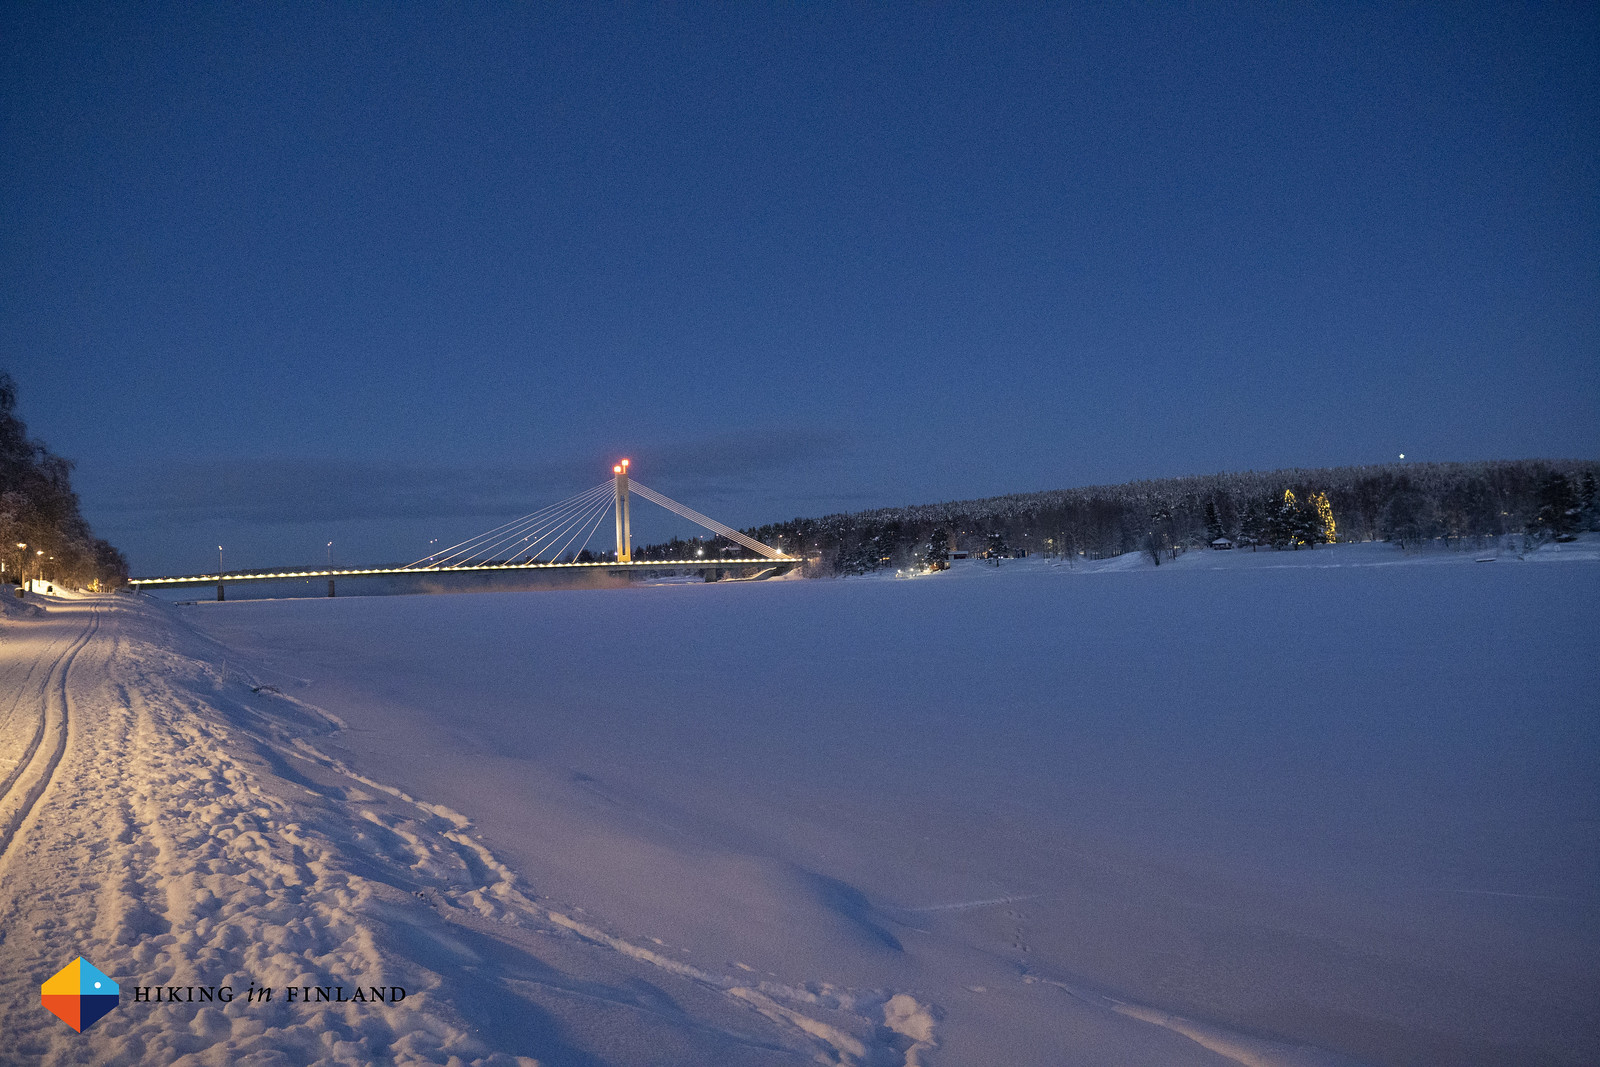
We decided we should walk to the Upper Rhine, as it’s just a short stroll through Vaduz, and we’d see more of the town, too.
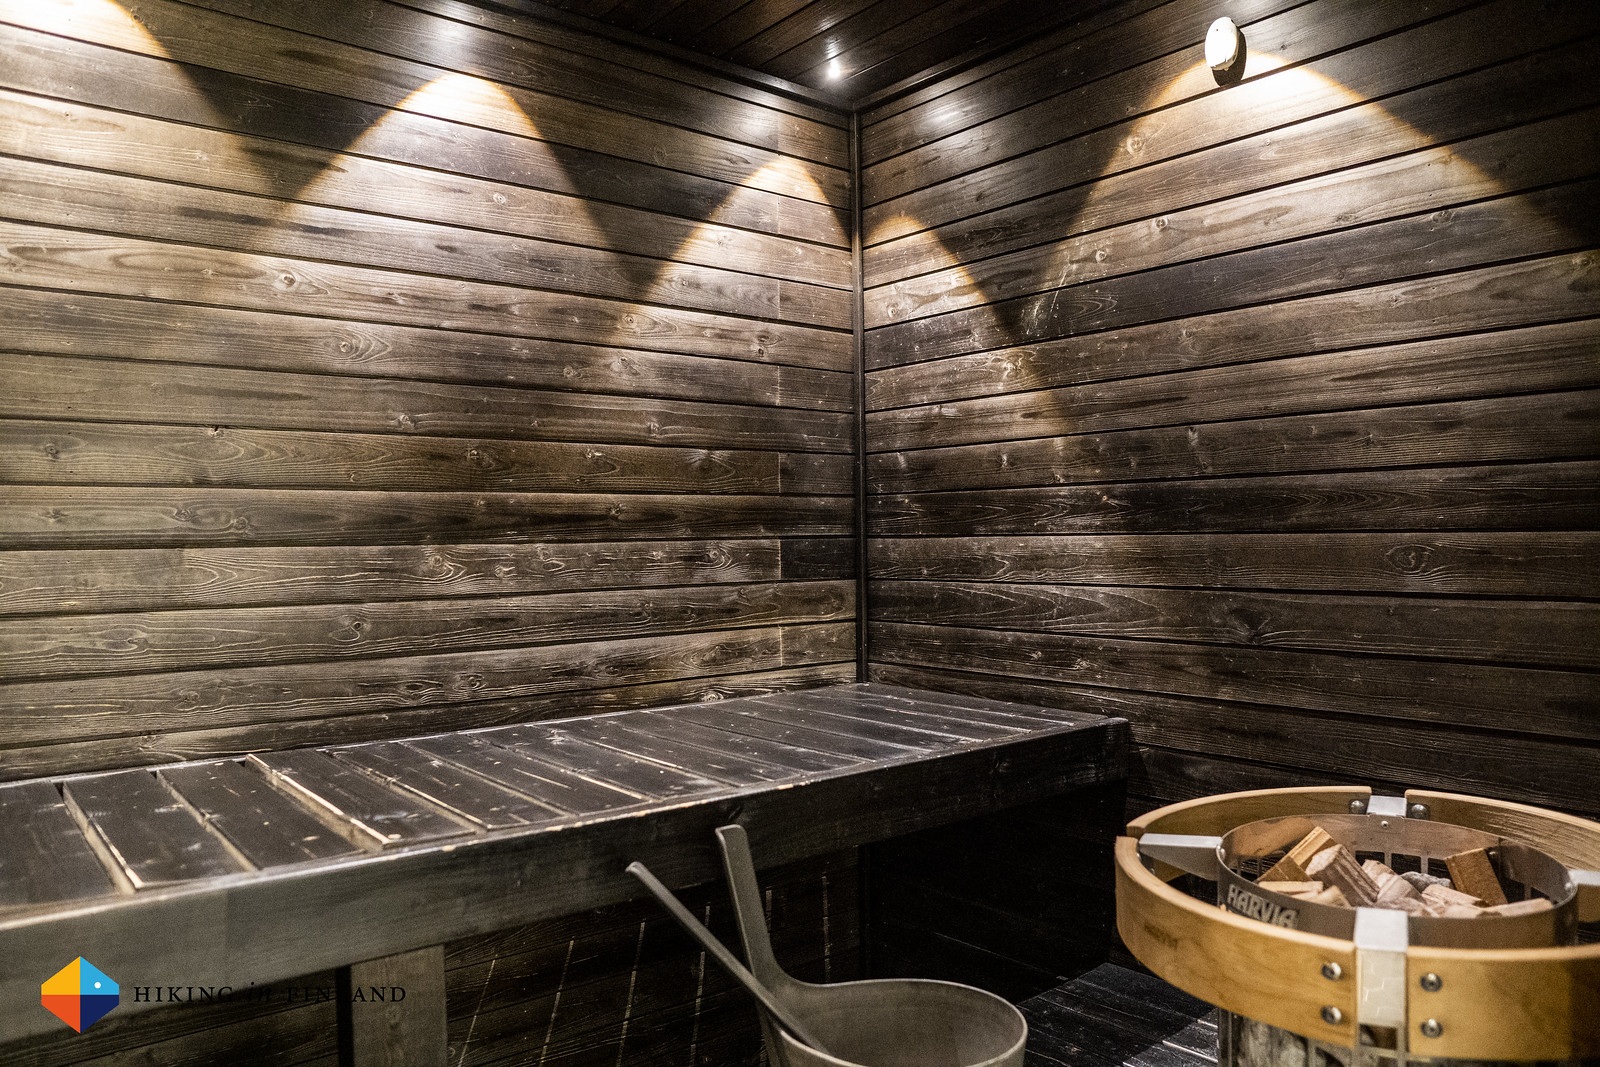
After this wee excursion it was time to head back to the centre, enjoy the sauna at the hotel and then head for dinner, before getting ready for our first day of hiking.
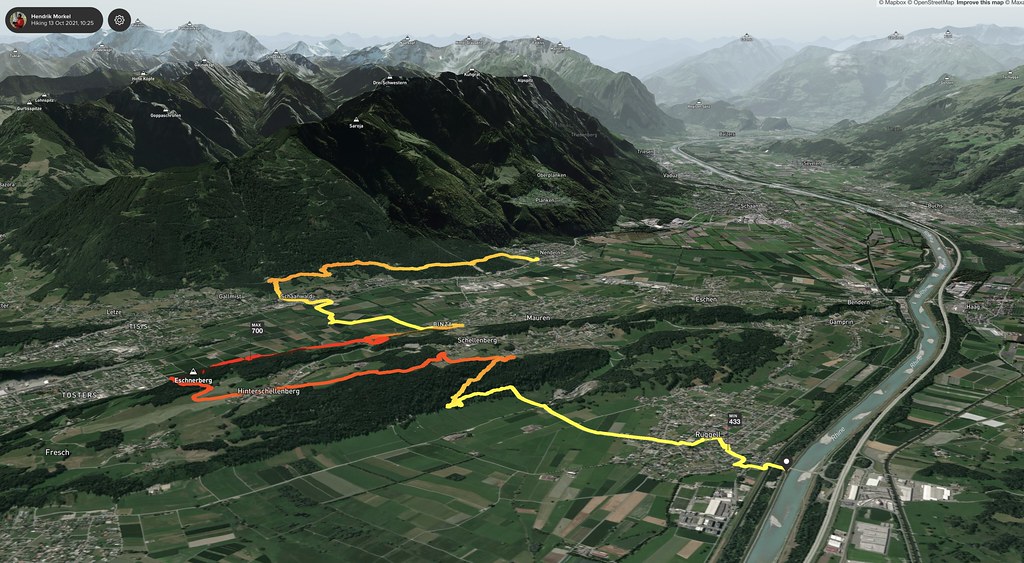
Usually we hike from Point A to B to C to D on our hikes. A clear starting point, a clear ending point. Sometimes we hike a loop, too - it’s easier from a transportation point-of-view. This time however, due to the weather, we needed to start our hike at Point C. This was still the moment we were planning to hike Route 66, the high alpine route, and as there was plenty of snow up in the mountains, as well as rain and snow in the forecast, we decided to hike first the last, low land section of the trail from Nendeln to Ruggell at the Swiss Border. For me this is fine, I like change and the possibility to do things differently - but for Martin it feels wrong.
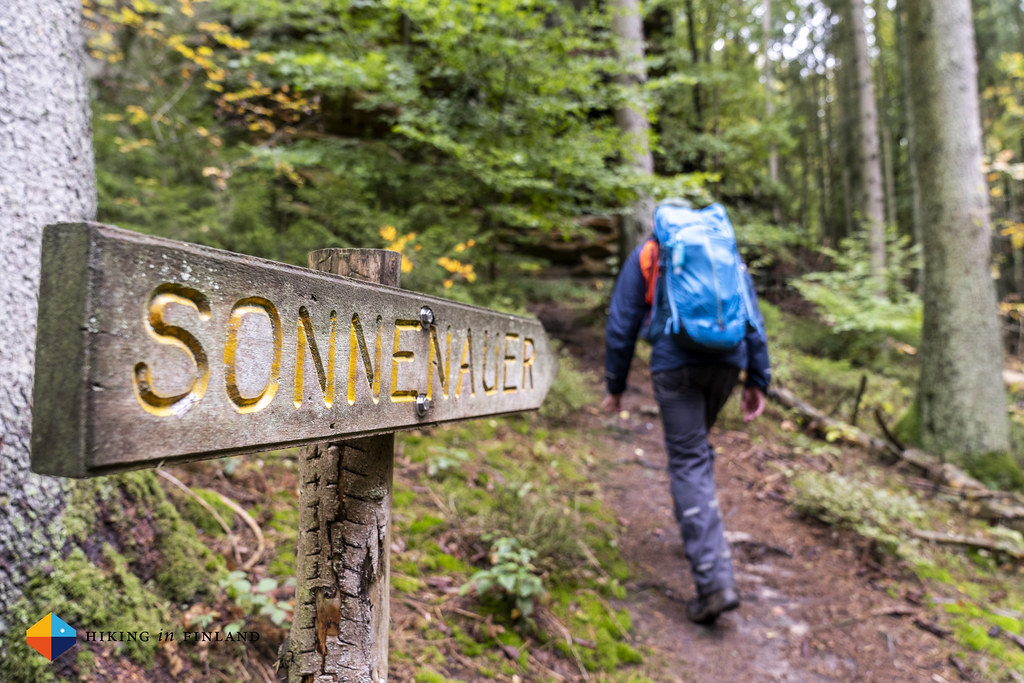
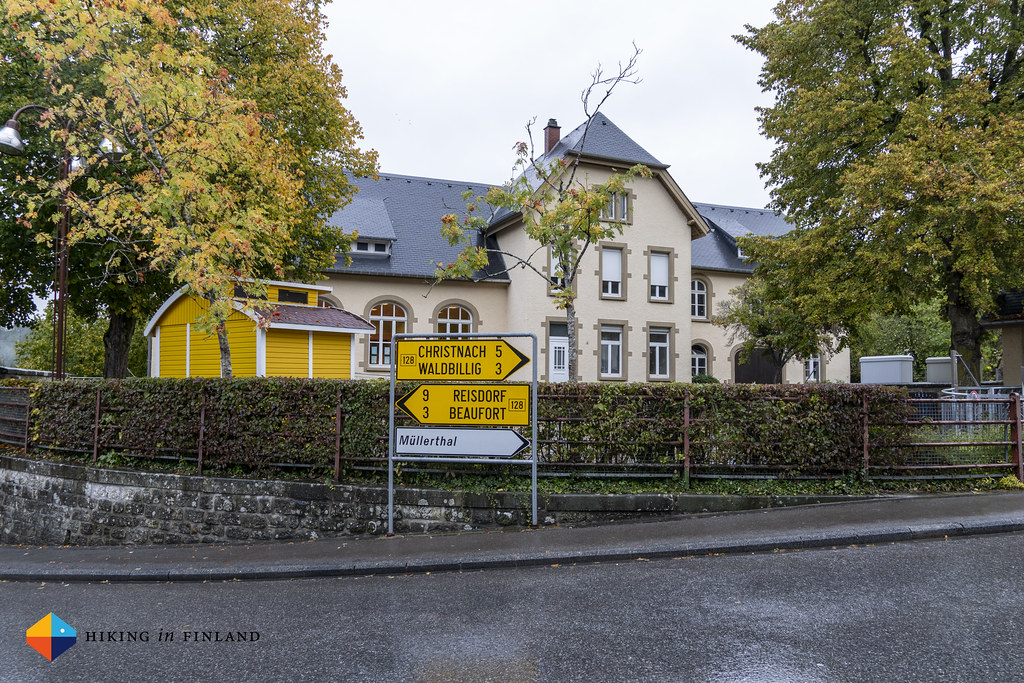
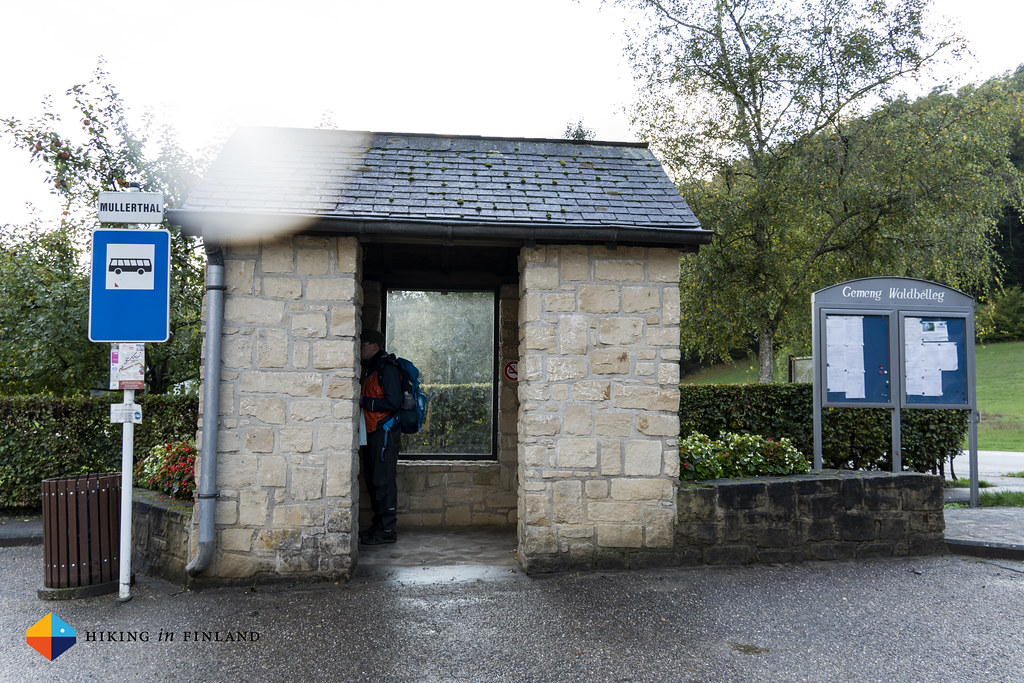
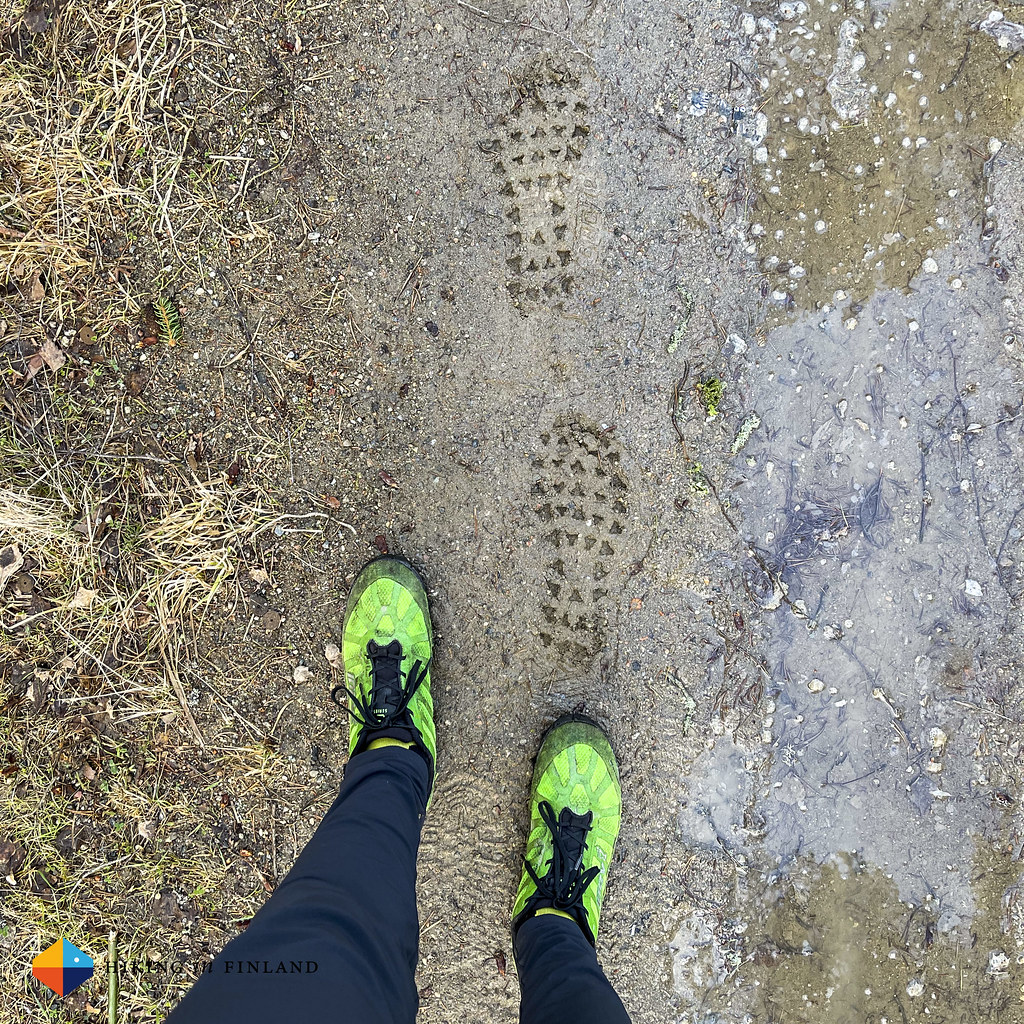
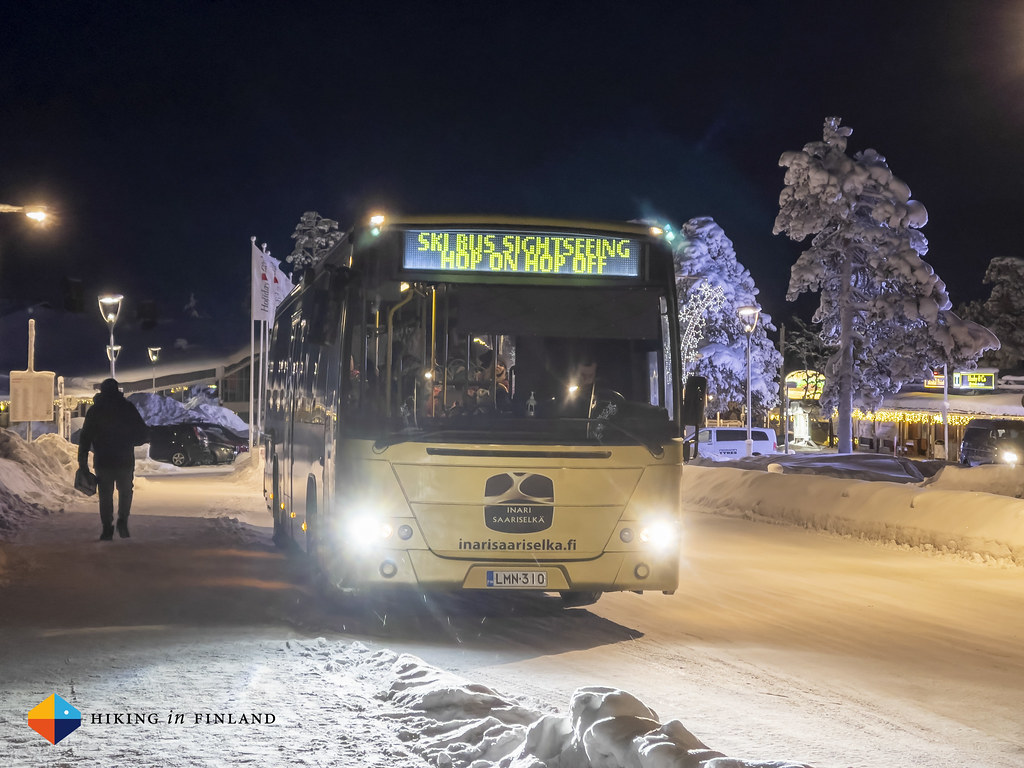
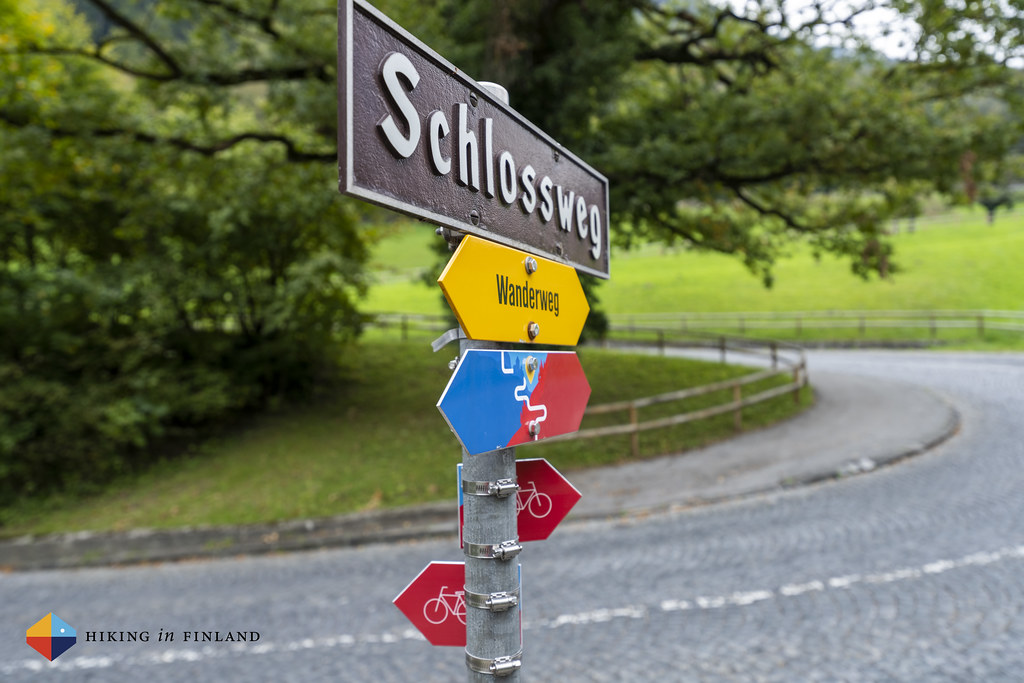
I totally get it. Doing something like a hike in a linear way, meaning starting at Point A and ending at Point D, makes a lot of sense. It minimizes transportation, and most importantly, it gives the feeling of hiking a trail from start to finish. But then jo-jo-ing, or section hiking, is quite common, especially on very long trails, and also makes a lot of sense if you want to do a hike in a given time frame and not return when the weather is better. So this time around we jo-jo this trail, because of the weather and conditions on the ground. Thanks to the good public transportation infrastructure in this small country we will be using the Bus to get around. Taking the Bus in Liechtenstein is easy, they’re just as punctual as in Switzerland, and so a short ride later we were in Nendeln, ready to start our hike. Above us the mountains are wearing a white blanket of snow, while down here it is a wee drizzle which means we are wearing our rain clothes.
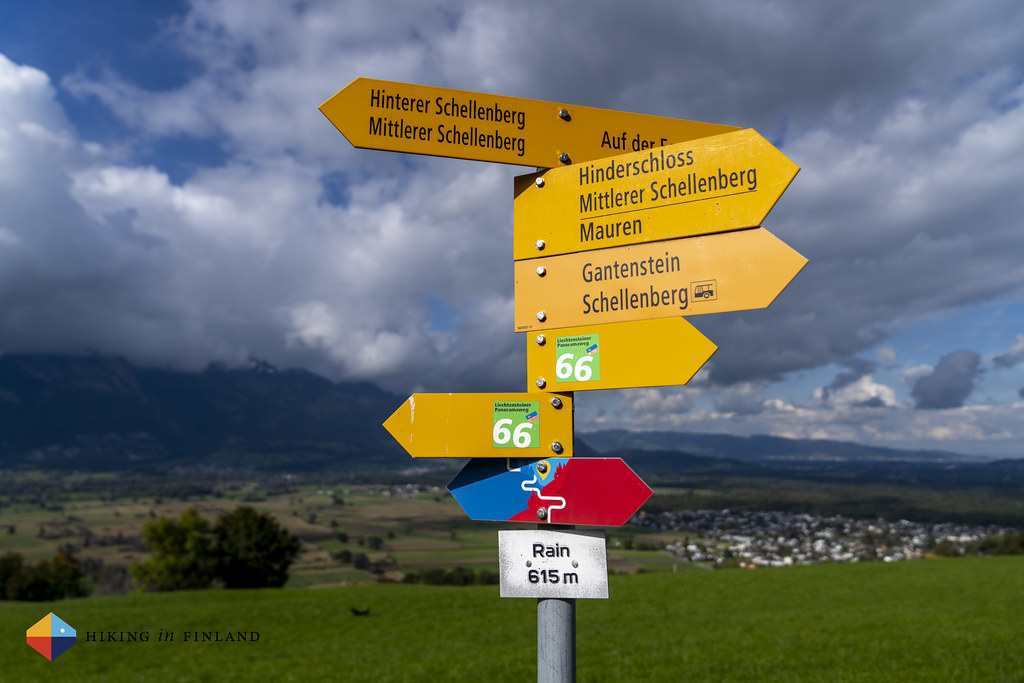
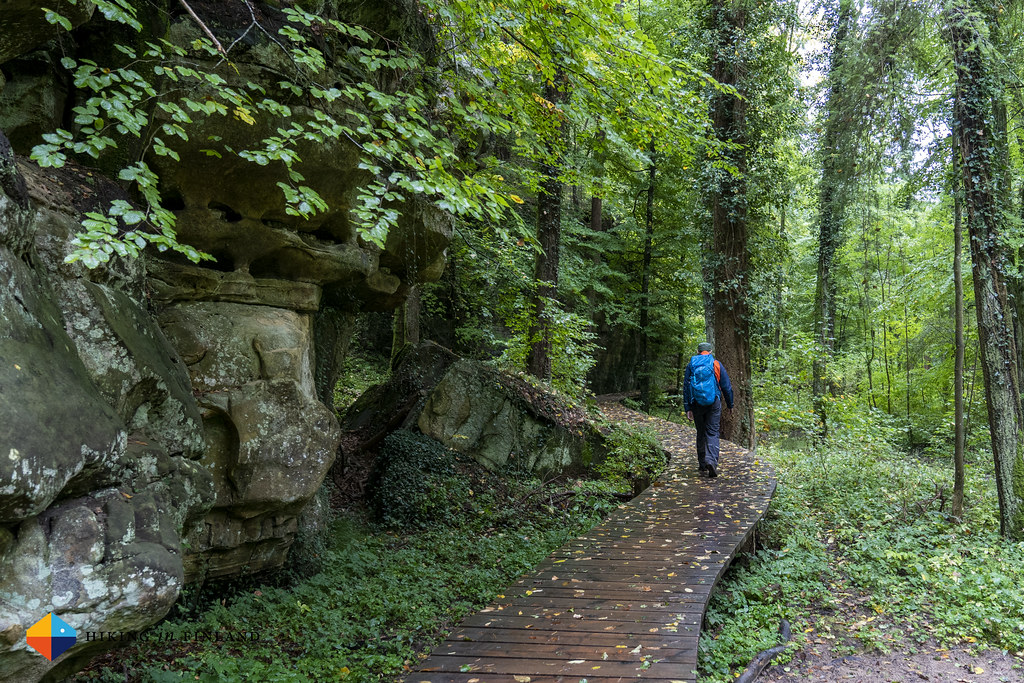
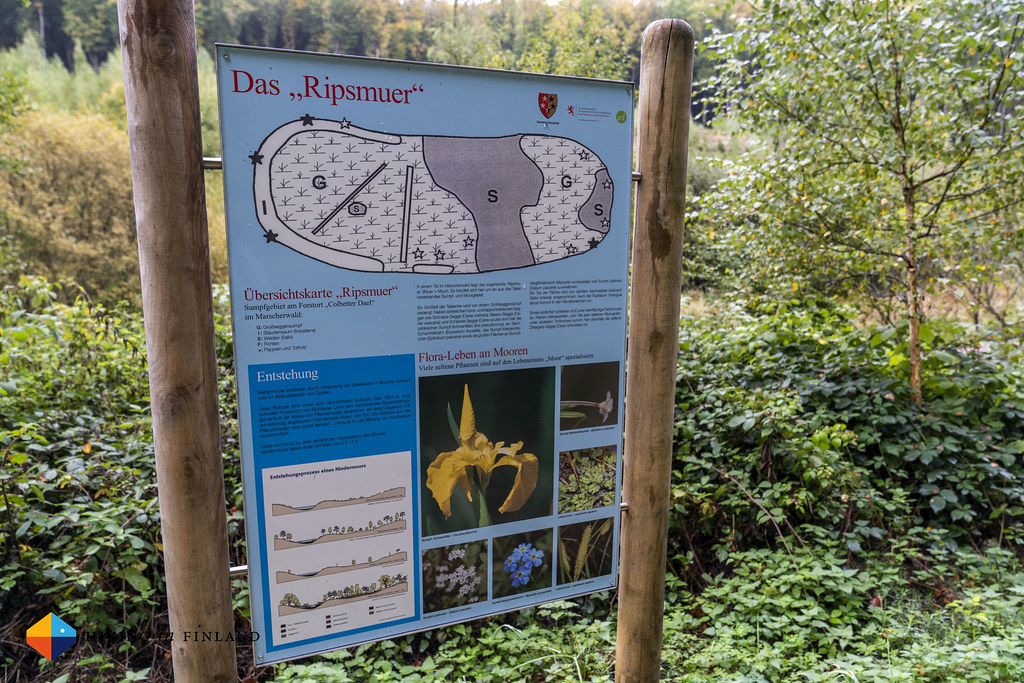
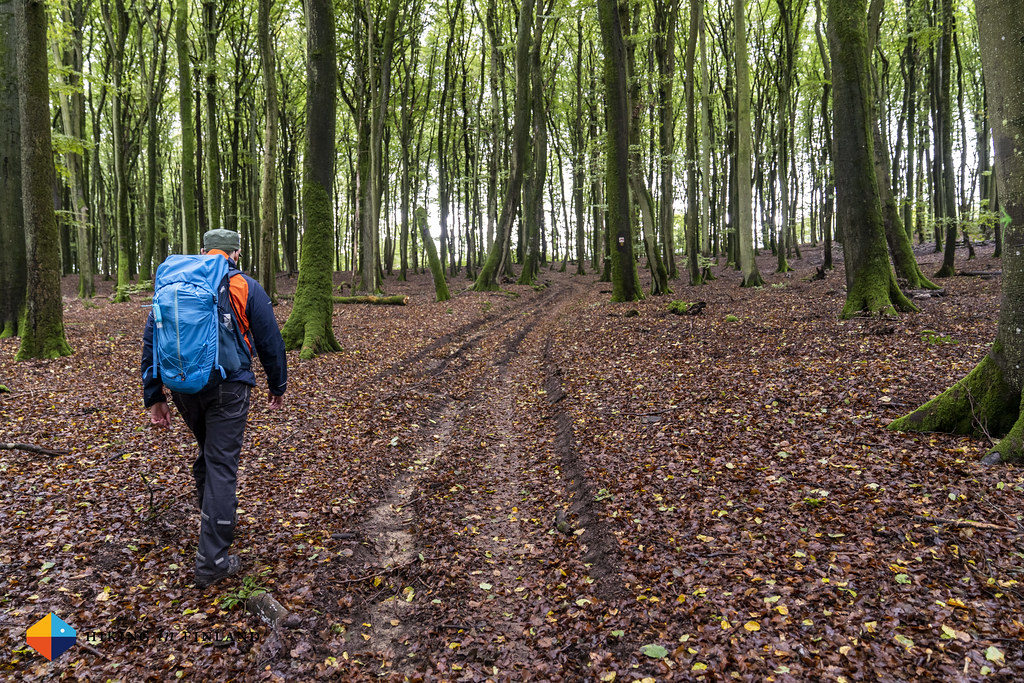
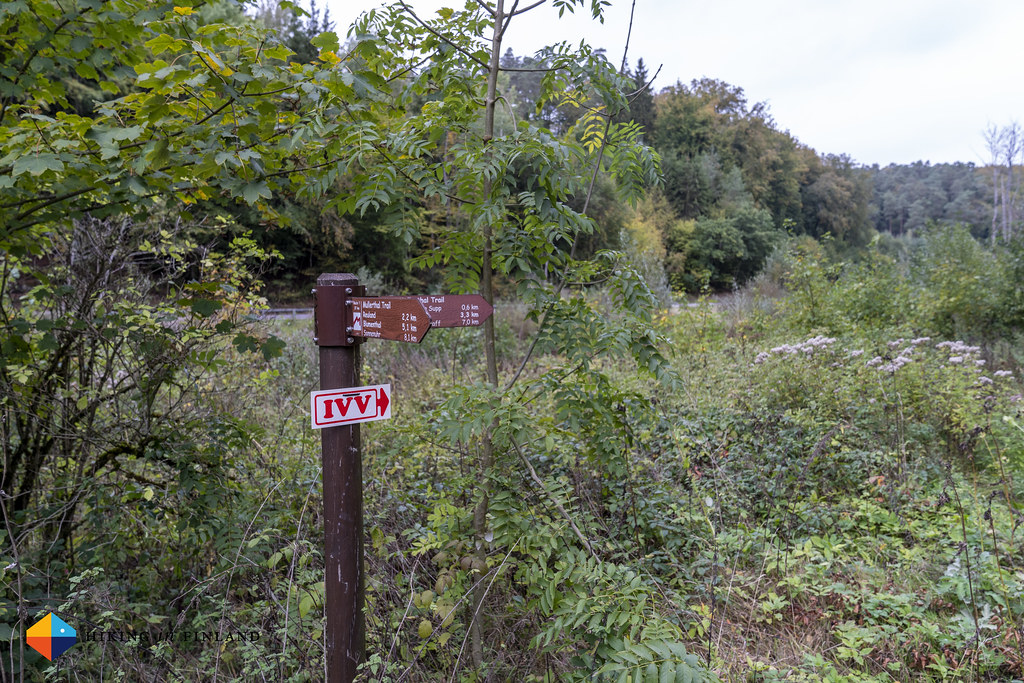
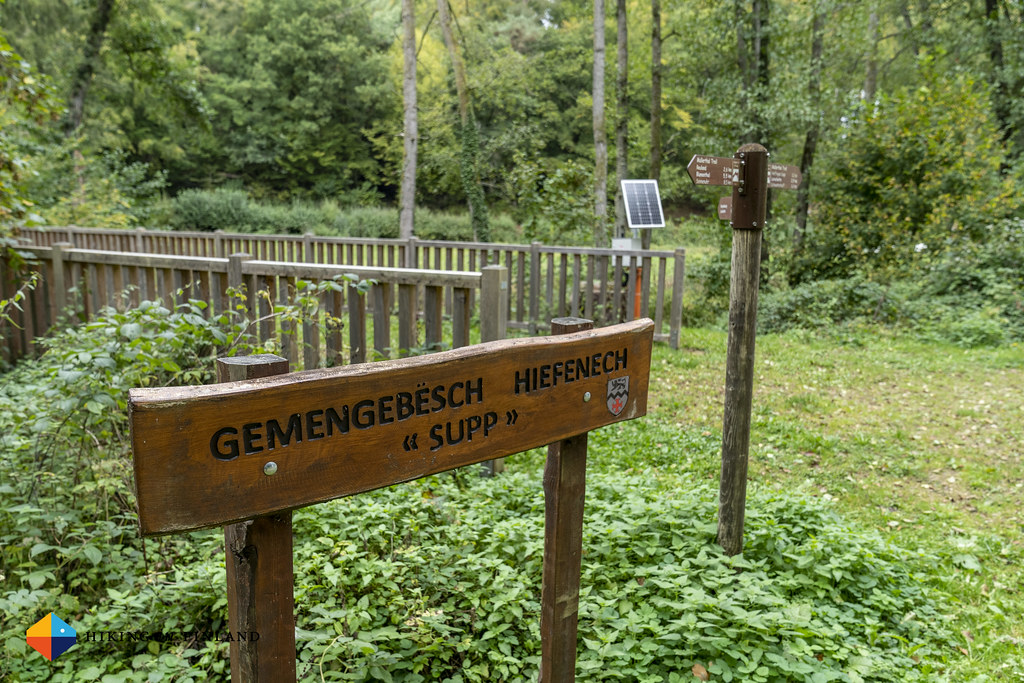
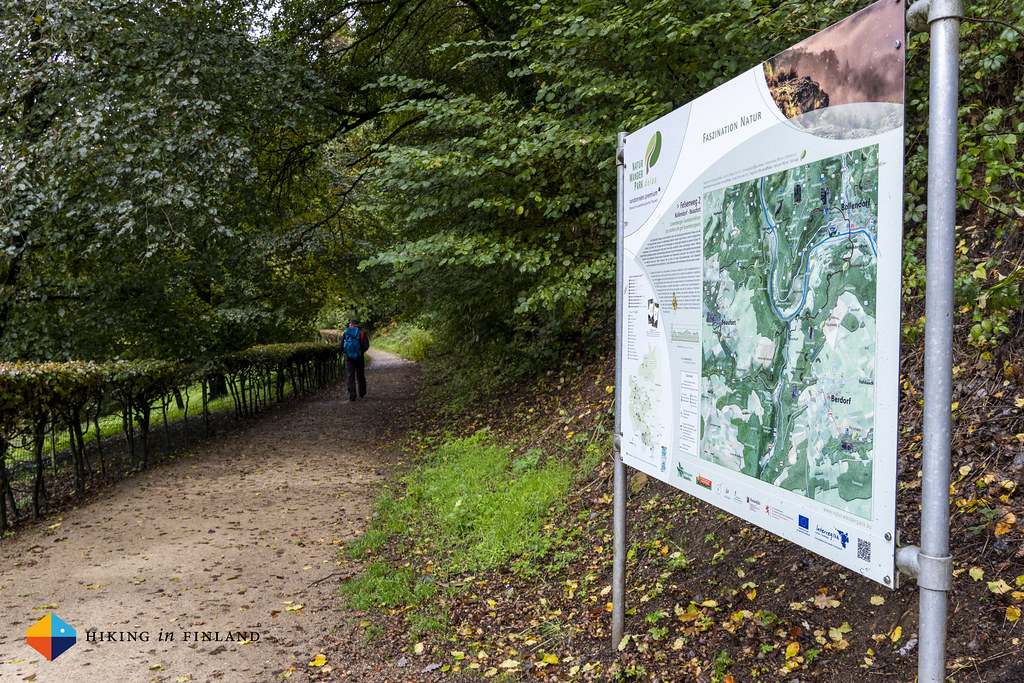
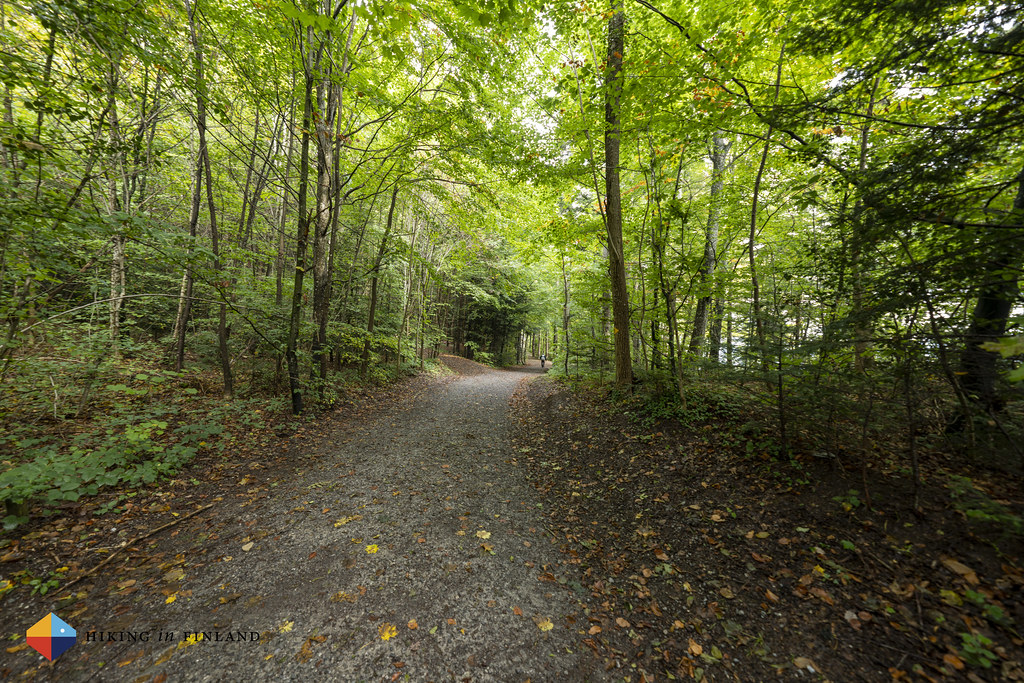
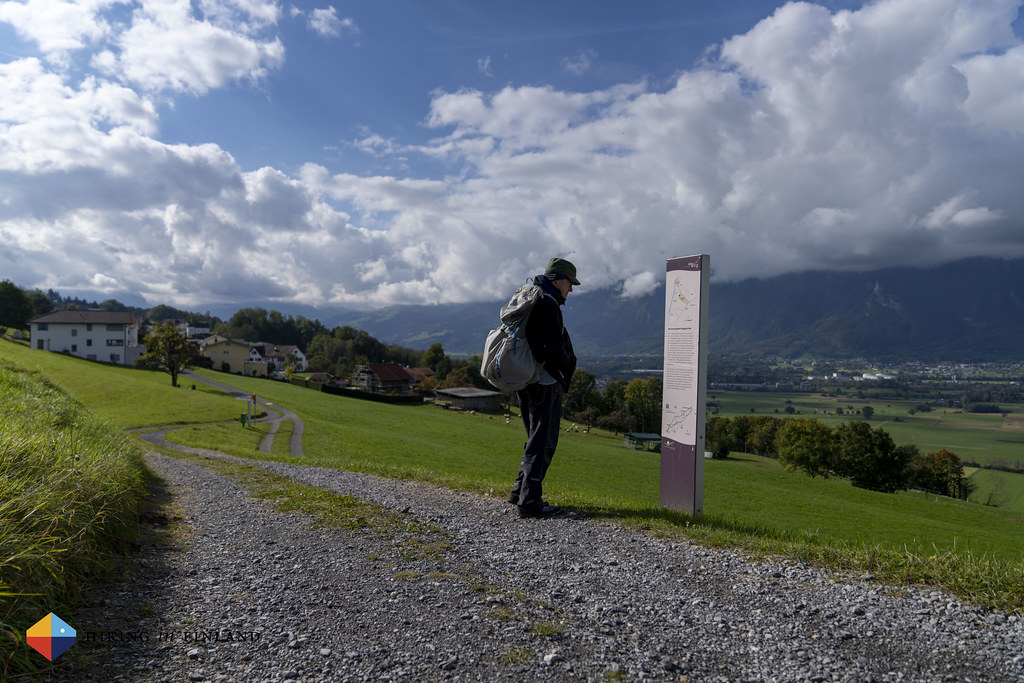
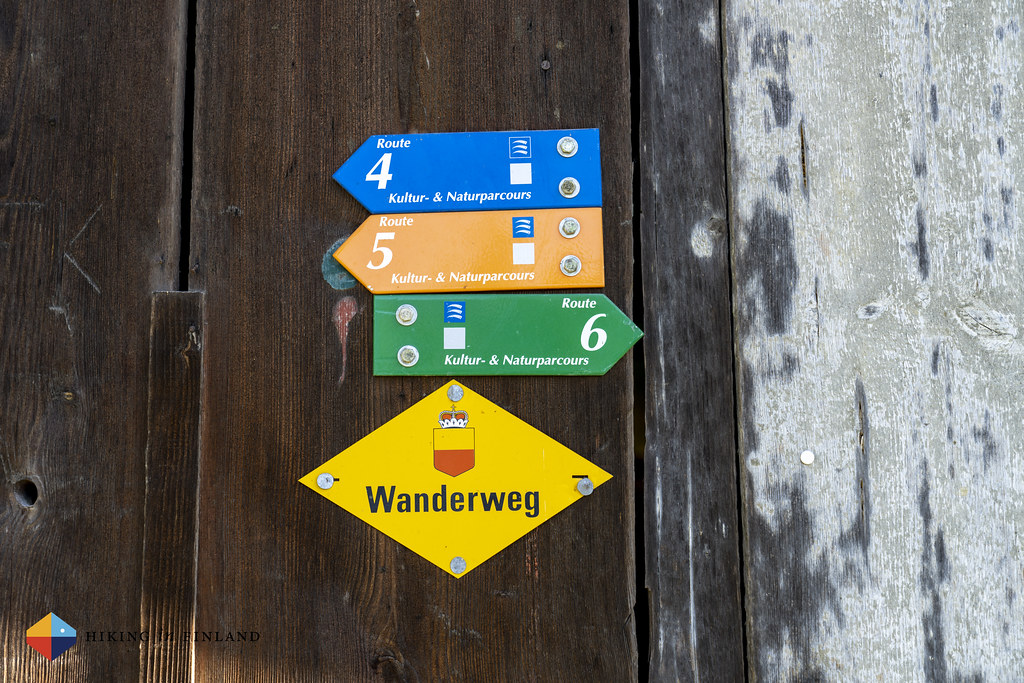
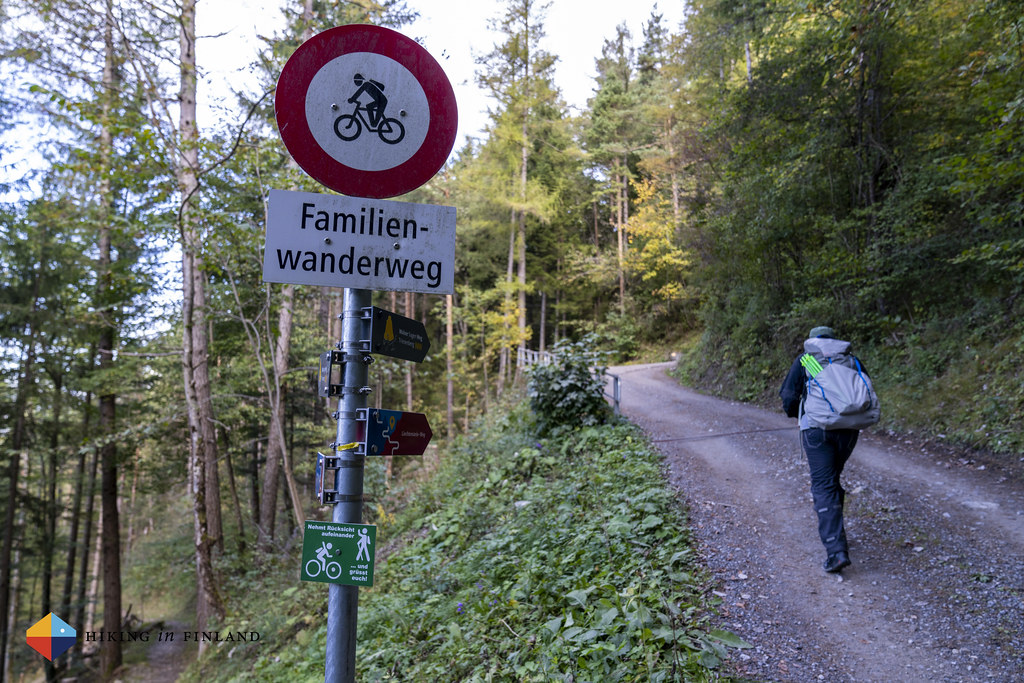
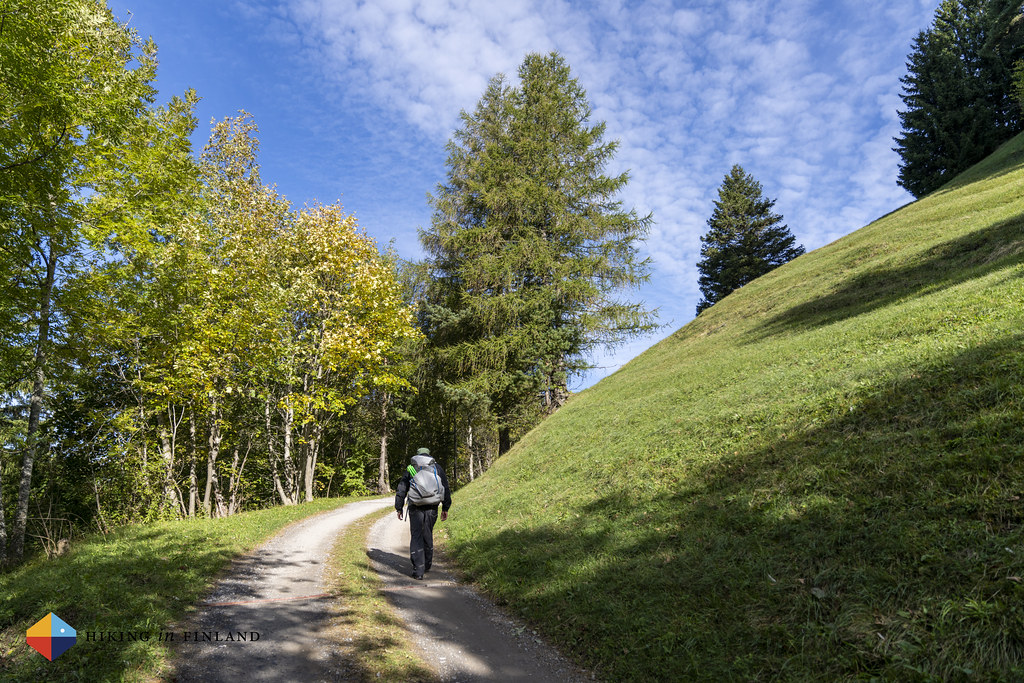
From the bus stop we hike up to the forest and the start of the trail. Navigation is easy as the Route 66, also known as the Liechtensteiner Panoramaweg, is well marked and getting lost is not easy. This makes it great for both beginner hikers who want an easy trail and more experienced hikers who don’t want to check the map all the time to make sure they’re still going in the right direction. It does not take us long and we’re on a nature trail, which takes the same route, and informs about the nature around one.
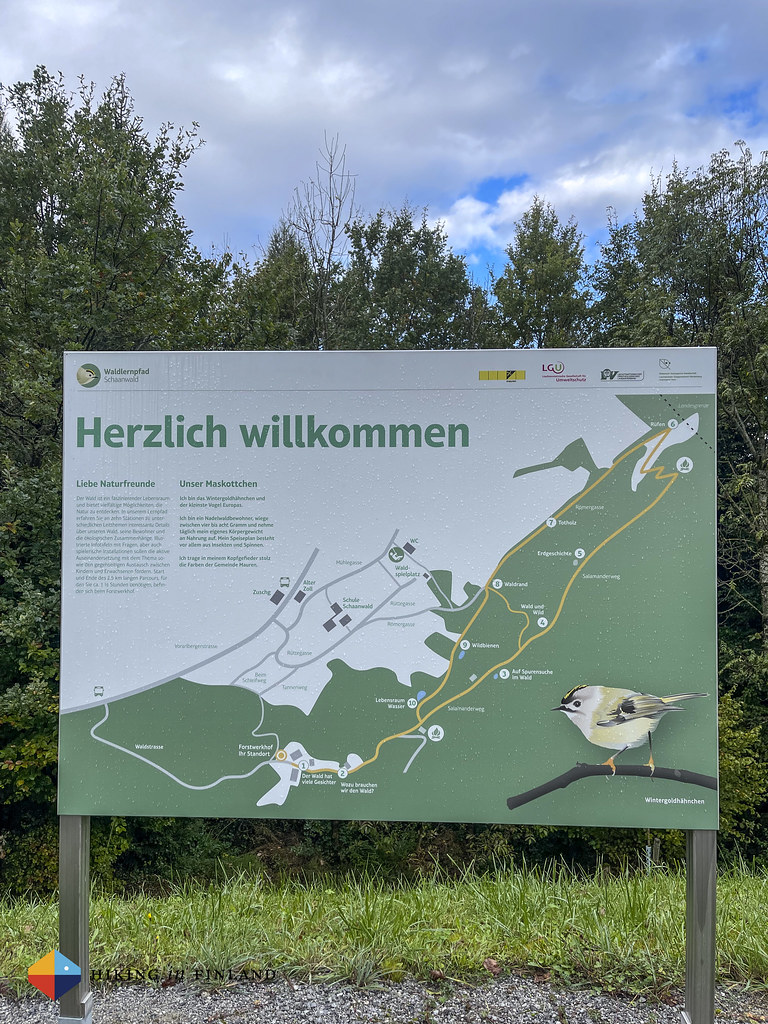
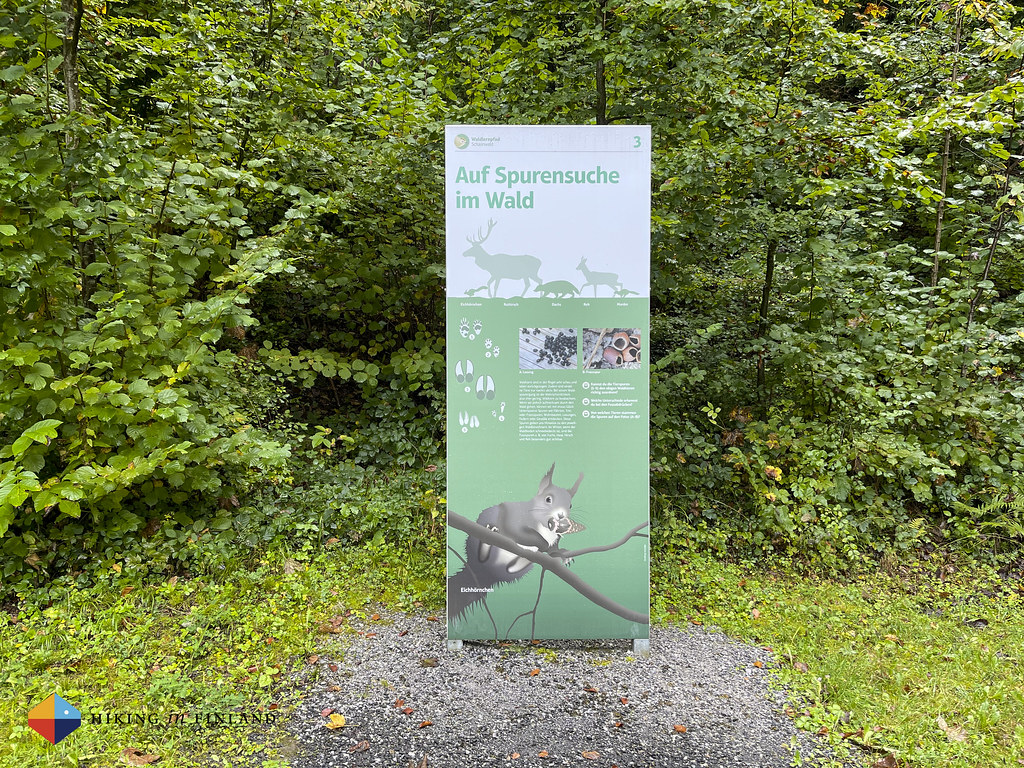
We make good speed on the trail, even though we stop at each sign to read about the nature around us. There’s a cool picture game on one, too, where you can guess the name of animals and insects on the front and see the correct answers on the back. It’s an easy and enjoyable walk over forest roads and trails, and soon we arrive in Schaanwald, the border town with Austria.
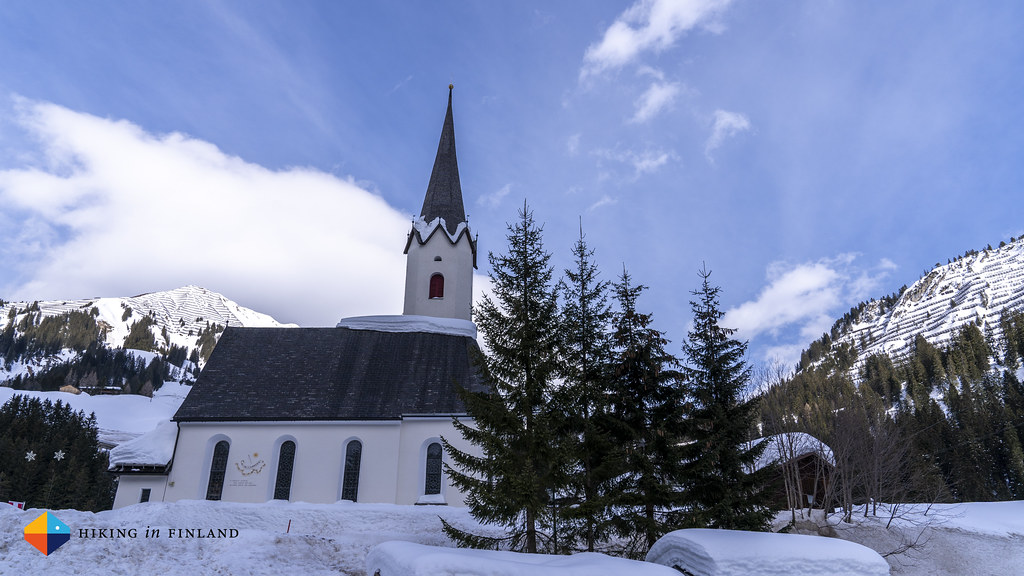
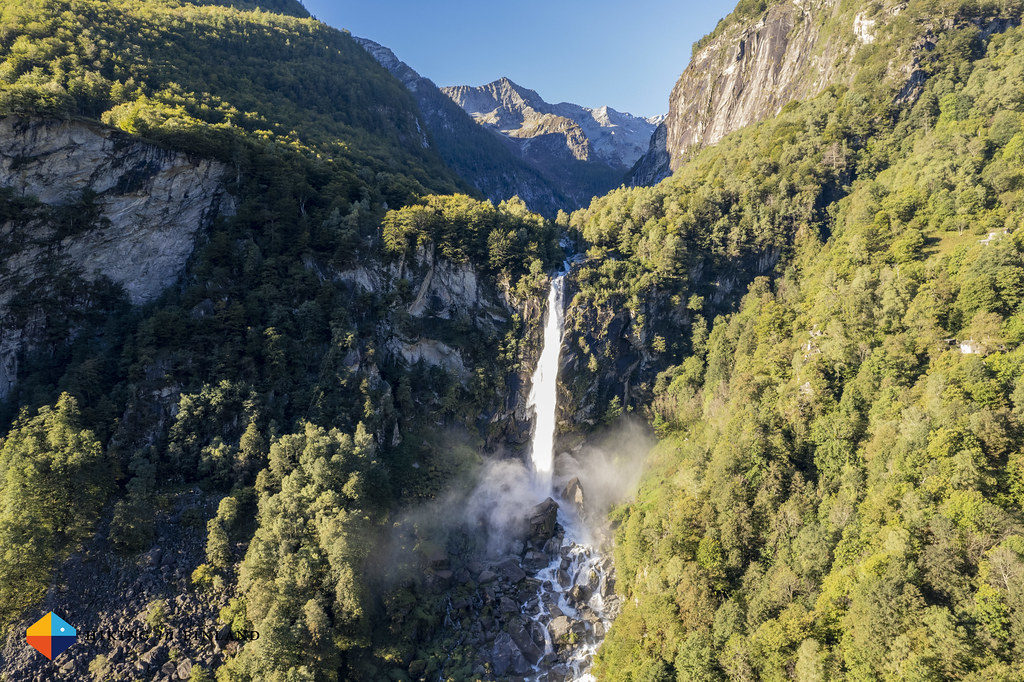
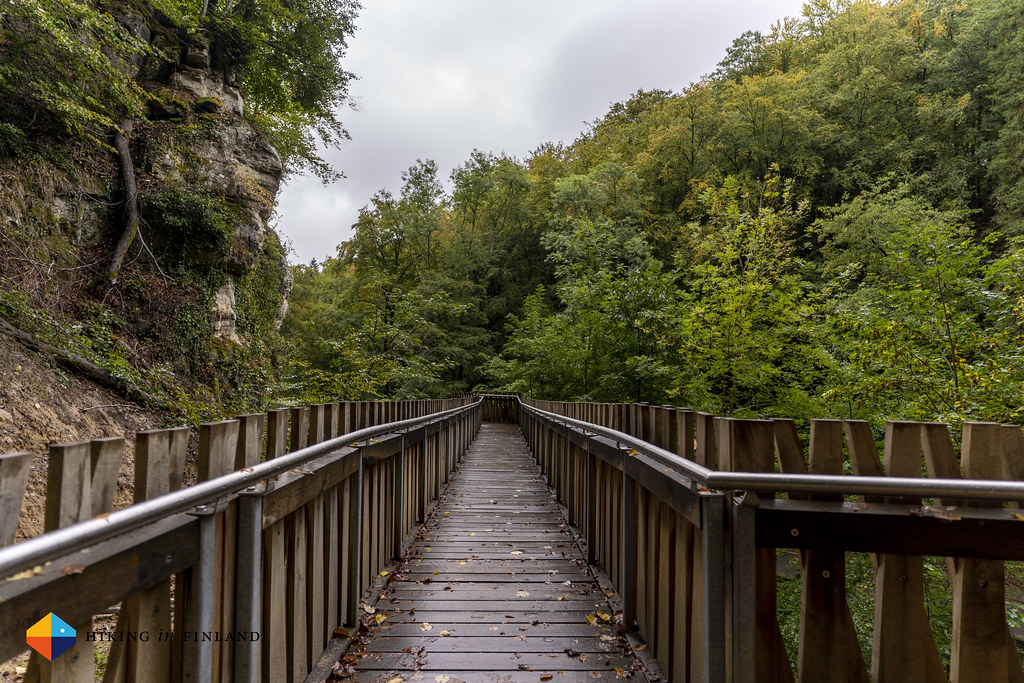
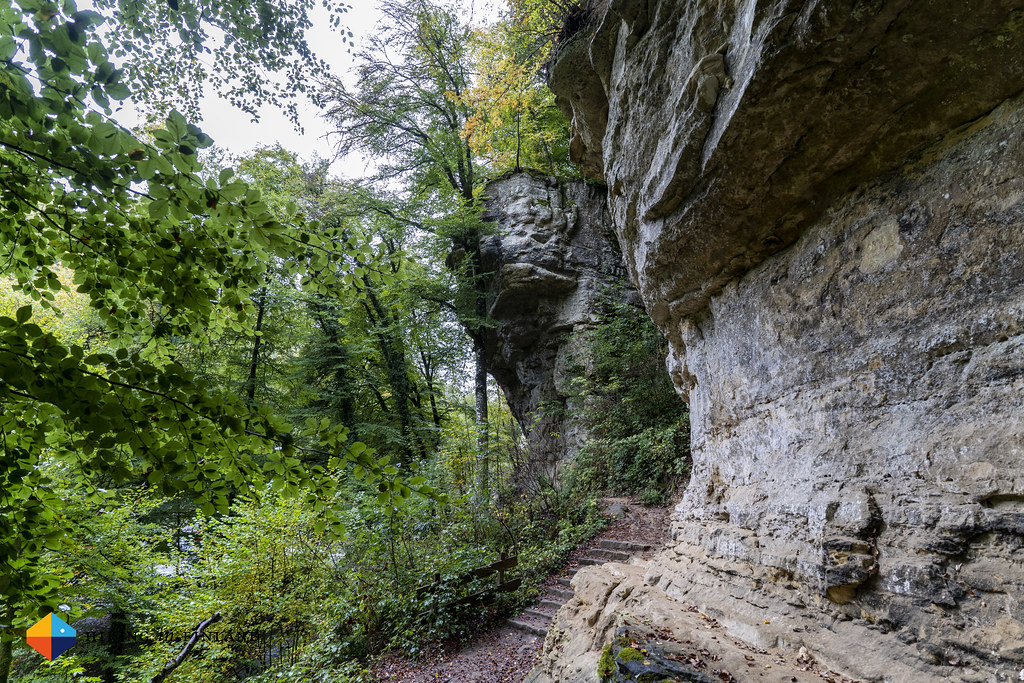
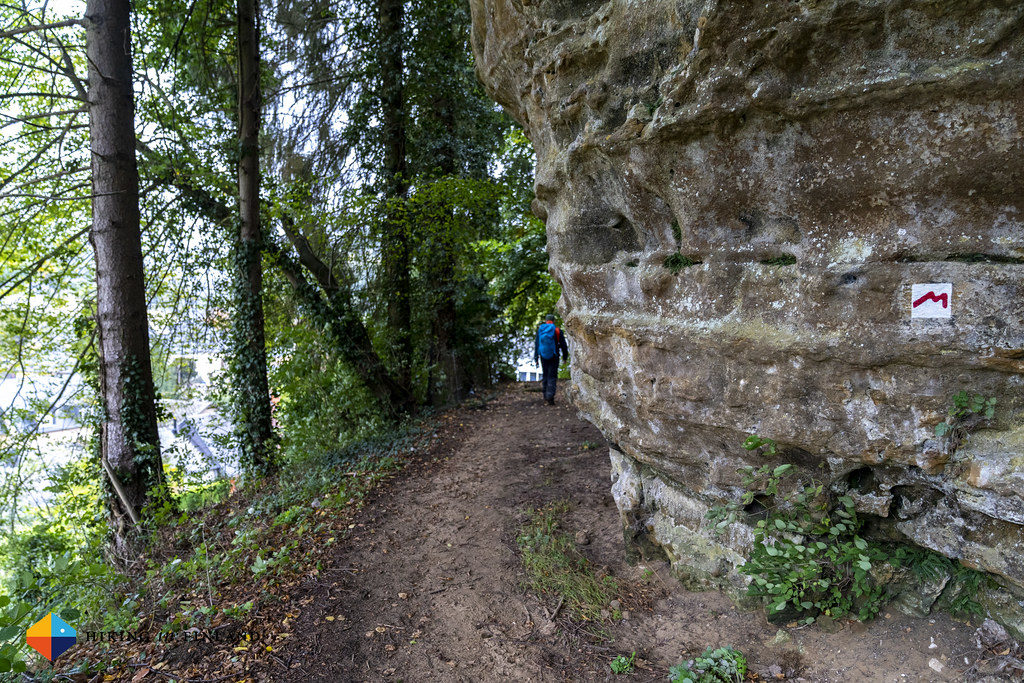
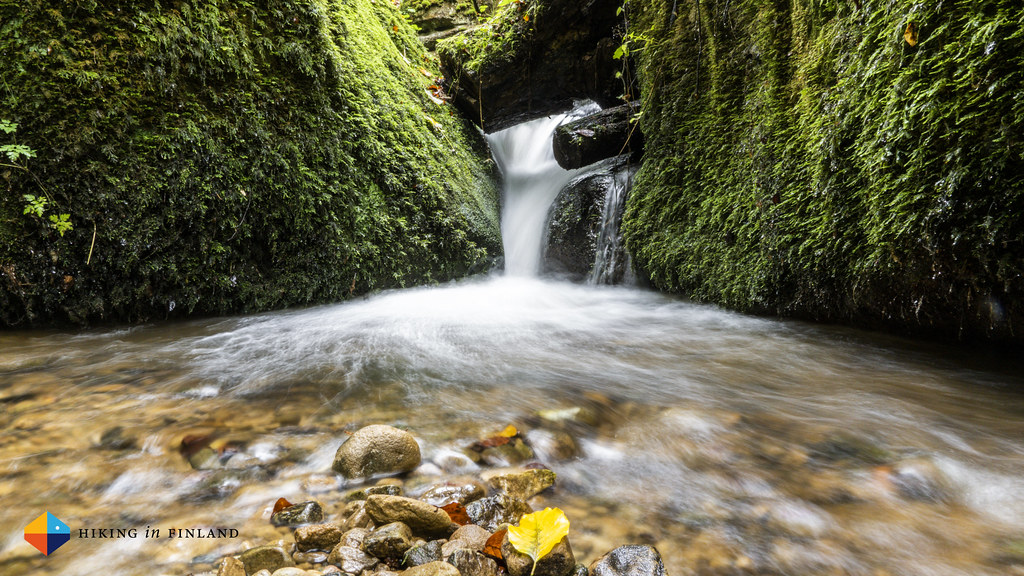
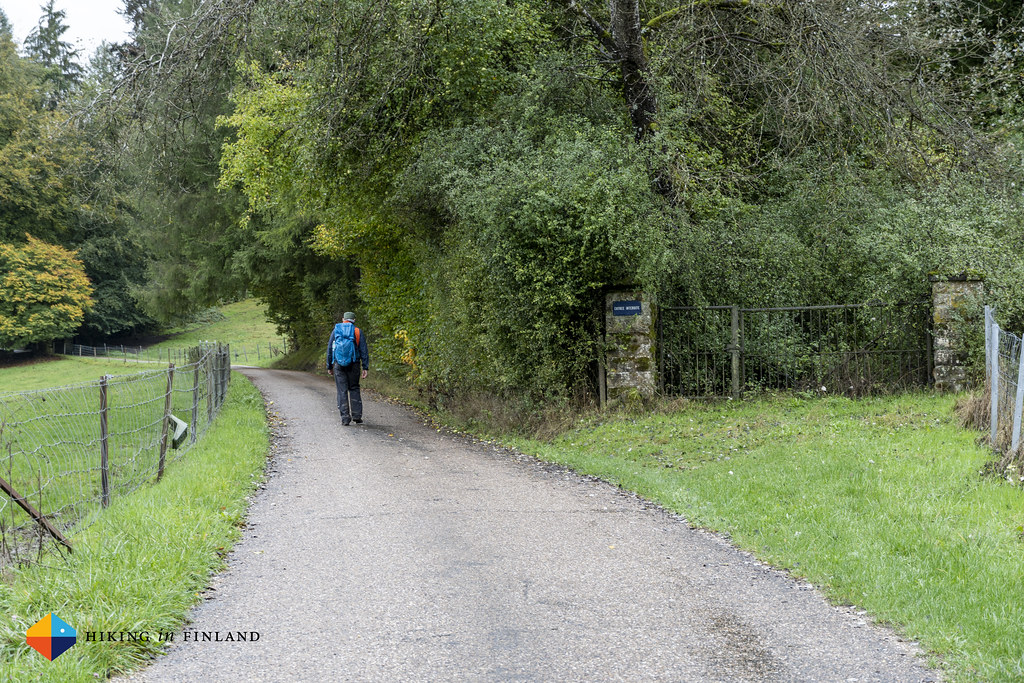
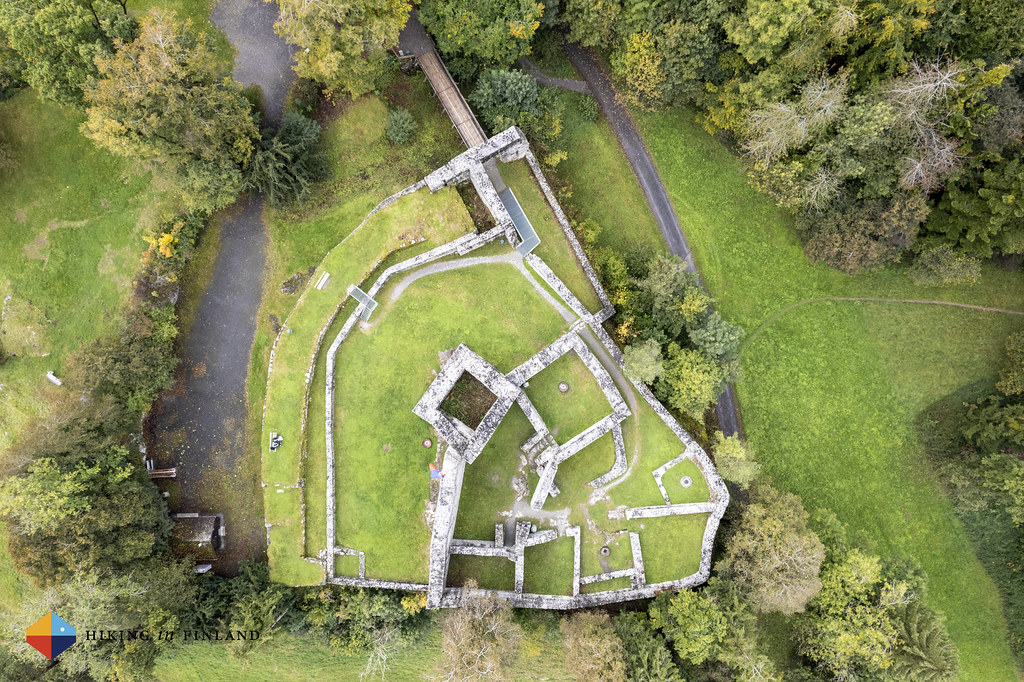
Also here in civilization the trail is well marked, and we follow it over a bridge to the Egelsee lake and onwards through a small village. Here you can drive easily into Austria if you don’t pay good attention to the roads 😃 We stay in Liechtenstein, and continue towards the Burgruine Schellenberg.
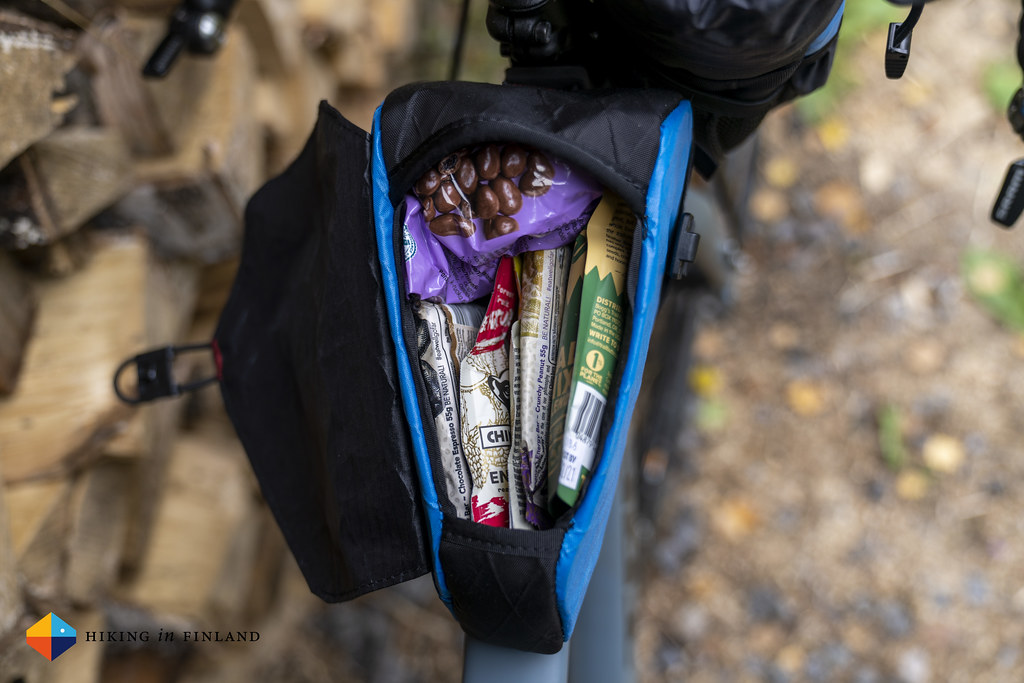
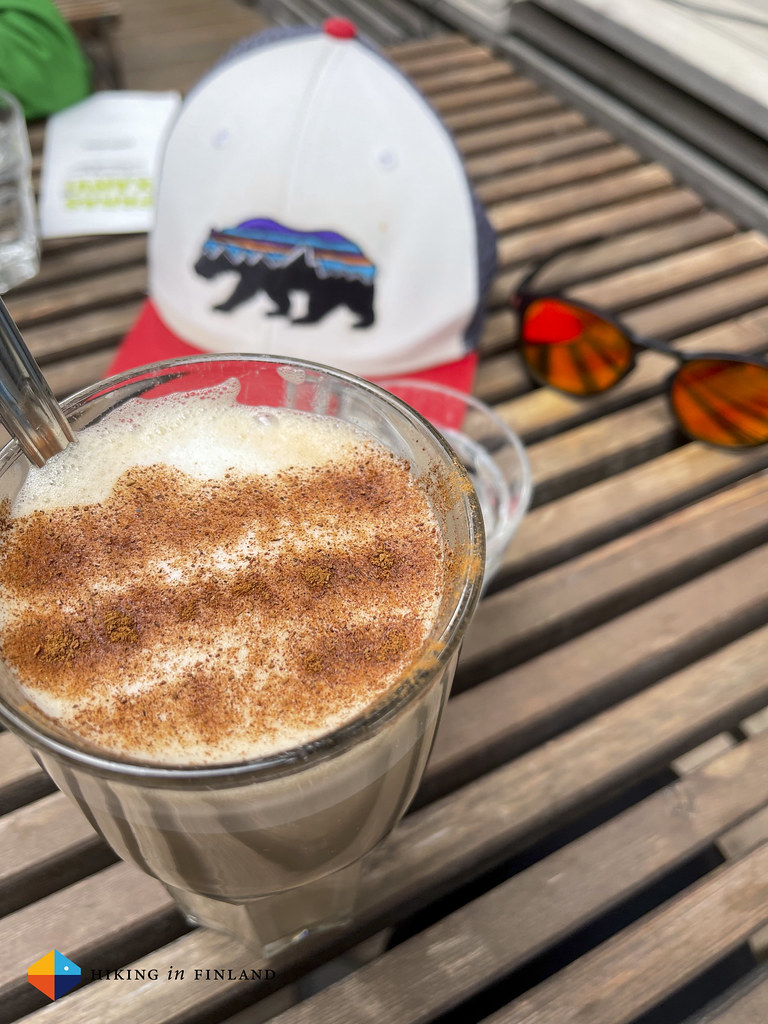
At this beautiful ruin we make a proper coffee break. Martin breaks out the ∞ Primus Lite+, cookies and coffee, while I fly my drone to take some sweet photos of this ruin. It’s a really cool location, and we talk about our common medieval reenactment past!
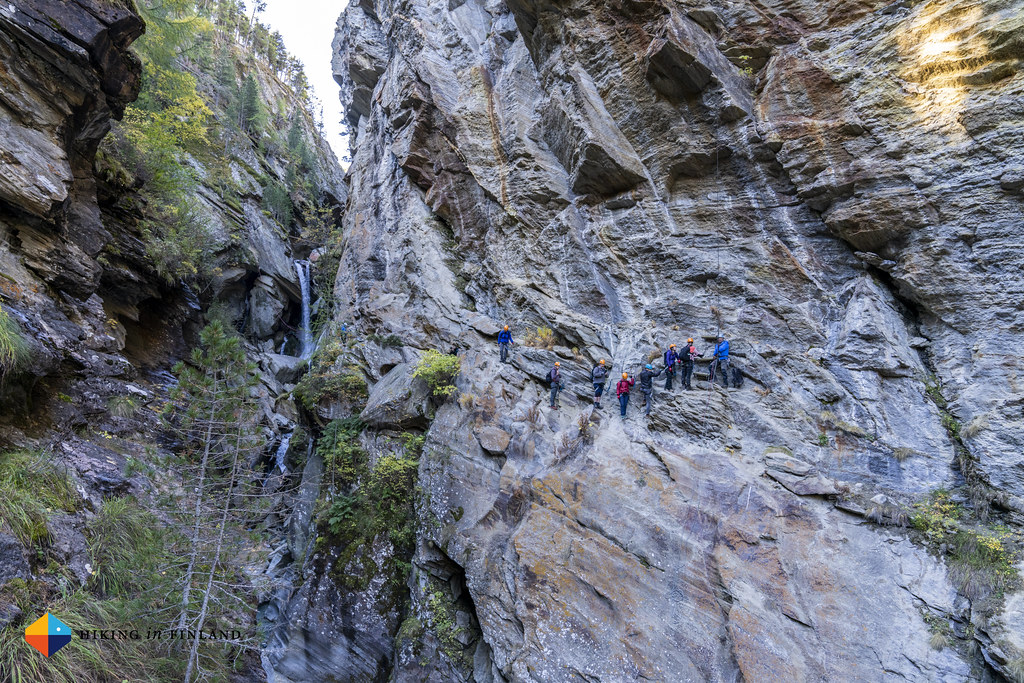
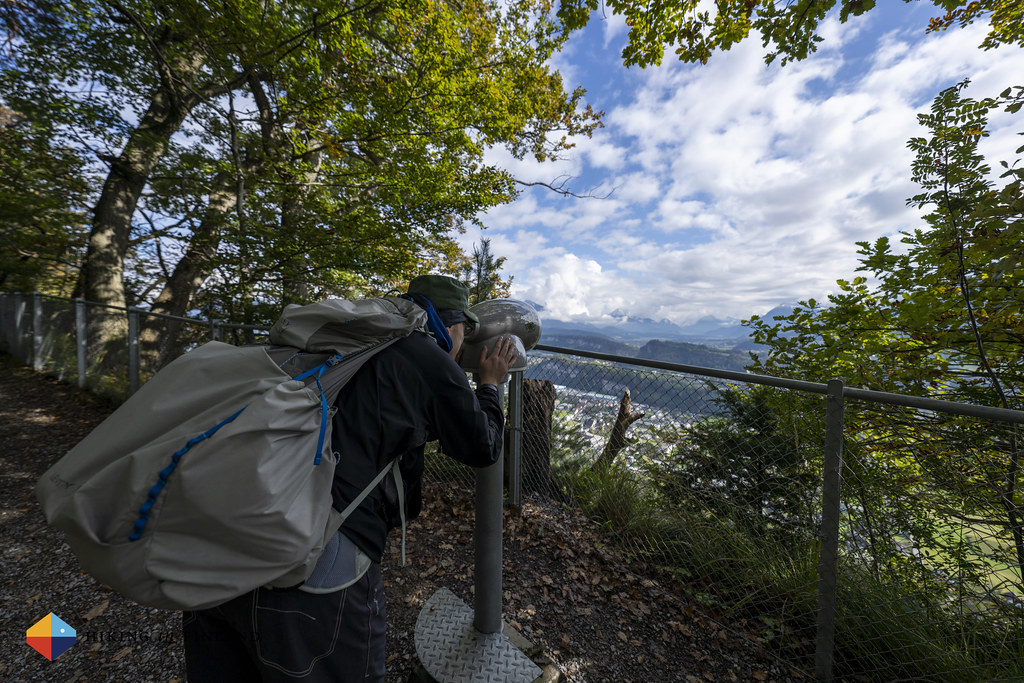
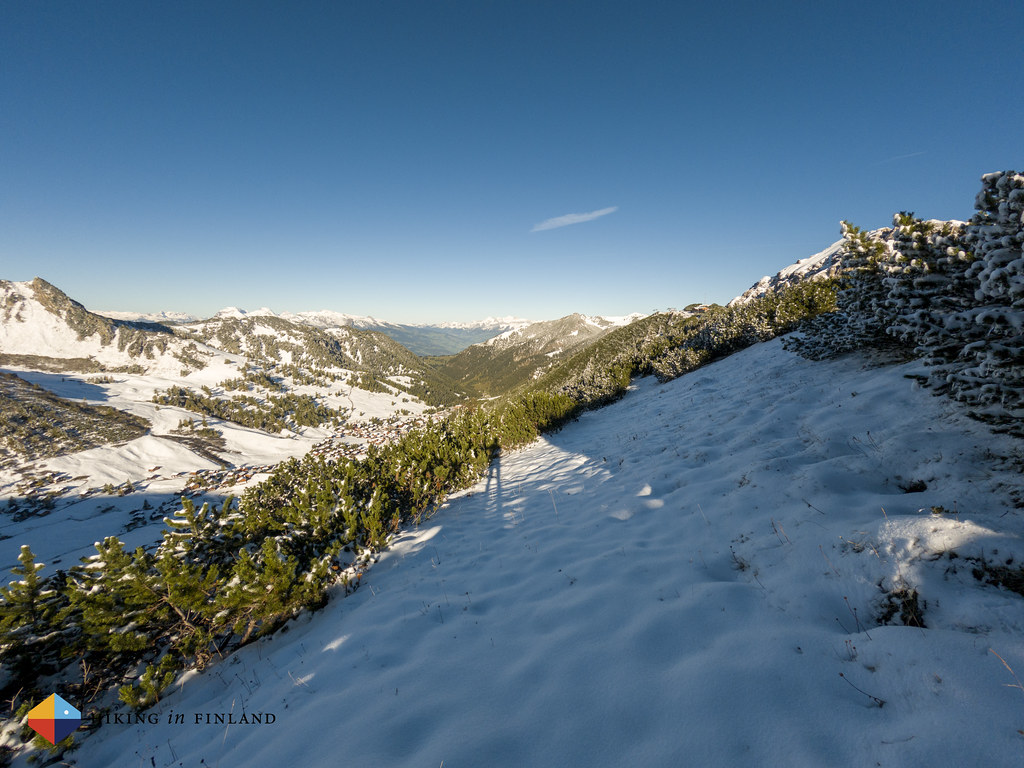
All good breaks have to end, and so we continue towards the North and Austria. Here we follow a trail which gives great views back to Liechtenstein’s mountains and into Austria - we are hiking on a cliff and at the bottom of the cliff is Austria, while up here we are in Liechtenstein. The trail has two different sets of info boards and installations along it, one for kids and one with historic information. Both sets of info boards are very informative and fun, and I can imagine that my kids would really enjoy this section of the trail.
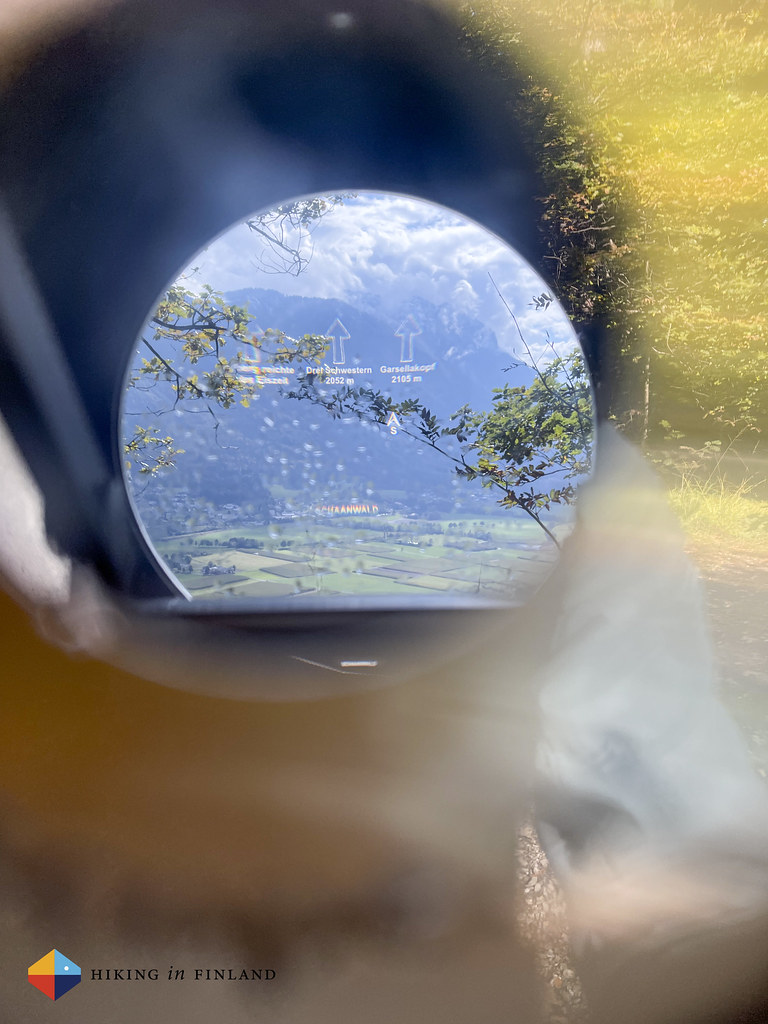
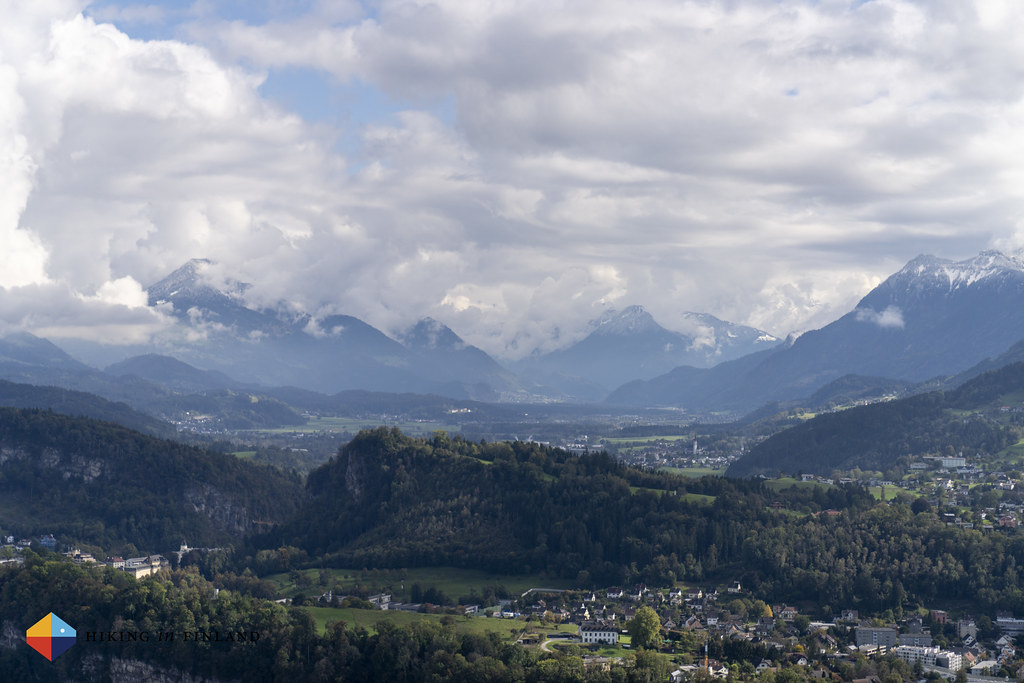
Very cool are the few telescopes along the trail. These have an optical overlay in them which changes when you move them around. So you’re able to identify the summits and places in the distance! It’s really informative and the first time we have seen something like it! The views themselves aren’t bad either, and helped by an improving weather - there is blue sky and sunshine now!
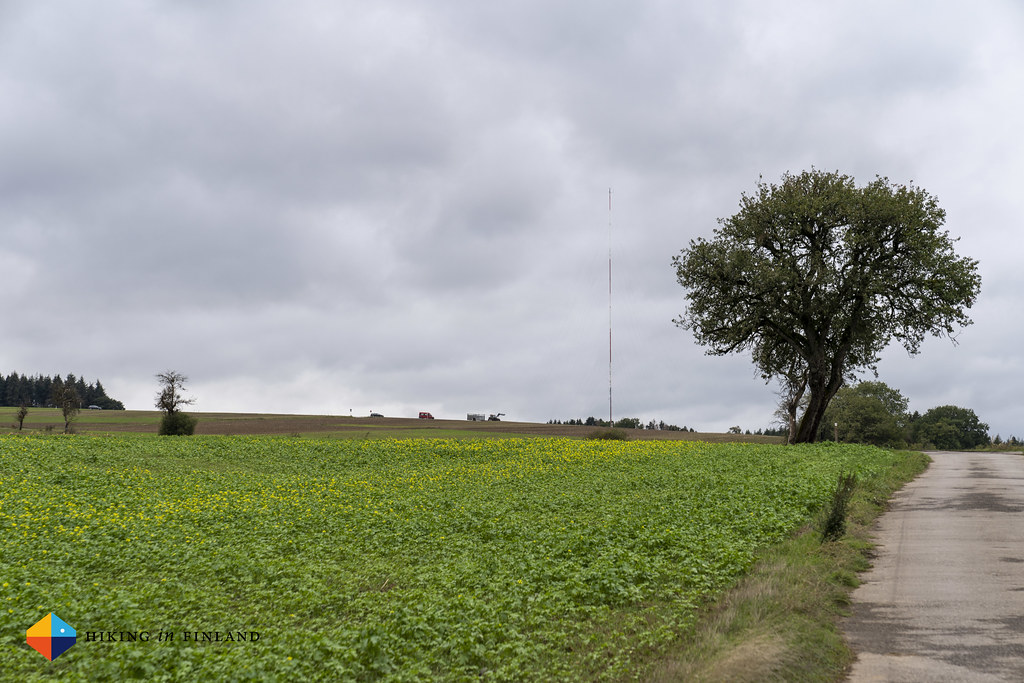
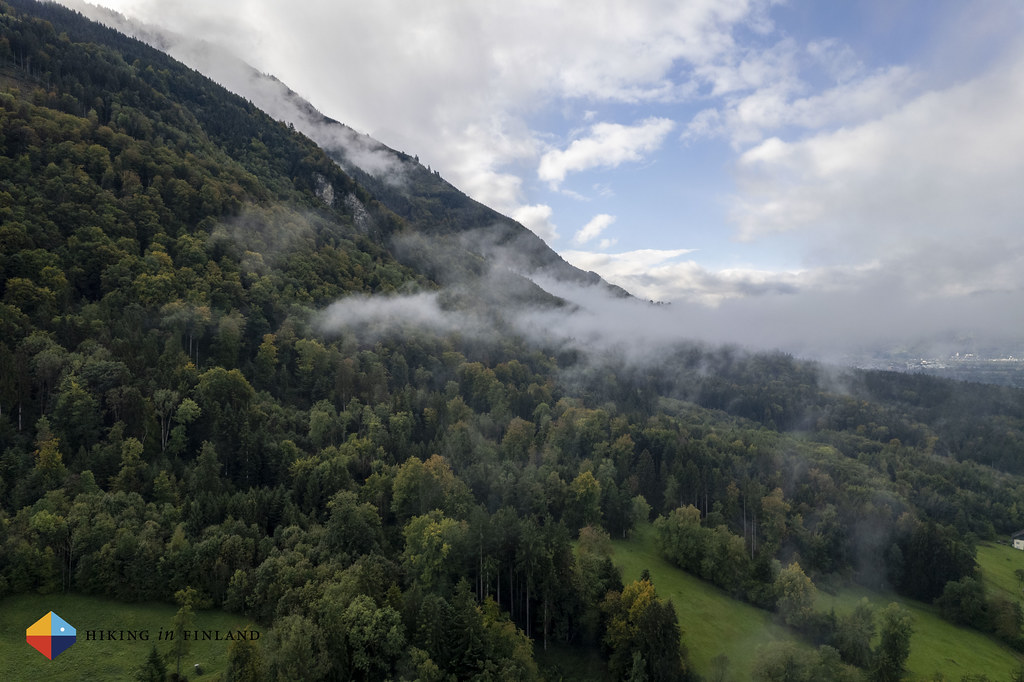
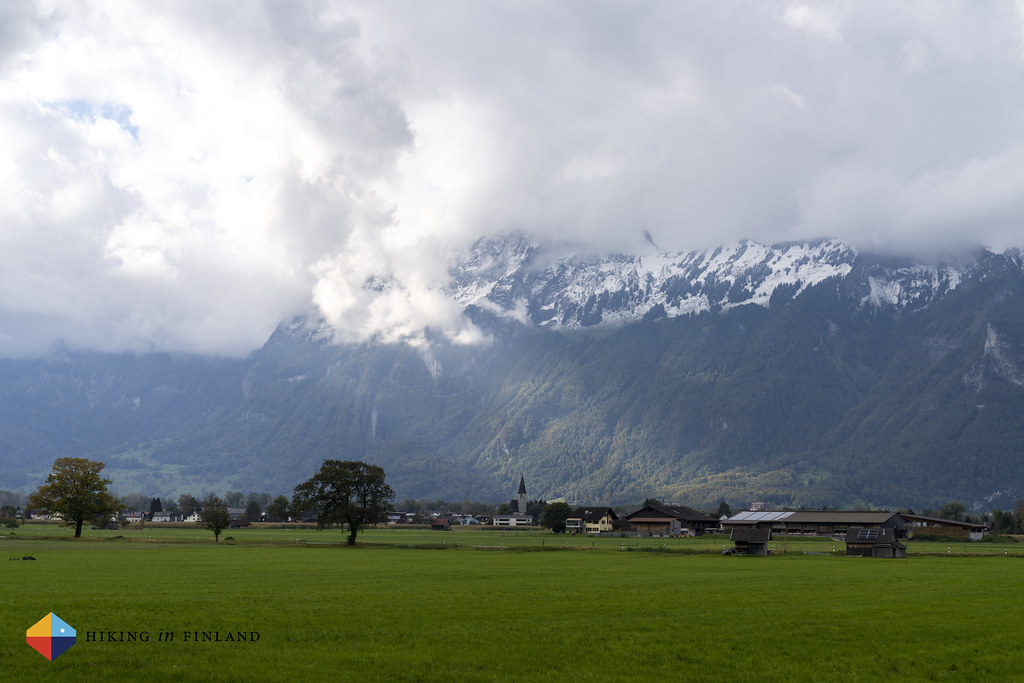
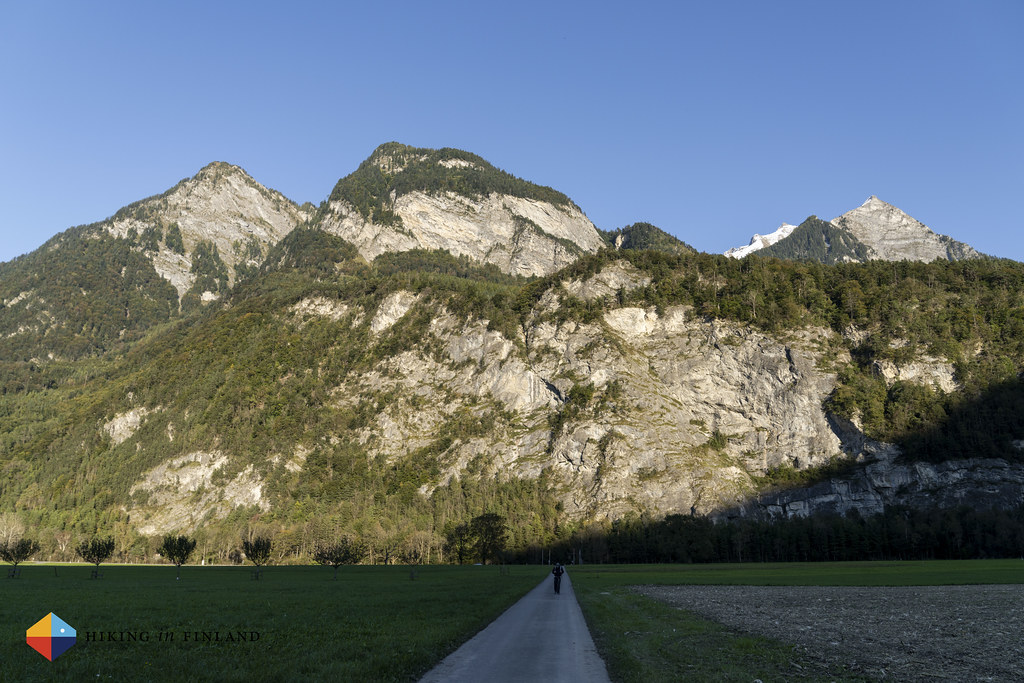
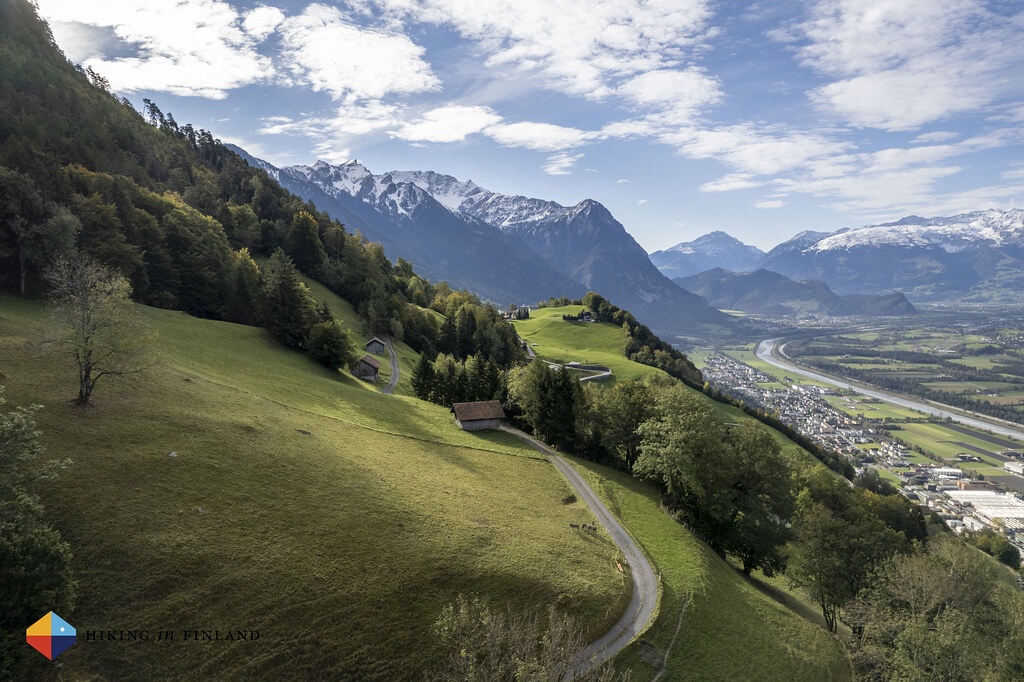
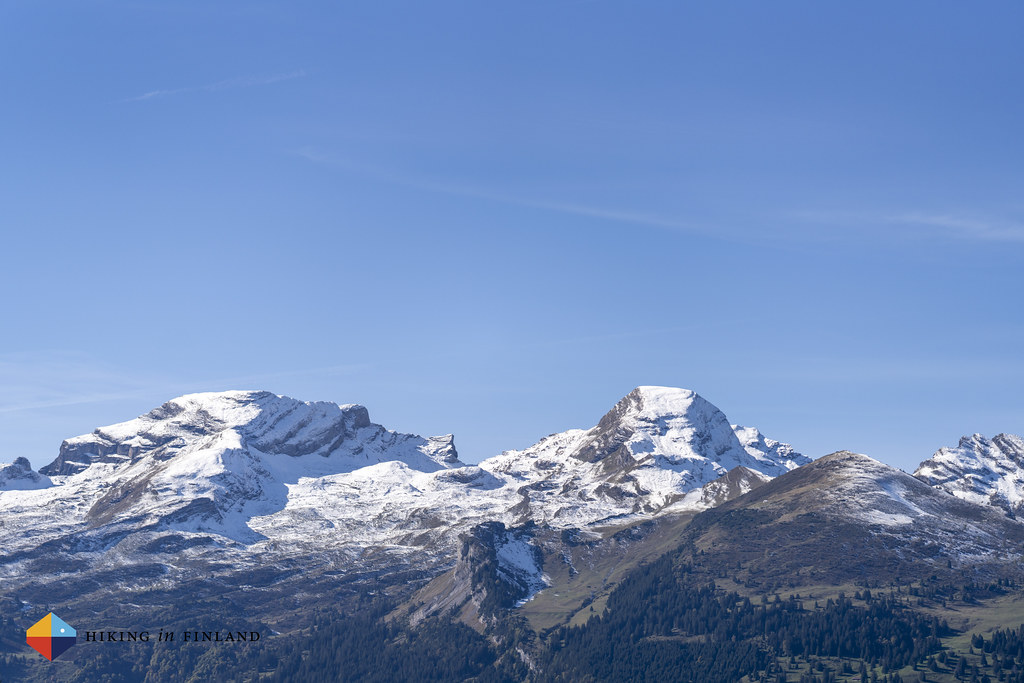
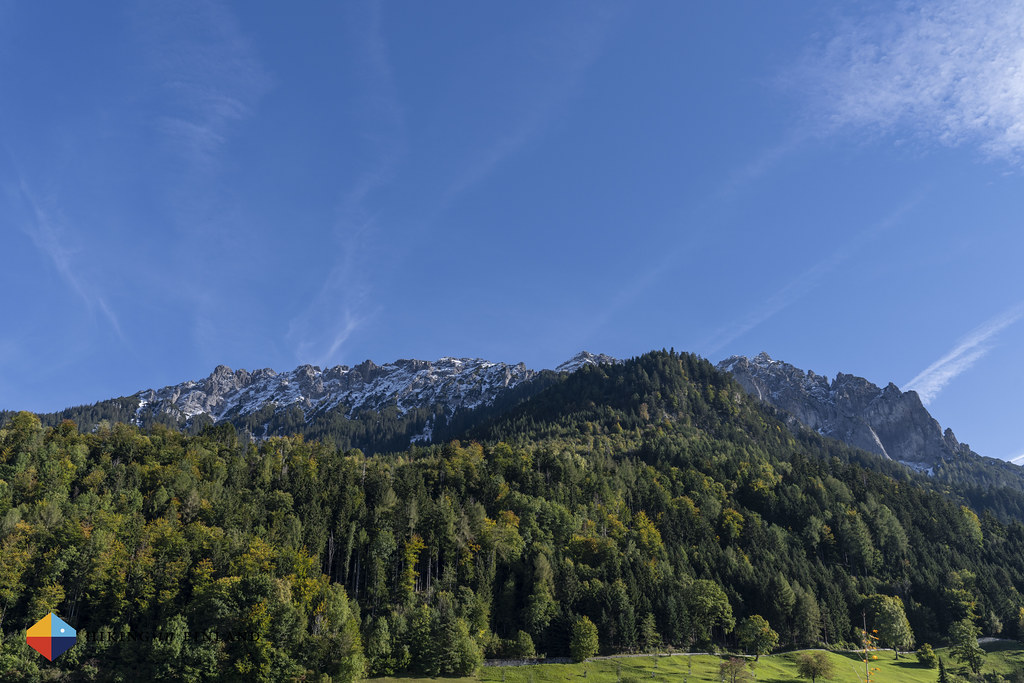
We start to reach the end of our first day while the trail takes us down towards the valley floor, where we hike on a forest road at the bottom of the hill and fields. We can see Ruggell, todays goal, and behind it the Swiss mountains which have snow on what seems to us pretty low elevations. Tomorrow we should hike the first section of the Route 66, which takes us above 2.000 m altitude, and we wonder if it will be possible?
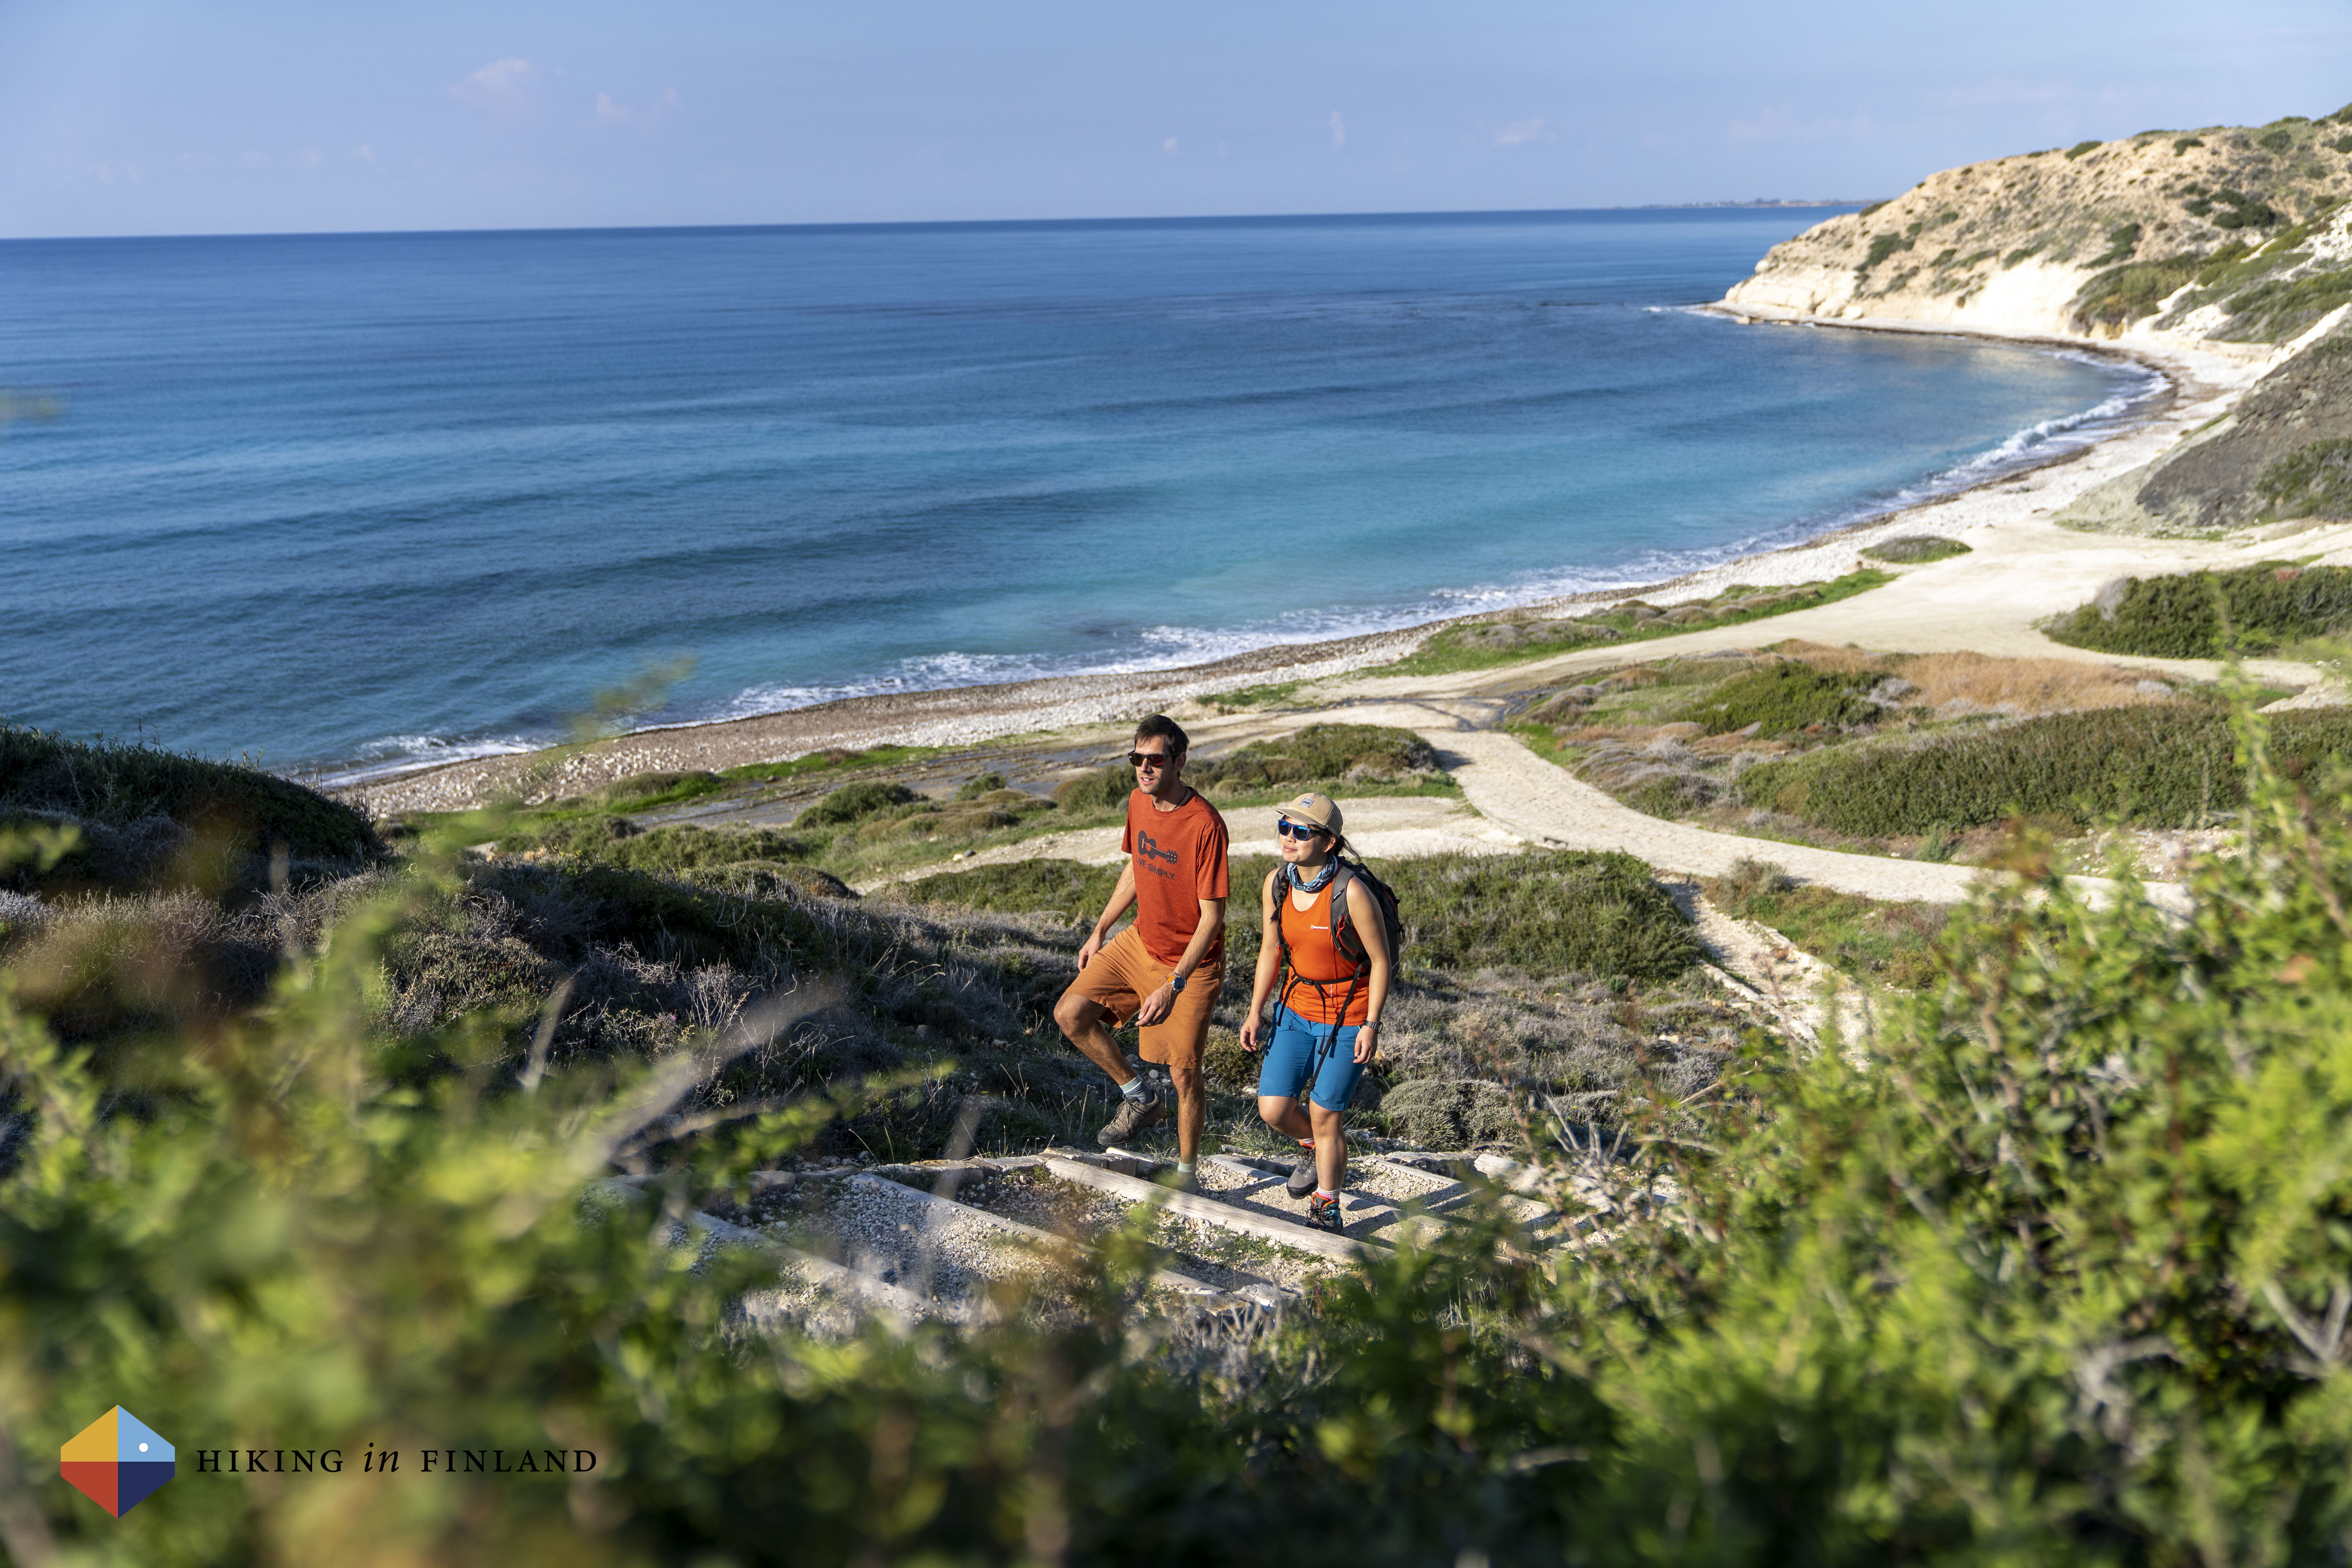
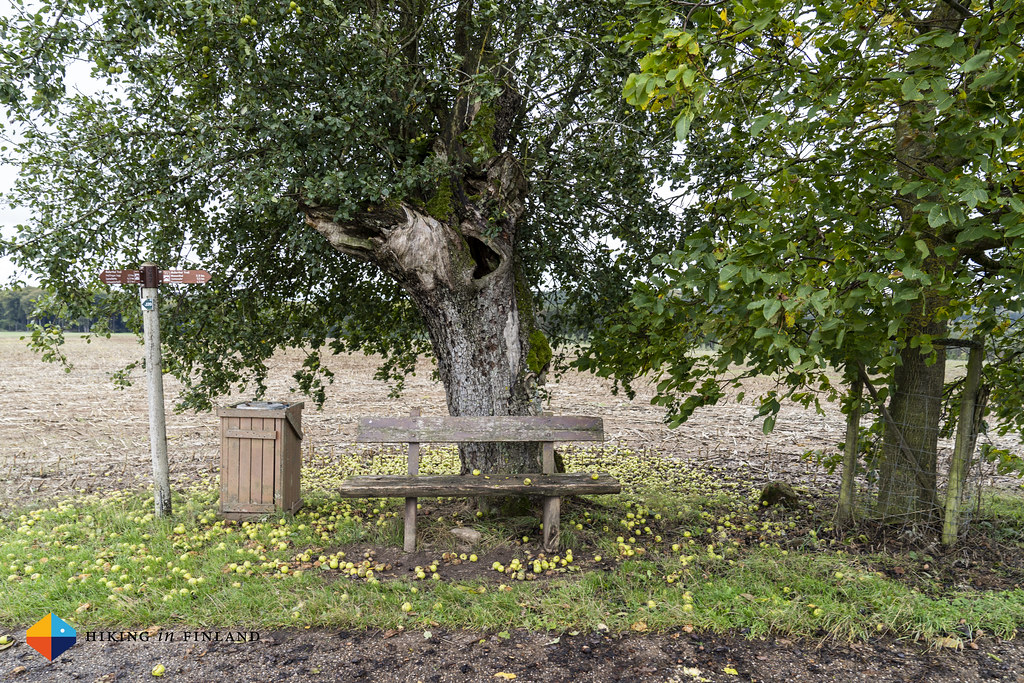
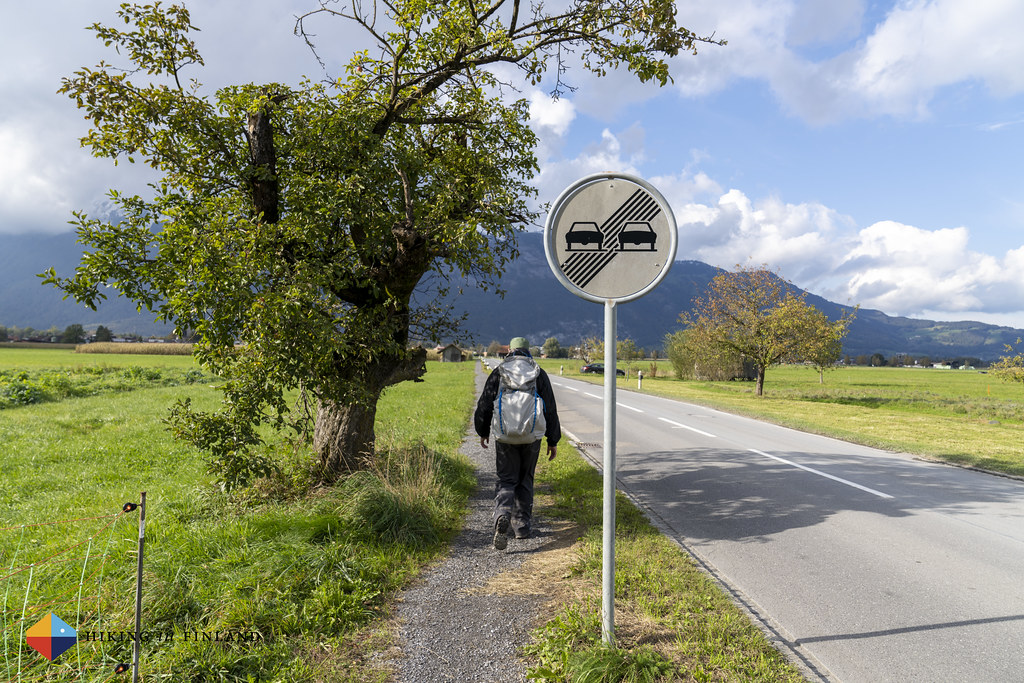
But right now we have some 500 metres more to hike till we reach Ruggell and the end of this section. It goes on the side of a road which sees very little traffic, and after a short while we reach this small town on the border with Switzerland. The next bus goes in twenty minutes and so we decide to walk on till the Upper Rhine, to mark the end of our hike today here at the Border. Less than six hours and 18 km after we have started in the morning we’re finished for the day, and we are both quite happy about the good days walking we had!
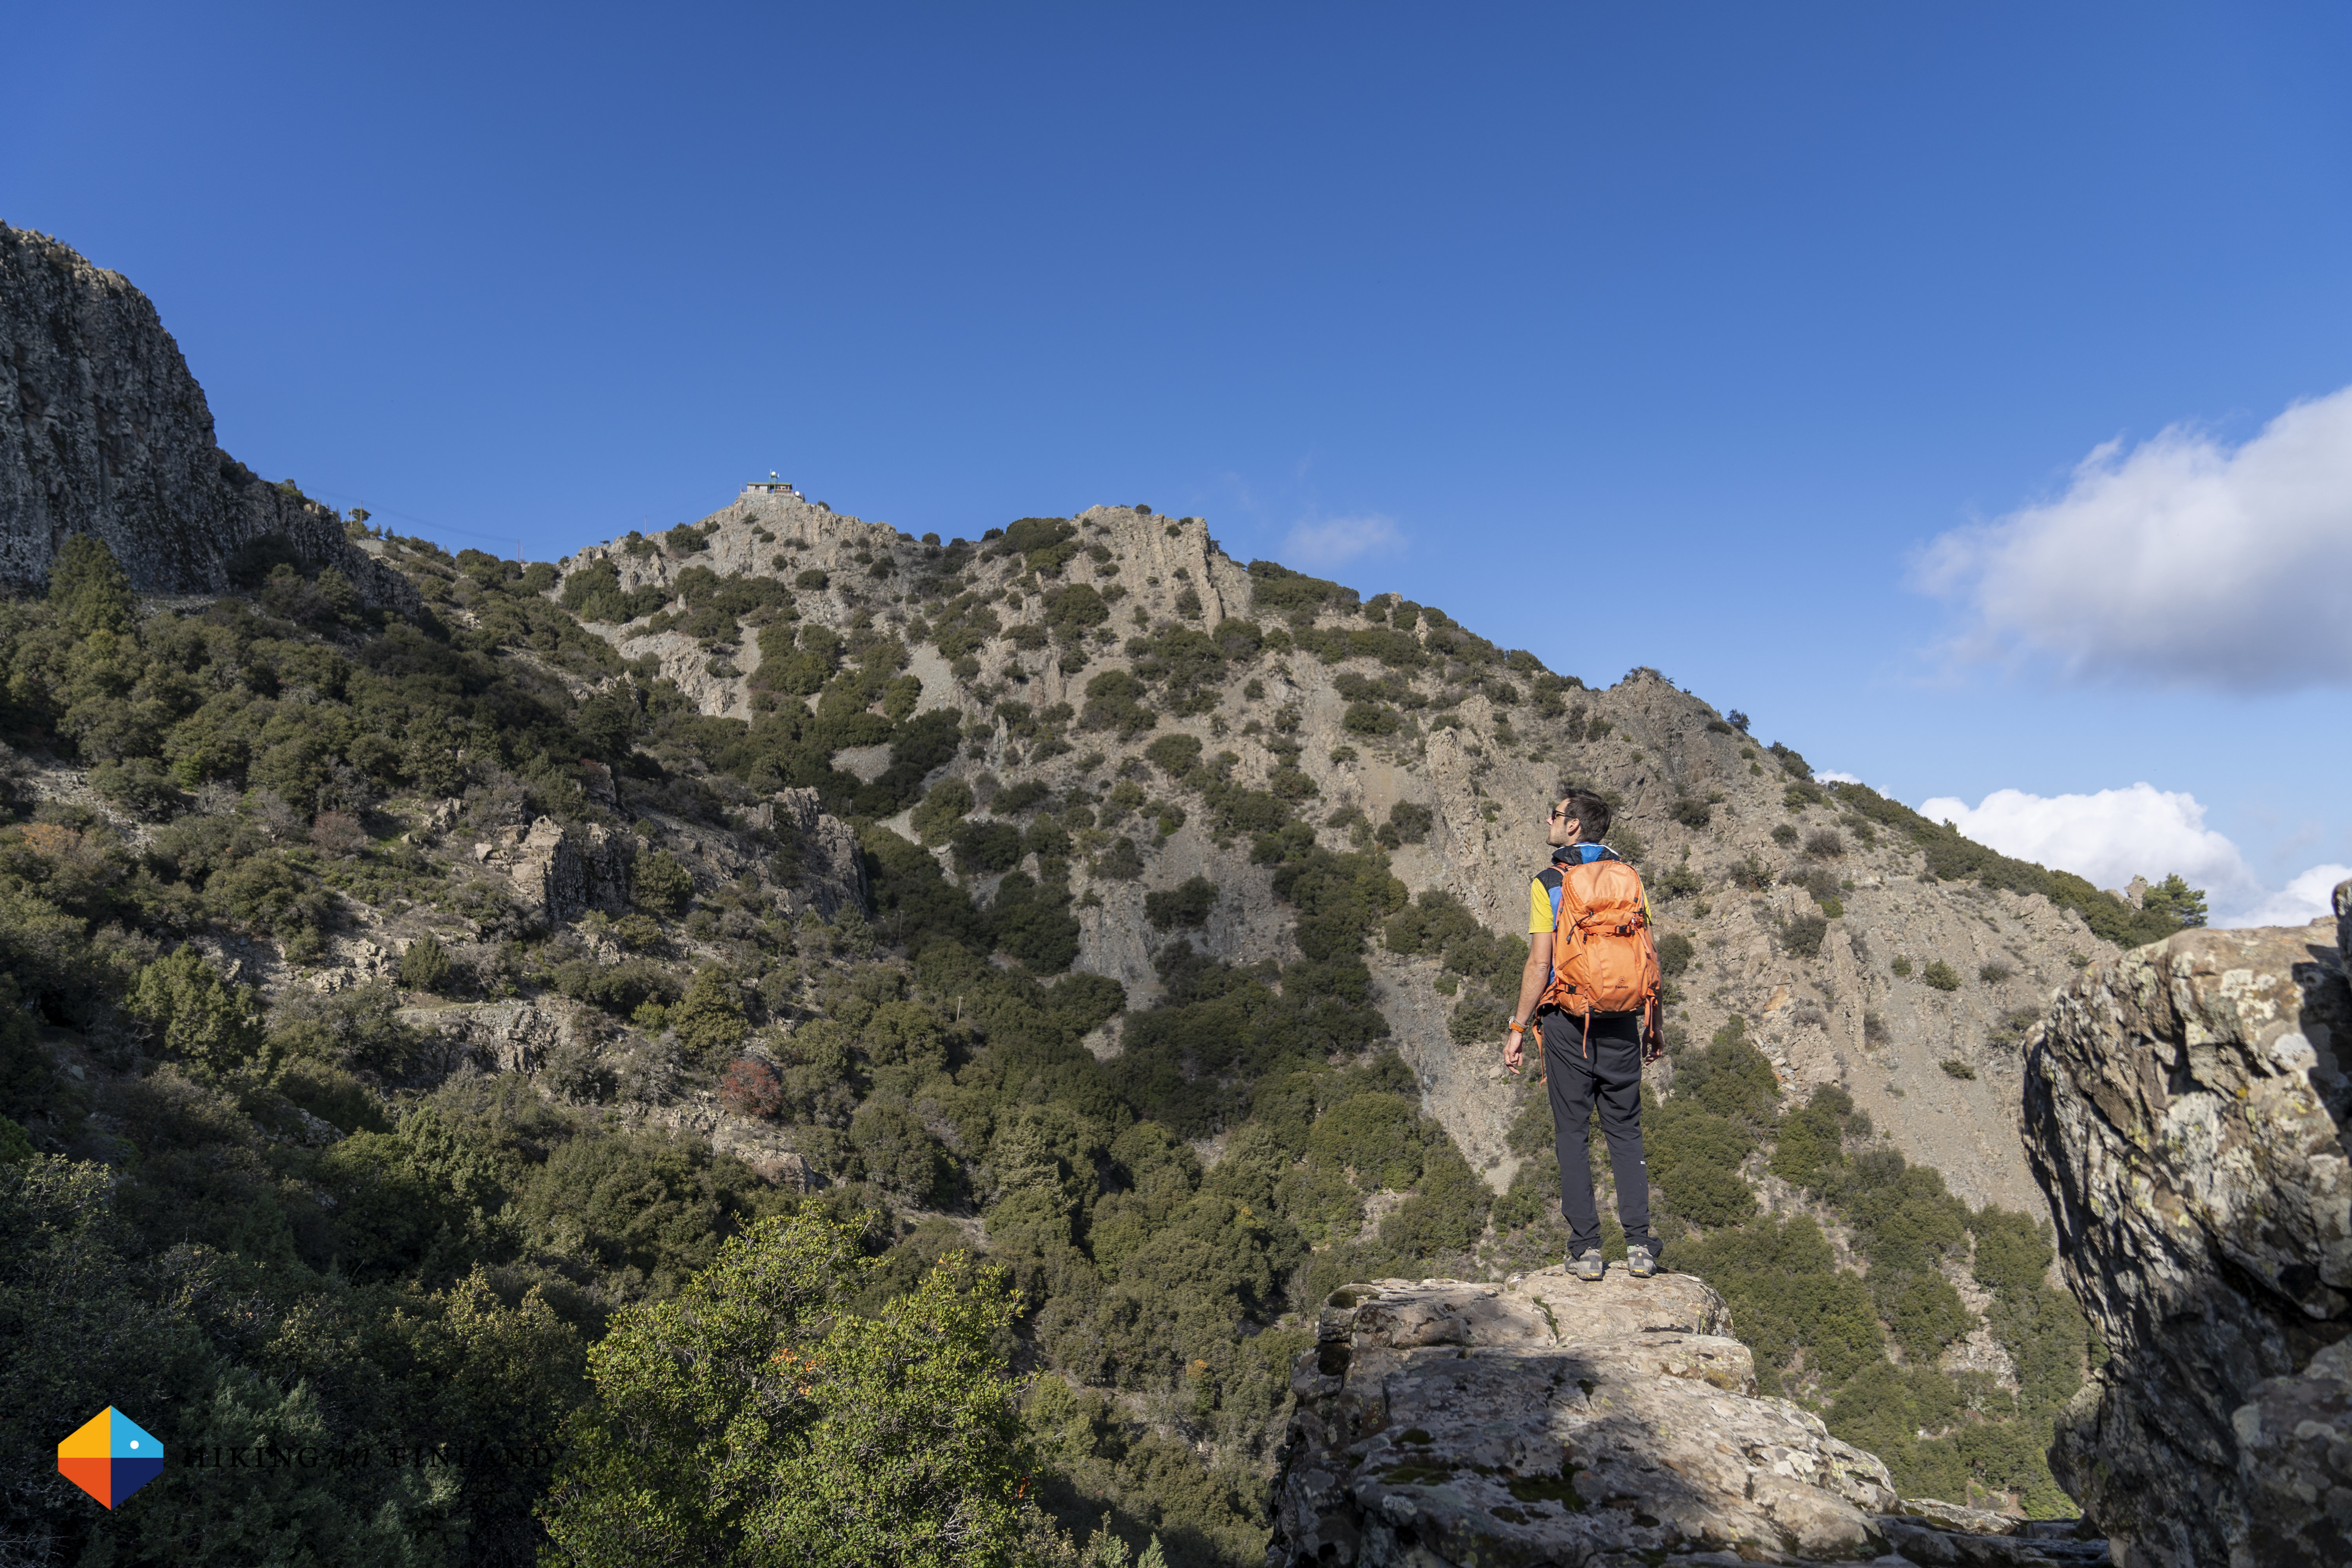
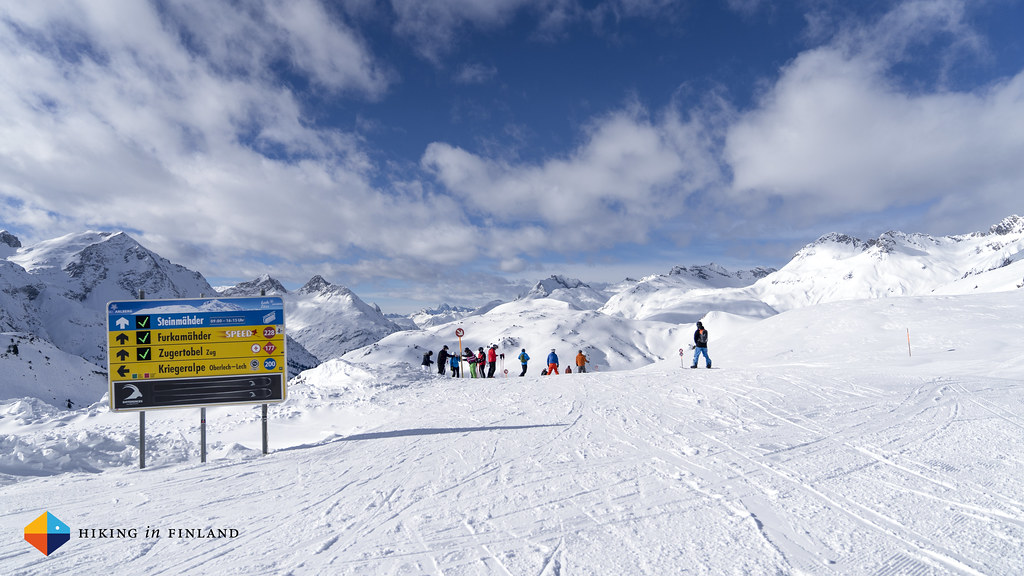
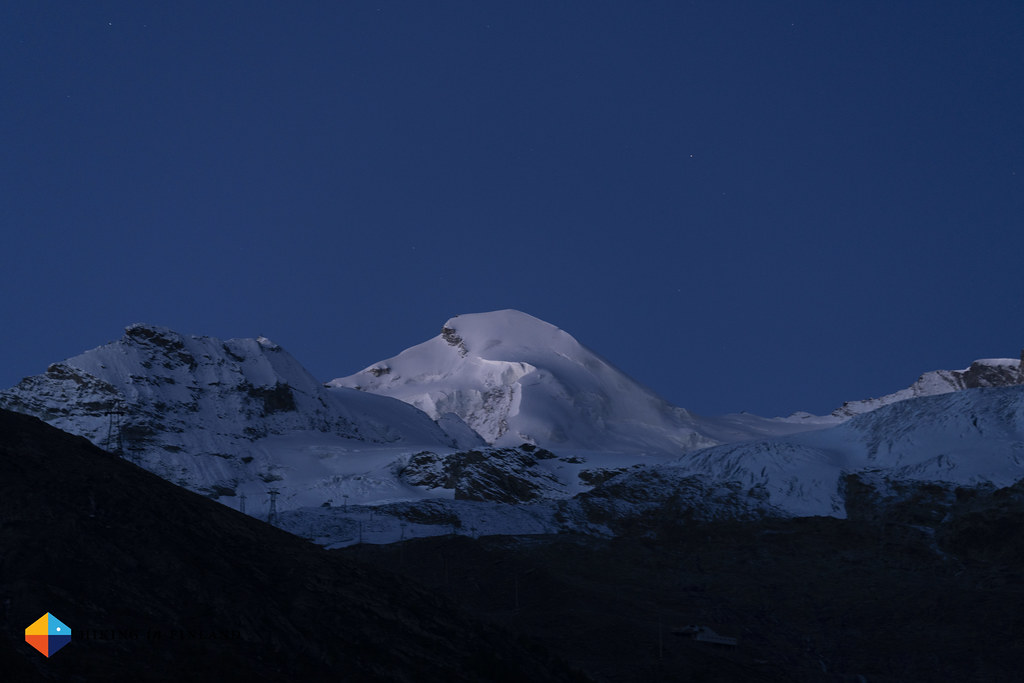
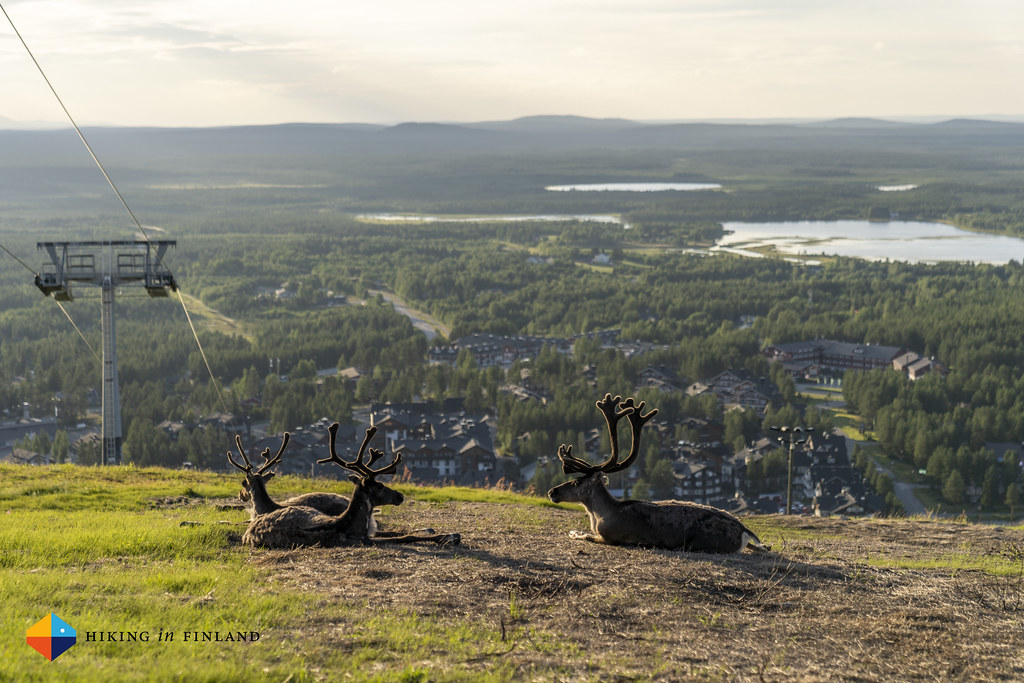
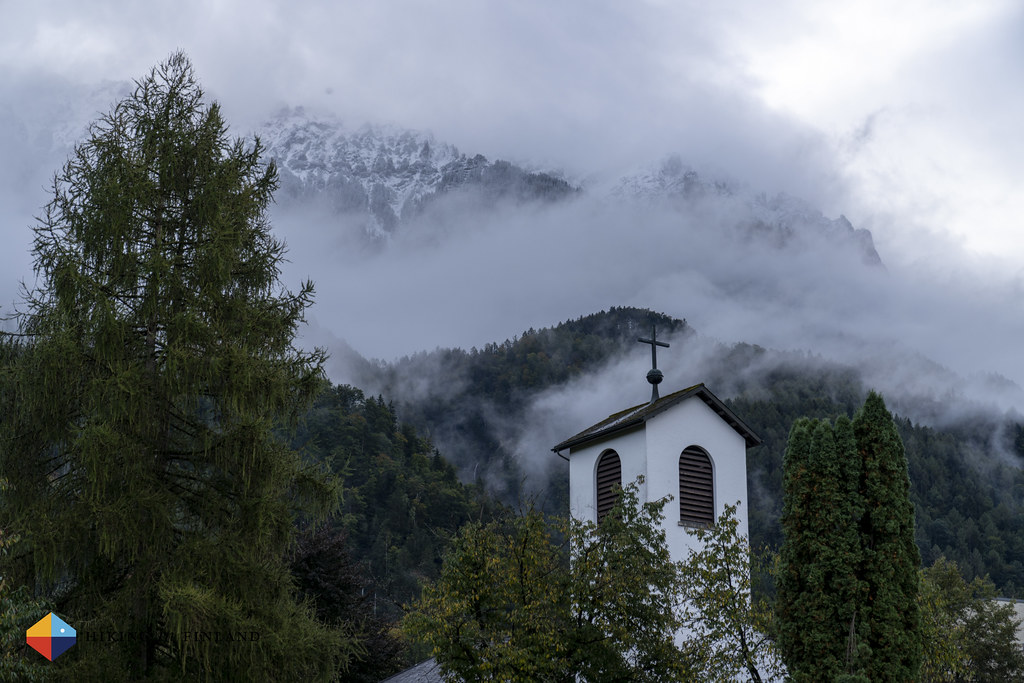
Martin and I meet early for breakfast. Good coffee, Müsli, bread and fruit, then we are checking out of the Hotel and head to the bus stop in Vaduz. Today we are heading into the other direction, and thirty minutes later we arrive in Malbun, a picturesque village high up in a valley. Snow is on the ground and the roofs, but it’s a sunny day, the sky is clear and the forecast is perfect for the next few days, so we are optimistic that today we can hike section 1 of the Route 66. The lift up to the Sareis Station is running and up at the summit the sun is already shining, but we decide to hike out of Malbun and to the start of the trail.
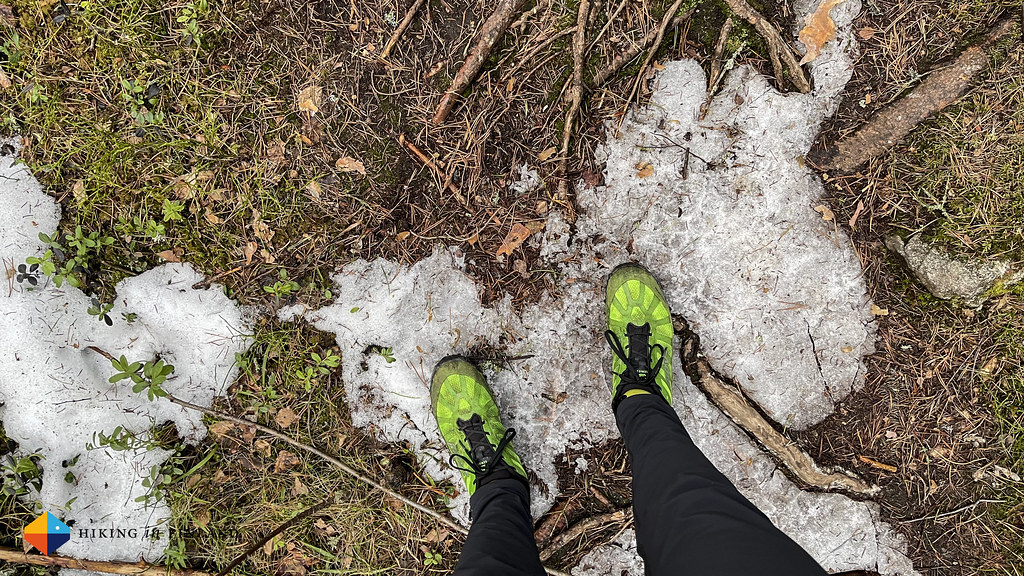
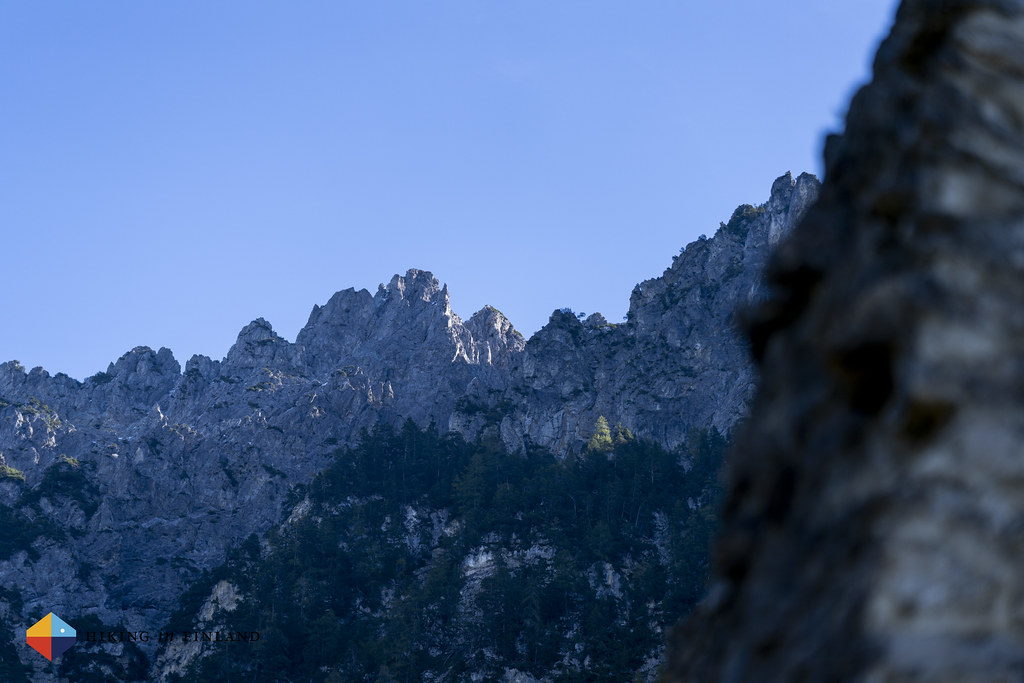
The road up the mountain is free of snow but icy in places, and here in the shade it’s fresh. After a few hundred metres of ascent we reach the start of the trail proper, and some steps from a forest worker go through the snow. We can hear his chainsaw once in a while, but other than that it’s silent up here. Silent, and very pretty!
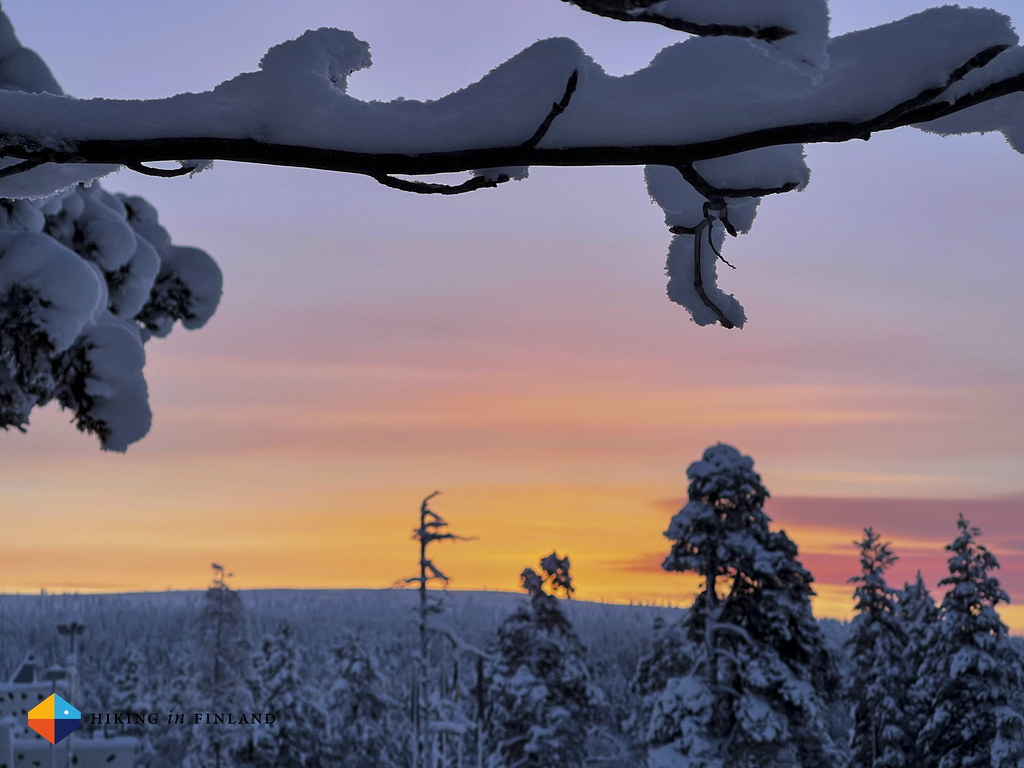
It’s amazingly beautiful, to be honest. I love winter, and seeing these pretty snow-covered mountains here in October is something which makes me very happy. I smile, delighted by the great conditions, the perfect weather - sunny, warm and with almost no wind - and the possibility to hike this beautiful trail with my best friend.
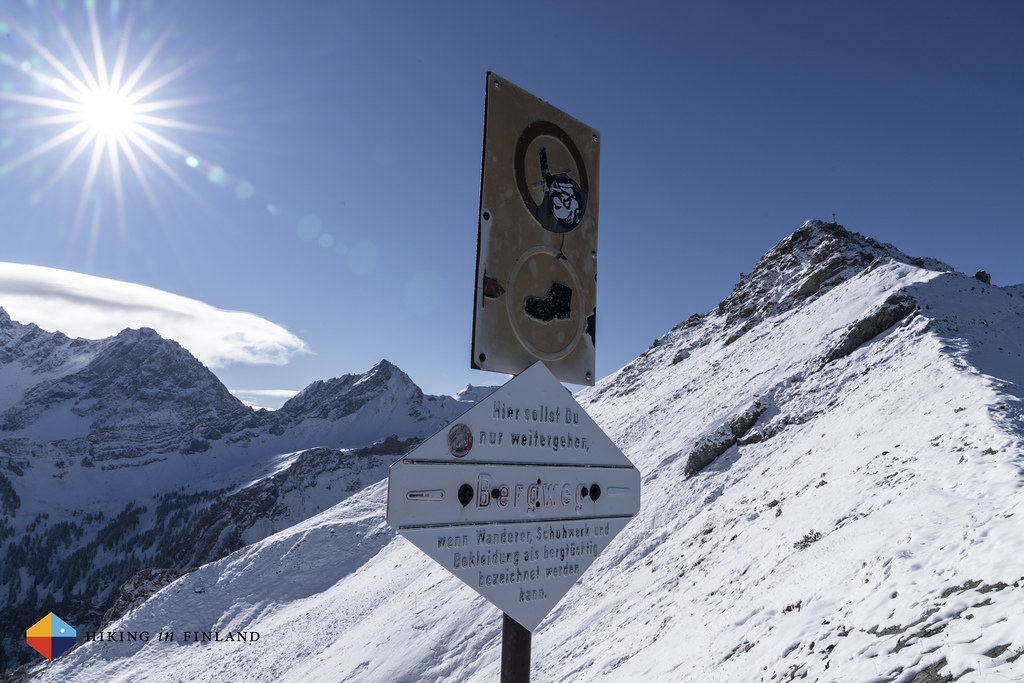
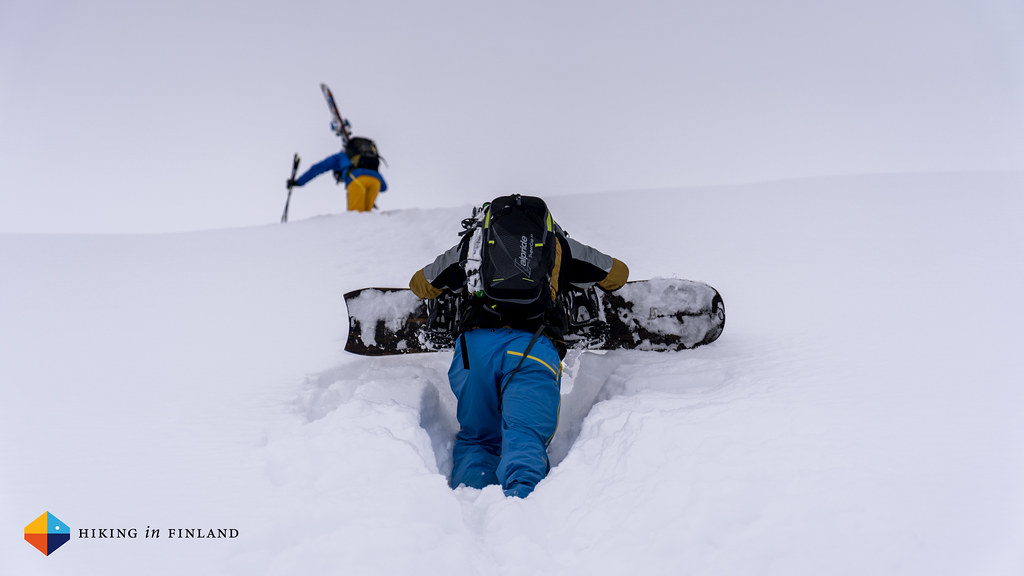
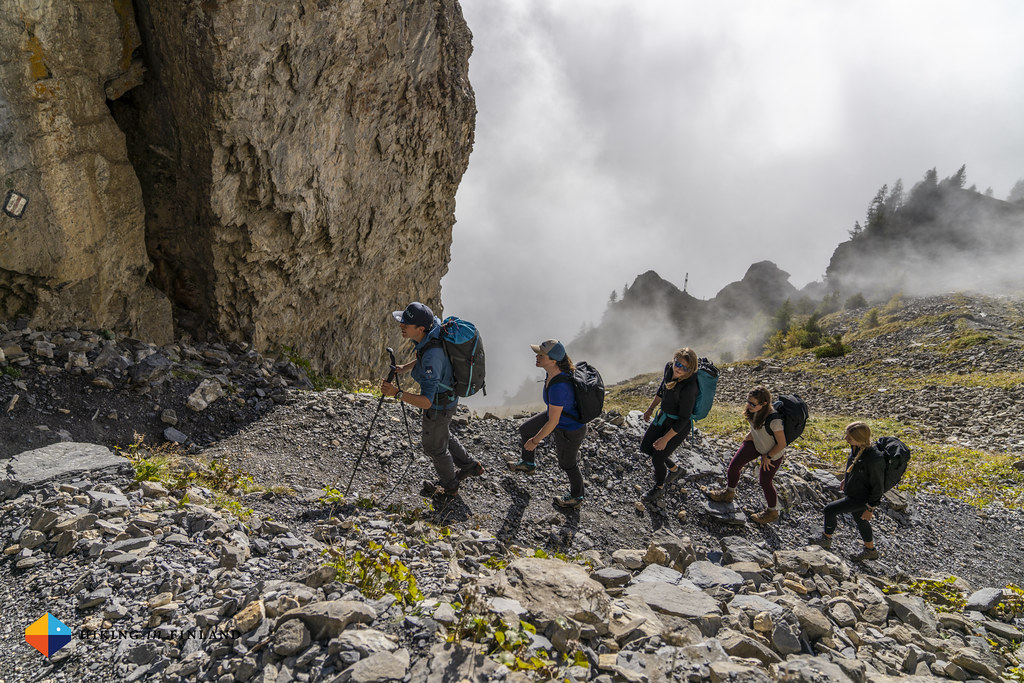
My best friend, however - and I am well aware of this - feels the opposite of me. And I completely understand him. When we reach a sign which warns of the way ahead and that it should only be gone if “Person, Footwear and Clothing are capable of mountaineering” we have a short discussion. The snow goes to the middle of my shins, some 25 cm of fluffy white powder, which hides the trail and its markings ahead. No one has hiked before us, and while we have a map and can follow it via GPS it feels reckless to hike it in these conditions, also as we don’t have an ice axe and crampons along. Martin says that he’s willing to continue and hike on the snowy trail, and for a short moment I am willing to say “Great, lets do this!” but then I know that it’s the wrong answer. We both have wives and kids at home, and the possibility of something happening is always there. With a heavy heart I decide that the right thing to do for us is to turn around and hike another trail in a lower elevation.
It’s disappointing. A beautiful trail. Perfect weather. But with the snow and our lack of the appropriate equipment it’s the right decision. Hiking in these conditions on an exposed ridge has the possibility for things to go bad, and if we have the possibility to hike a safe, beautiful trail in this weather while still hiking through all of Liechtenstein, then this is for us the correct choice.
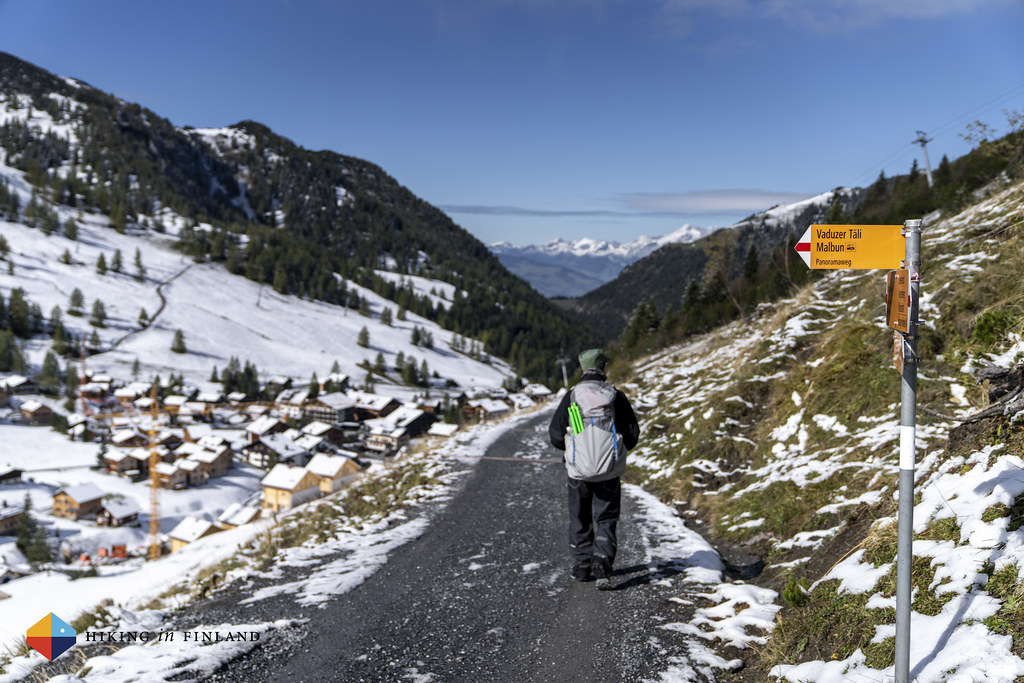
And so we hike back to Malbun. The sun has climbed high by now, and we enjoy the warm rays on our face. In Malbun we only have to wait a moment before we can board a bus down, and after some consideration - we were thinking about hiking through the gorgeous Valünatal valley - we decide to hike the Liechtenstein-Weg, as the section we hiked the previous day is shared by the Route 66 which we were planning to hike. That will mean we will hike a complete trail, just that today we will be hiking from Point B to A, or from Triesenberg to Balzers, to be more precise.
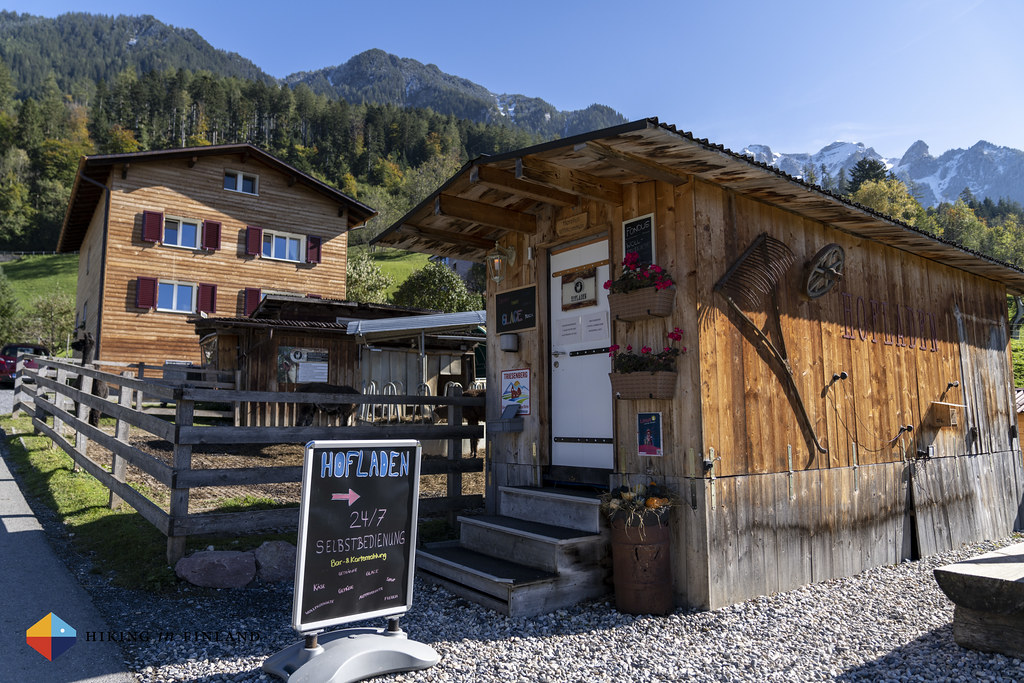
The bus lets us out at the church in Triesenberg. It’s blue sky and sunshine galore, and we hit the trail to Balzers in the south. It’s just 14 km, and as we’re hiking it vice versa we’ll be hiking pretty much only down. I guess doing things the other way around can have its benefits, too! On the way out of town we pass the Lama- & Alpakahof Triesenberg which also has a 24/7 Shop with ice cream and drinks - tempting in such good weather!
We leave the town behind and soon are in the forest, thankful for its shade as it starts to get warm in the sun ☀️ When we reach a viewpoint with a bench we have a break, taking in the view. It is beautiful, and feels like we made the right decision to be here.
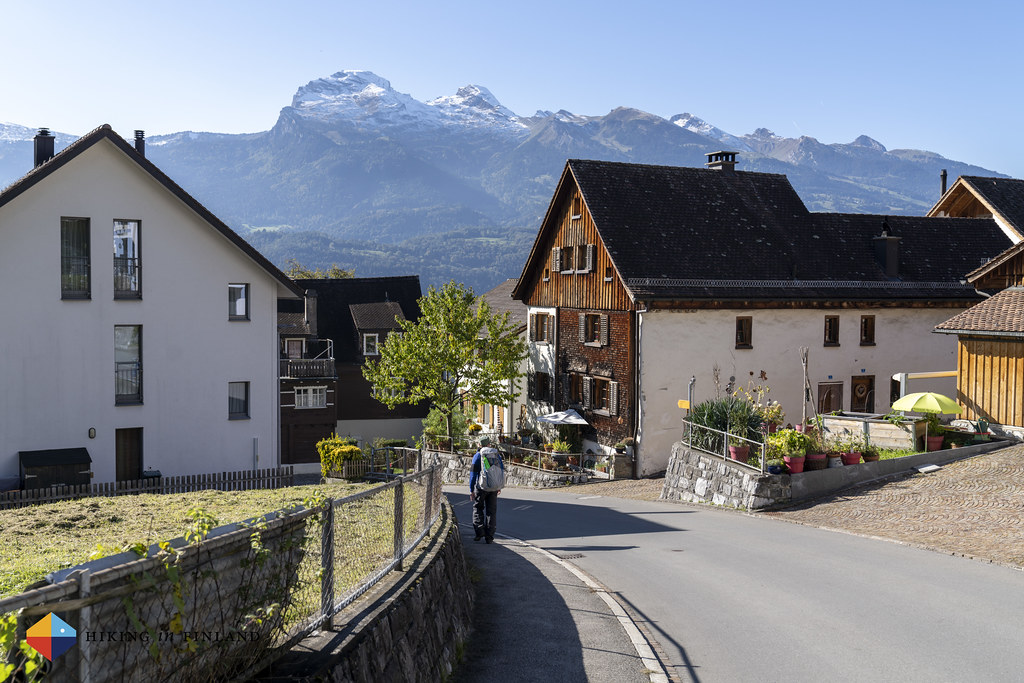
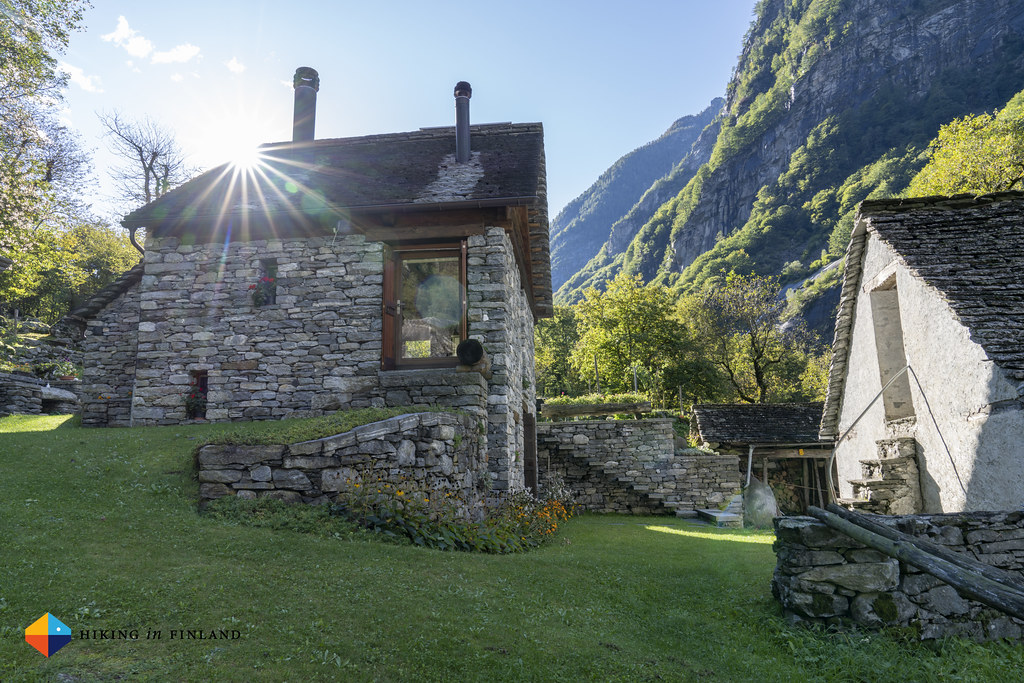
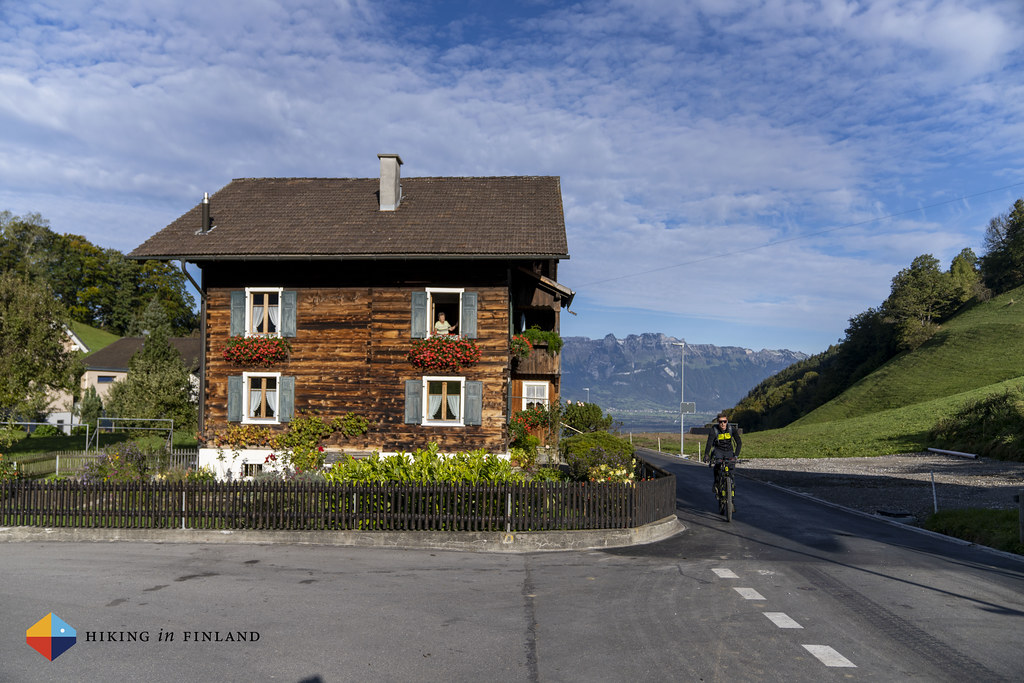
The trail takes us through the forest, meadows and small villages. Beautiful wooden houses line the streets, with flower pots in front of the house. It’s idyllic, and truly pretty to see.
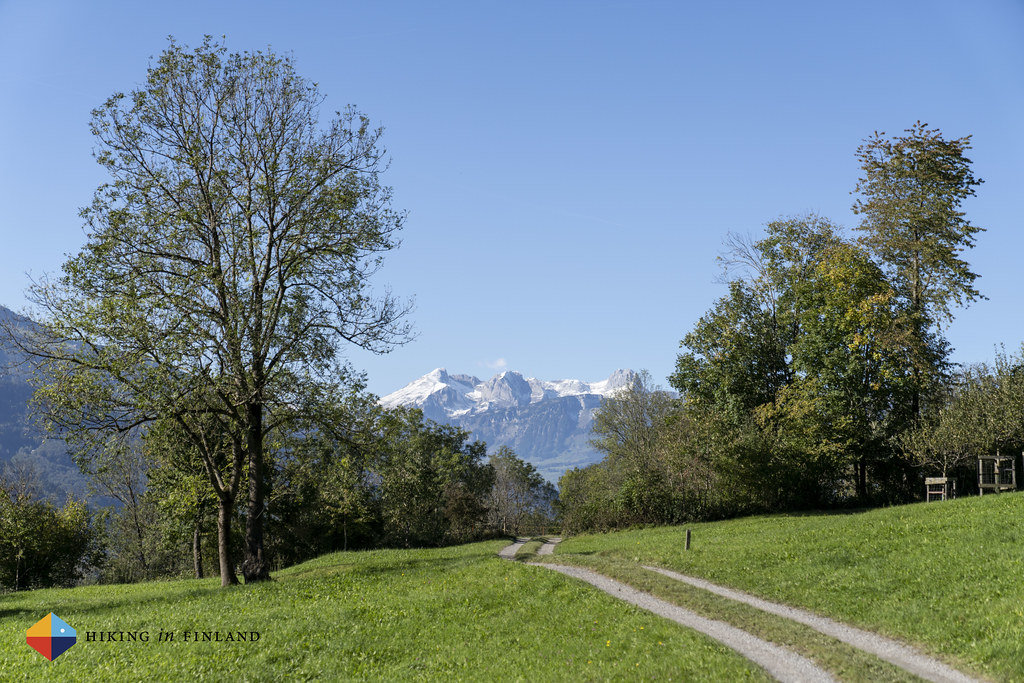
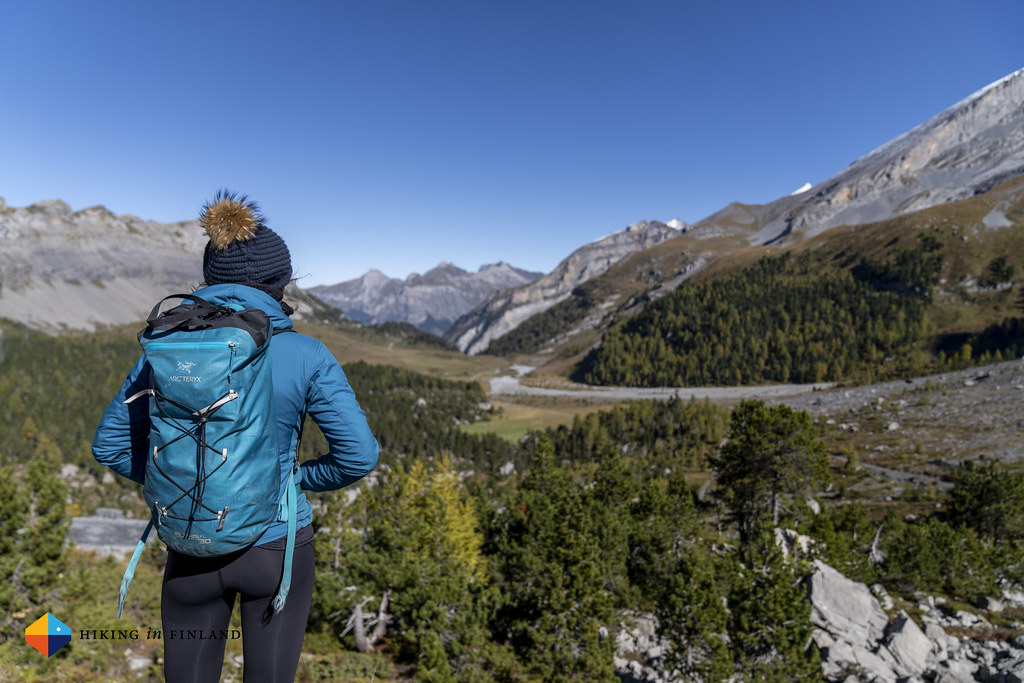
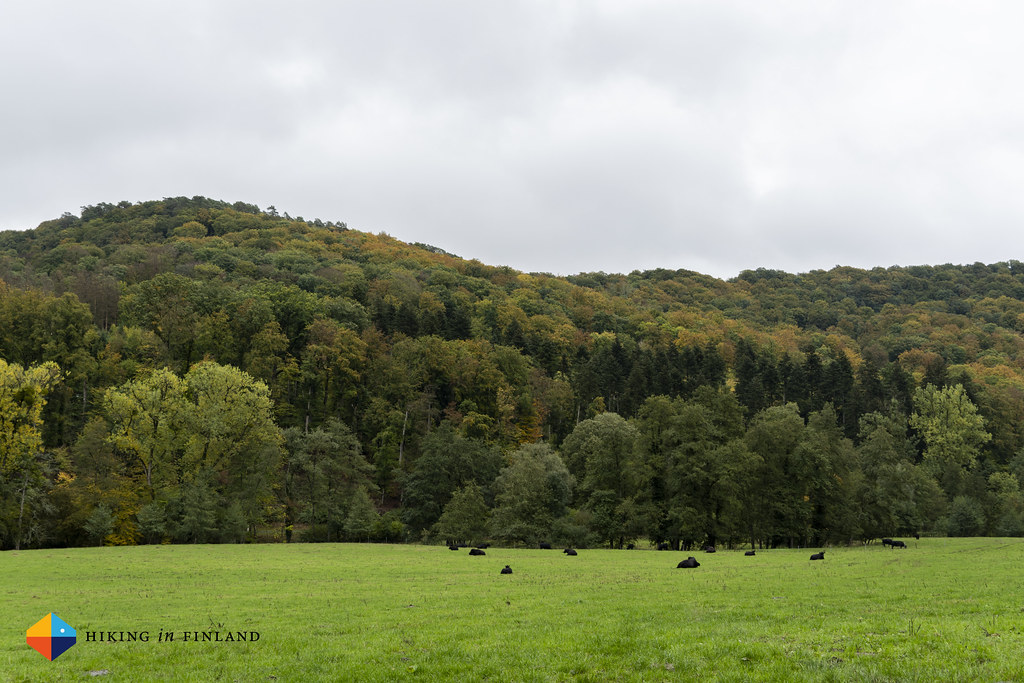
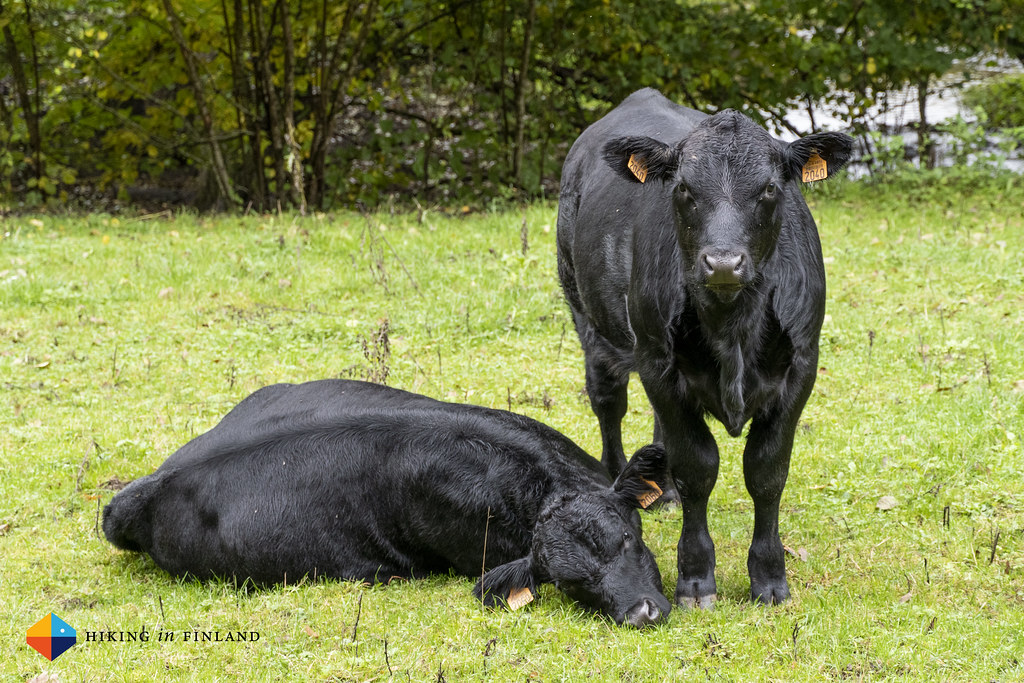
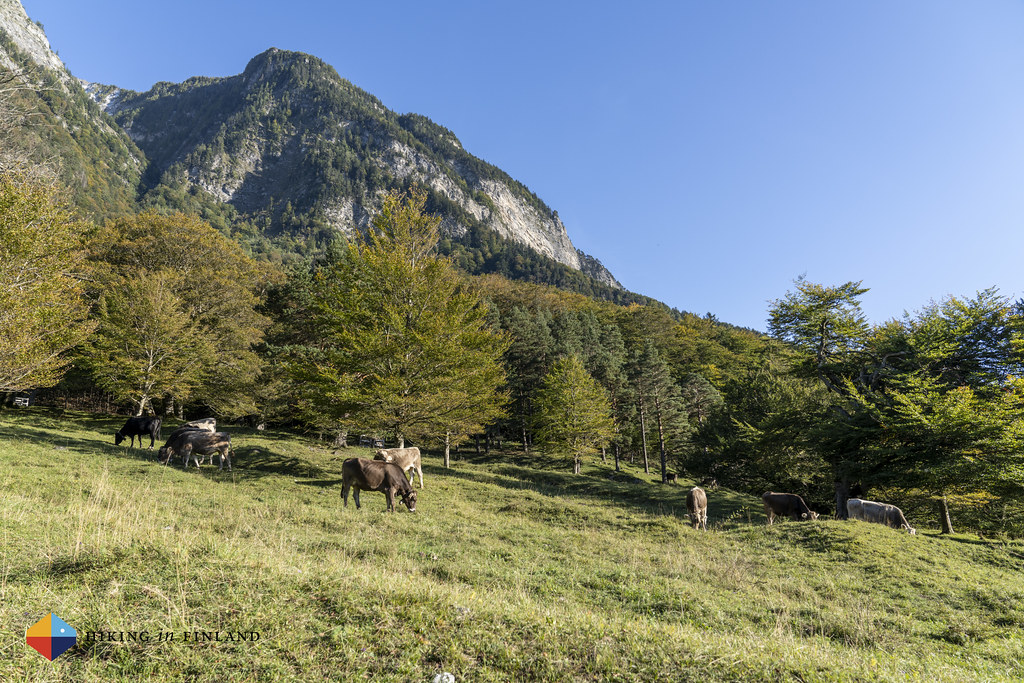
After the village come meadows. Cows are grazing, bees are still flying through the air and wild flowers are growing in the fields. The going is easy and enjoyable, Martin and me talk about life, hiking and food, and that we will have to return to do Route 66 in the summer some time, as above us the mountains look great.
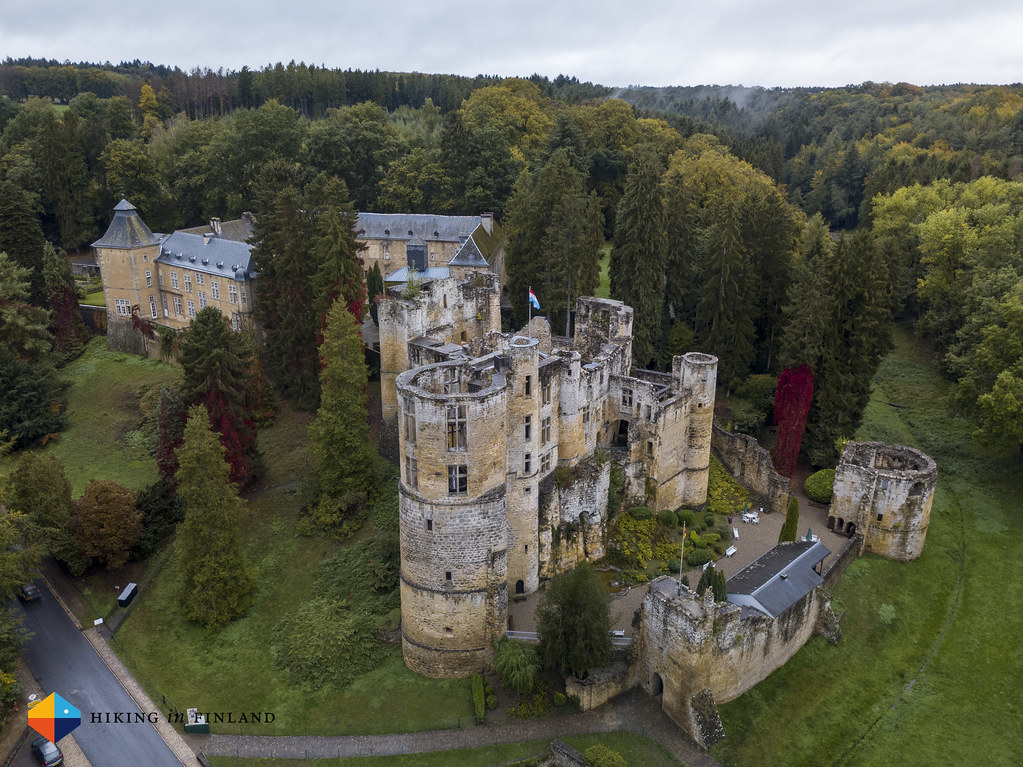
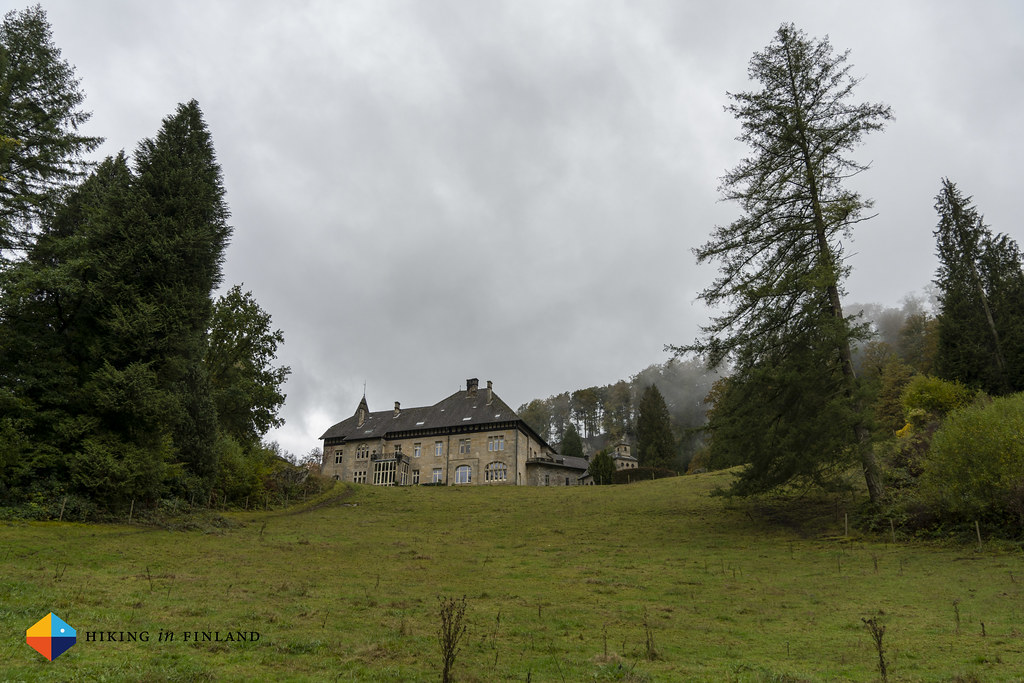
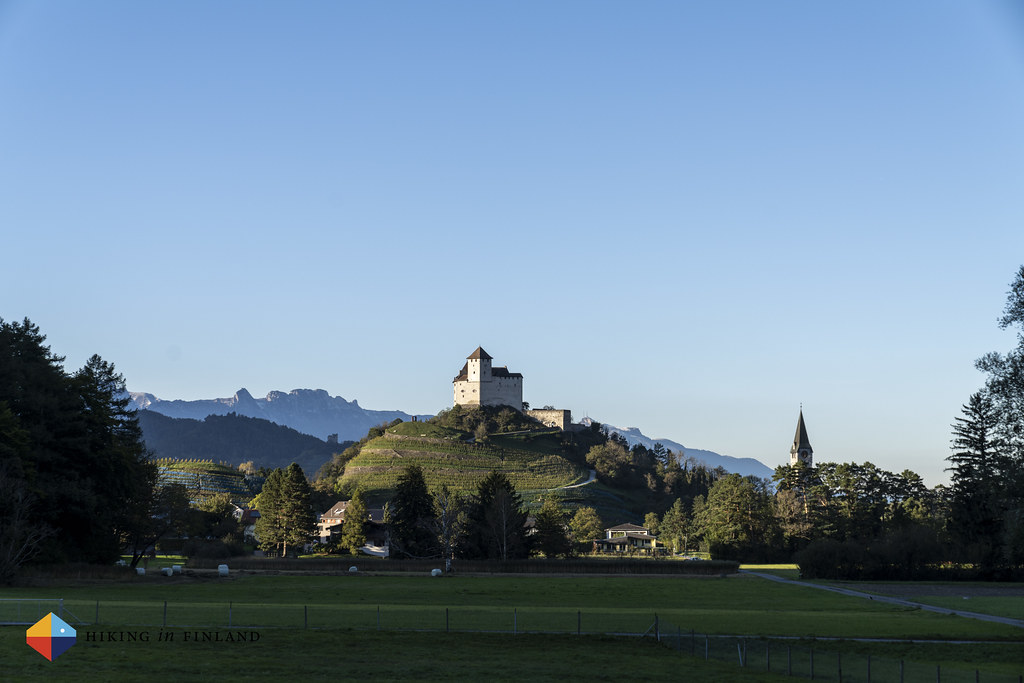
And then, without much warning, we come out of a small patch of forest and see Balzers. Oh, what beauty! On a perfectly shaped hill in the middle of the village sits a castle, with intact towers and walls, framed by the mountains in Switzerland on both sides and the back. It’s a post card picture, and will be the end of todays hike!
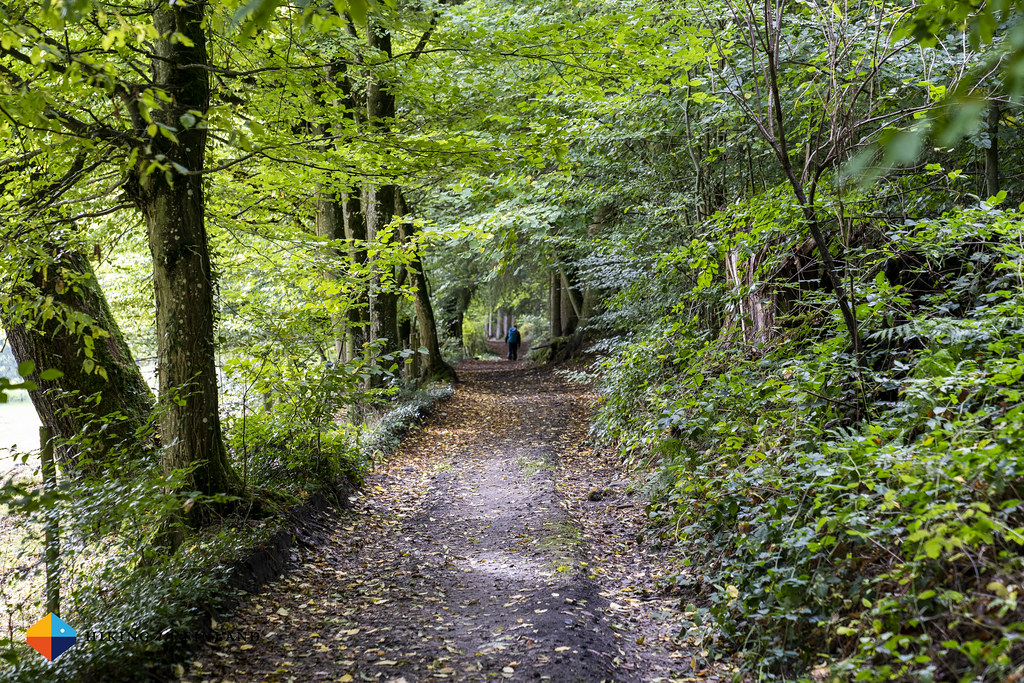
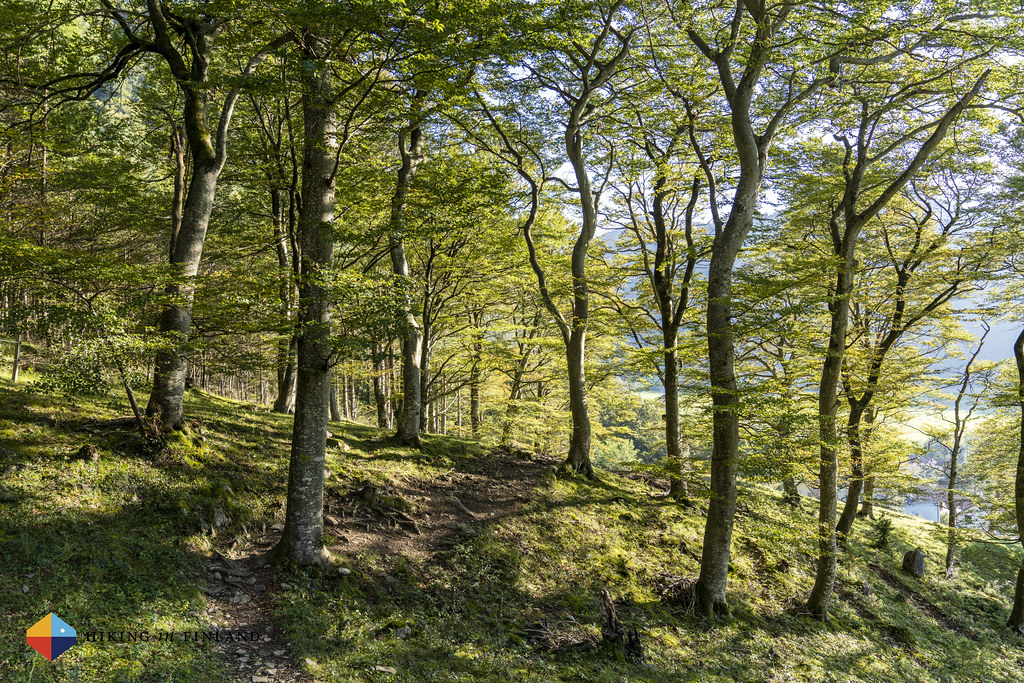
But before that the trail decides to treat us to some single-trail goodness. Much of the hiking in the afternoon has been on nice forest roads, but now we go through light broad-leafed forests on a beautiful single trail. Bathed in sunshine, it’s perfection.
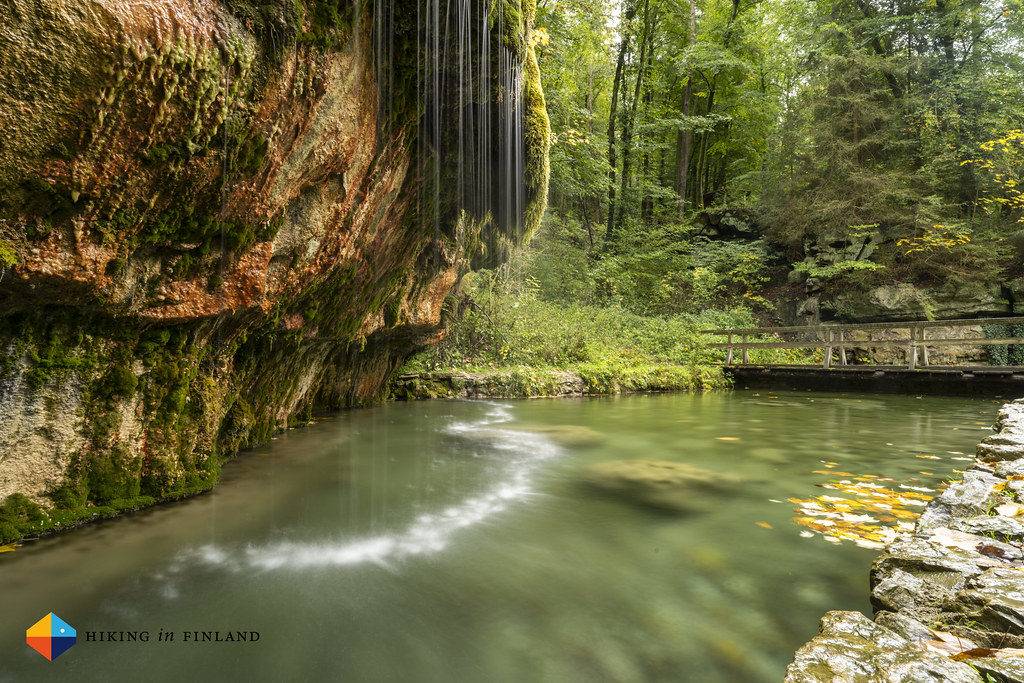
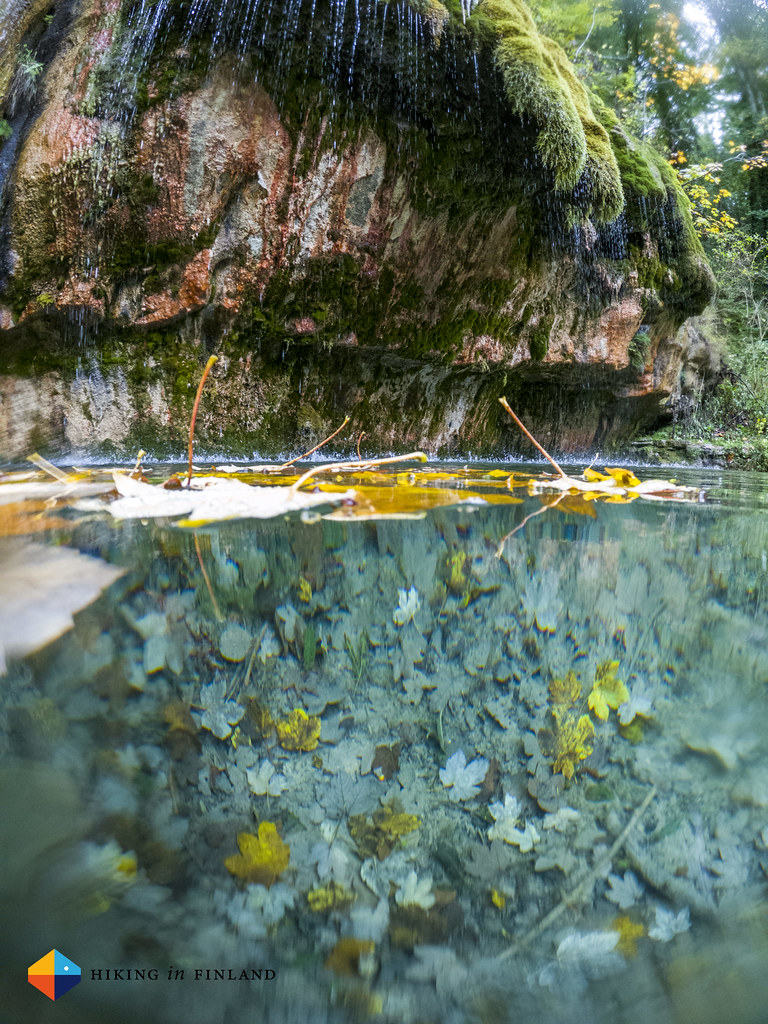
We pass the St. Katharinabrunnen picknick area, again a green space with lots of informative boards wich explain about the ecology around us. There’s a stream making that relaxing gurgling sound, a tiny lake with fish in it, and nice places to sit down (or pitch a tent ⛺️!), though we continue towards the Border with Switzerland.
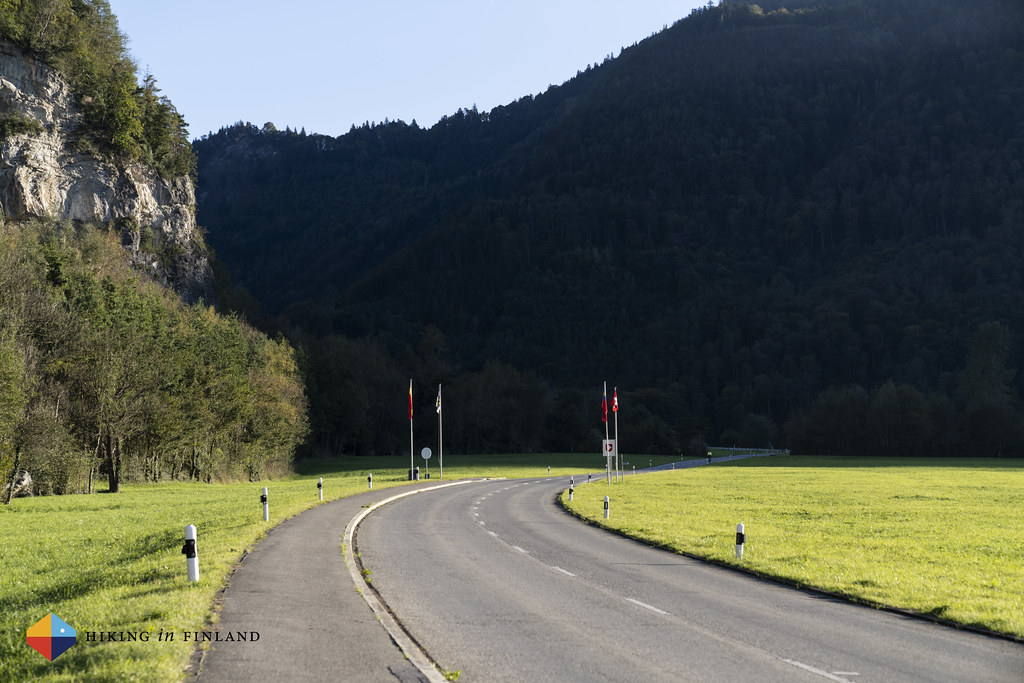
We walk on a sidewalk (!) to the Southern Border with Switzerland, where flags and signs inform us that here’s the Border. Cyclists ride by, we take a couple of photos and then head onwards towards Balzers. Behind us the mountains are glowing in the evening sun, while on our right the castle Burg Gutenberg stands proudly on its hill in the village. As we walk into the village the Bus stops in front of our nose, so we decide to jump on it and continue towards our Hotel up in Malbun, leaving the exploration of the castle for the future 🏰 😊
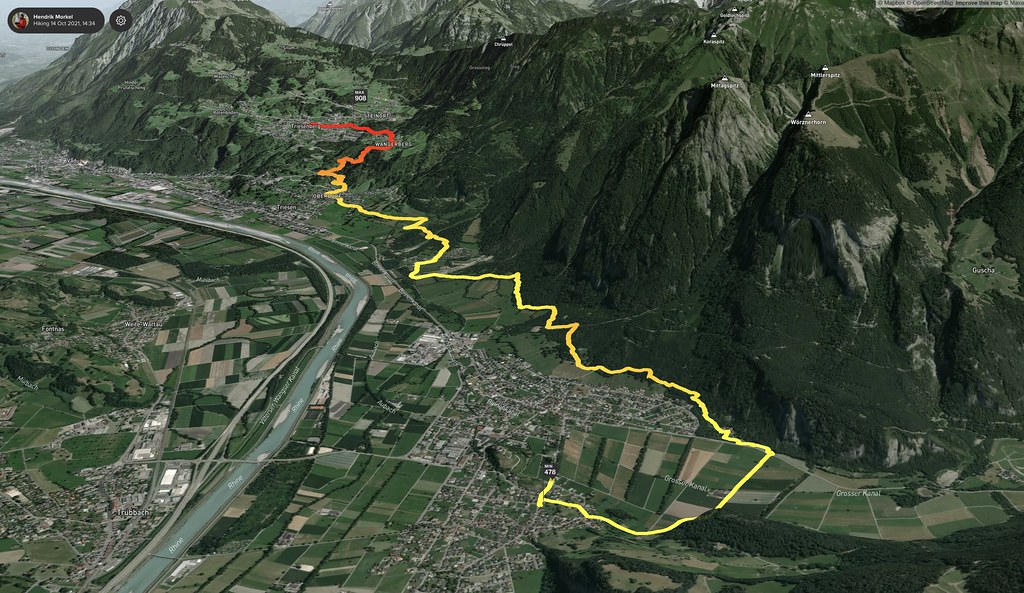
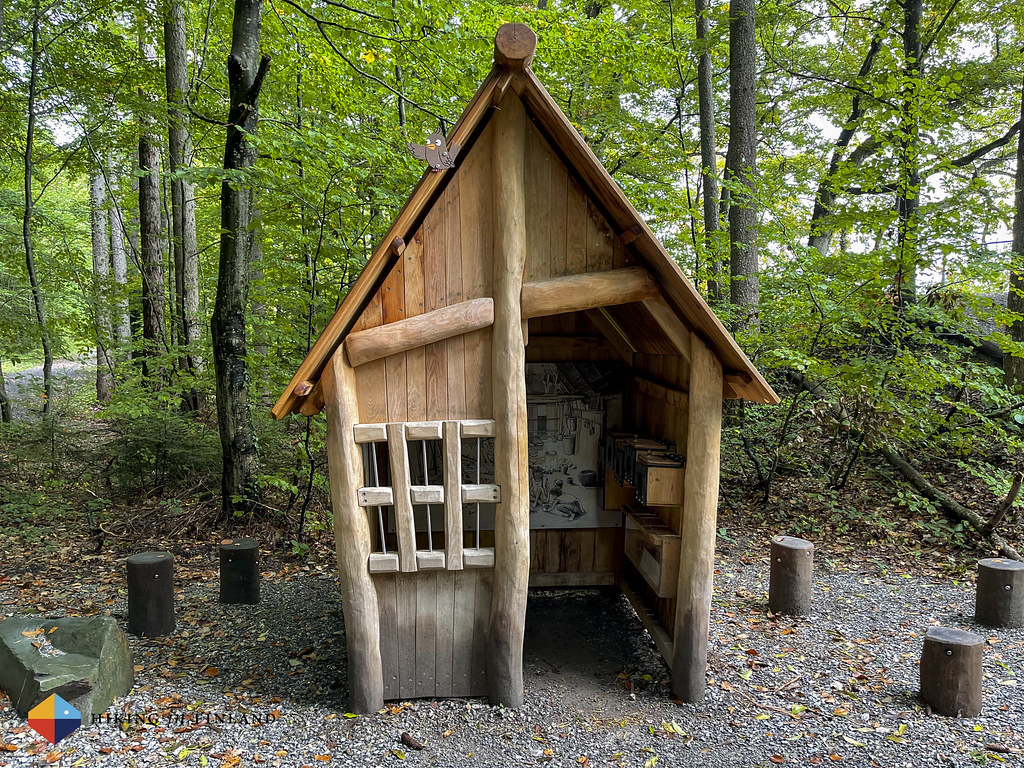
On our third day of hiking on the Liechtenstein-Weg we take the Bus from Malbun - we decided to stay up in the mountains when we planned the original route - and drive down to Triesenberg again. Here we follow the signs and walk out of the village, this time towards the North, and soon we are on the “Walser Sagen Weg Triesenberg” which shares this section of the Liechtenstein-Weg. Cool wooden statues stand besides the trail, along with information boards explaining the stories behind them. Again it’s a sign of quality that you find these kind of great details along the trail - not that the trail is boring, though: The views here are superb!
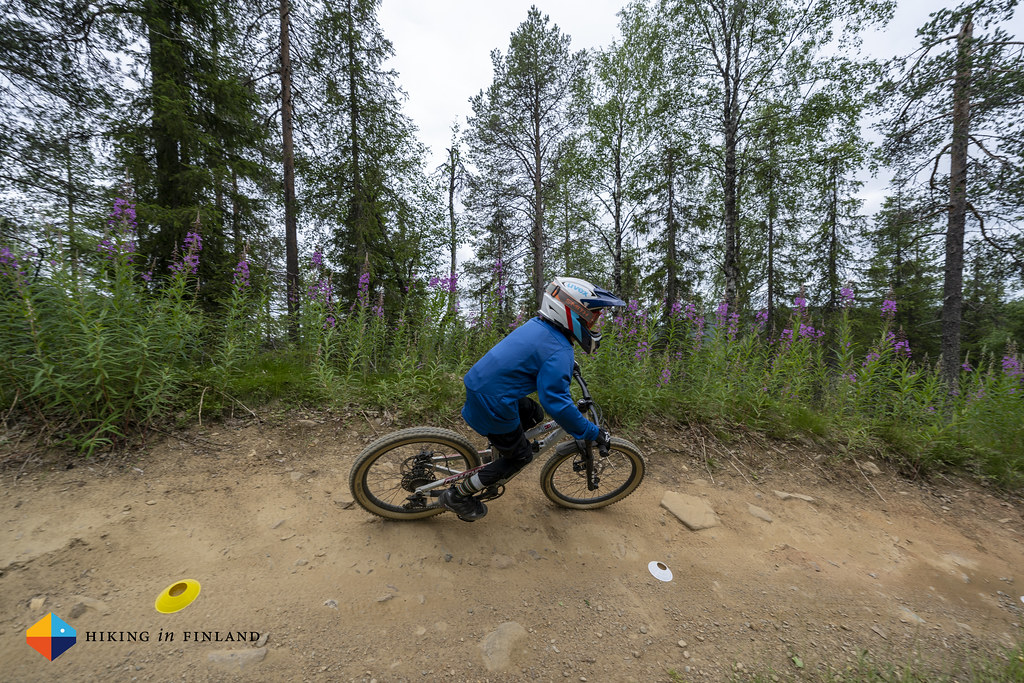
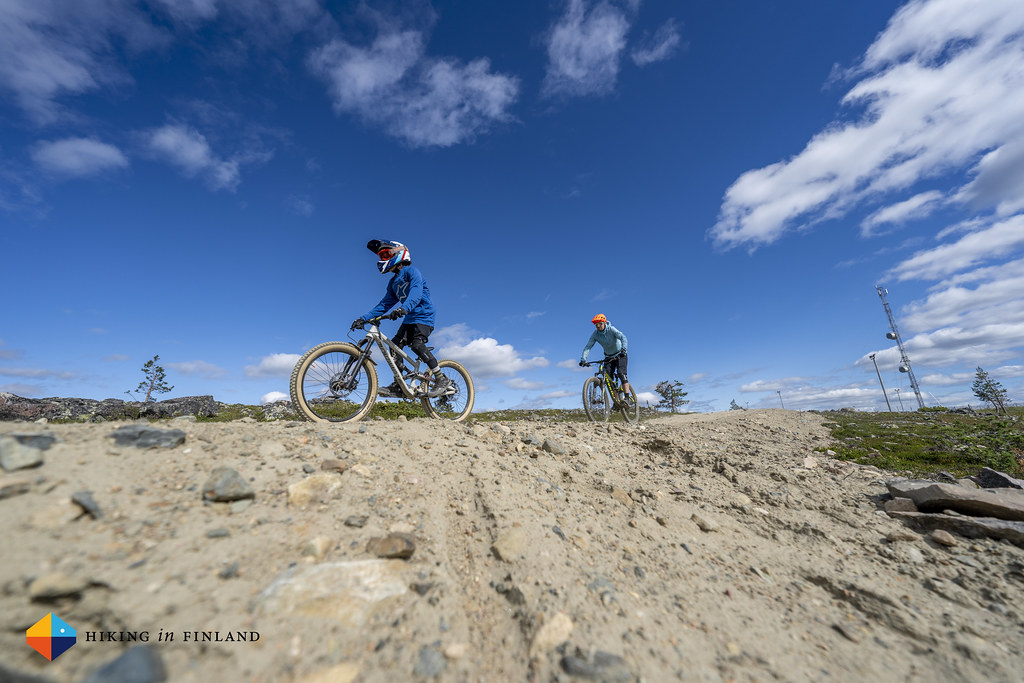
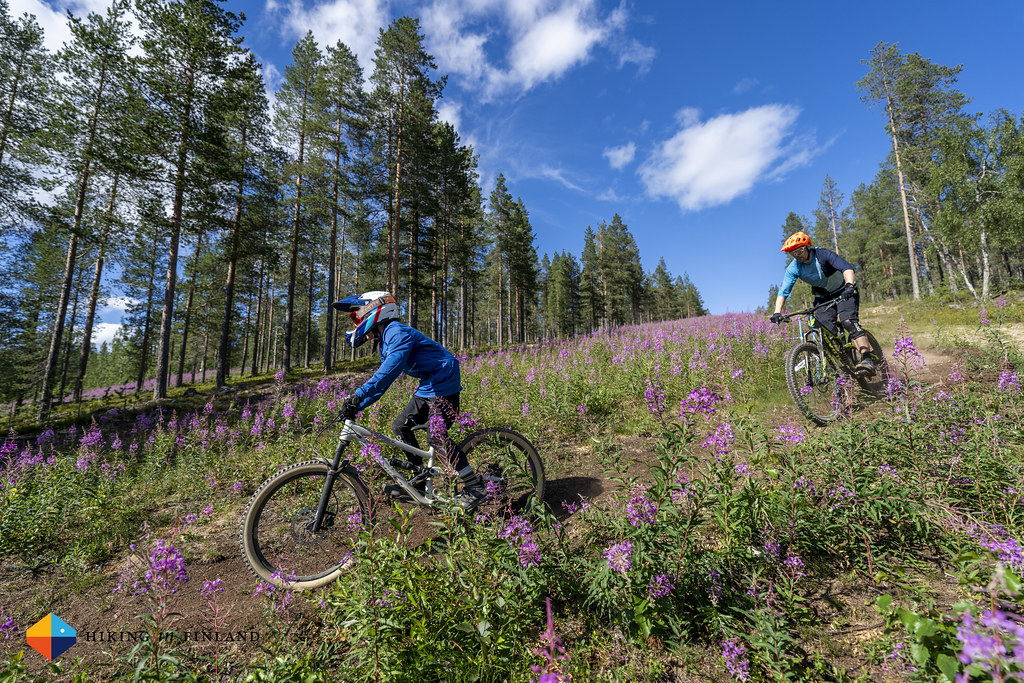
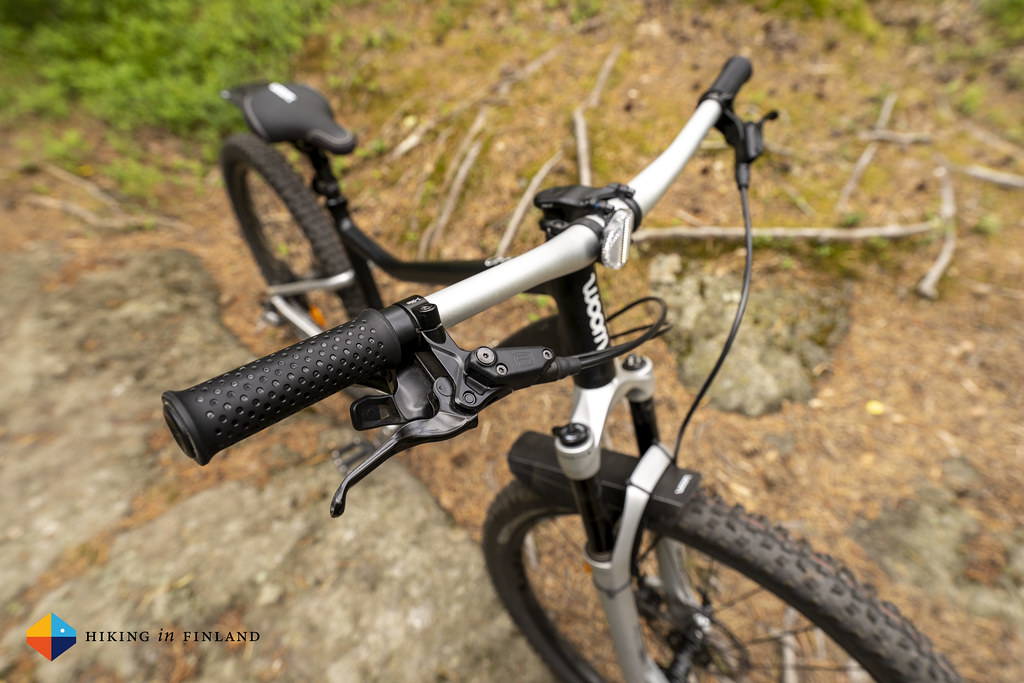
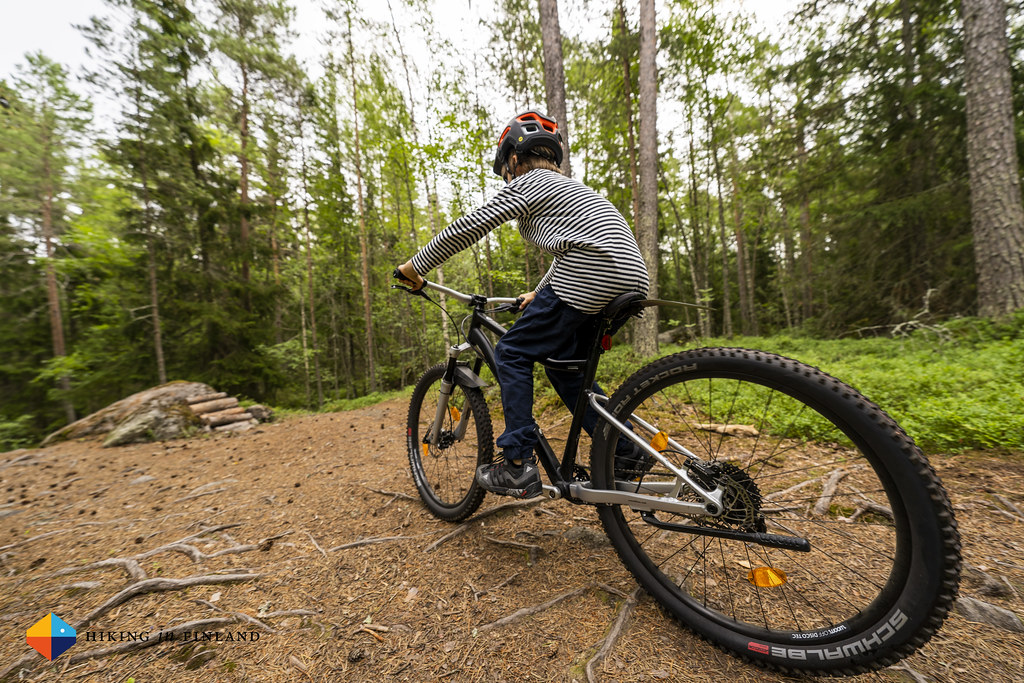
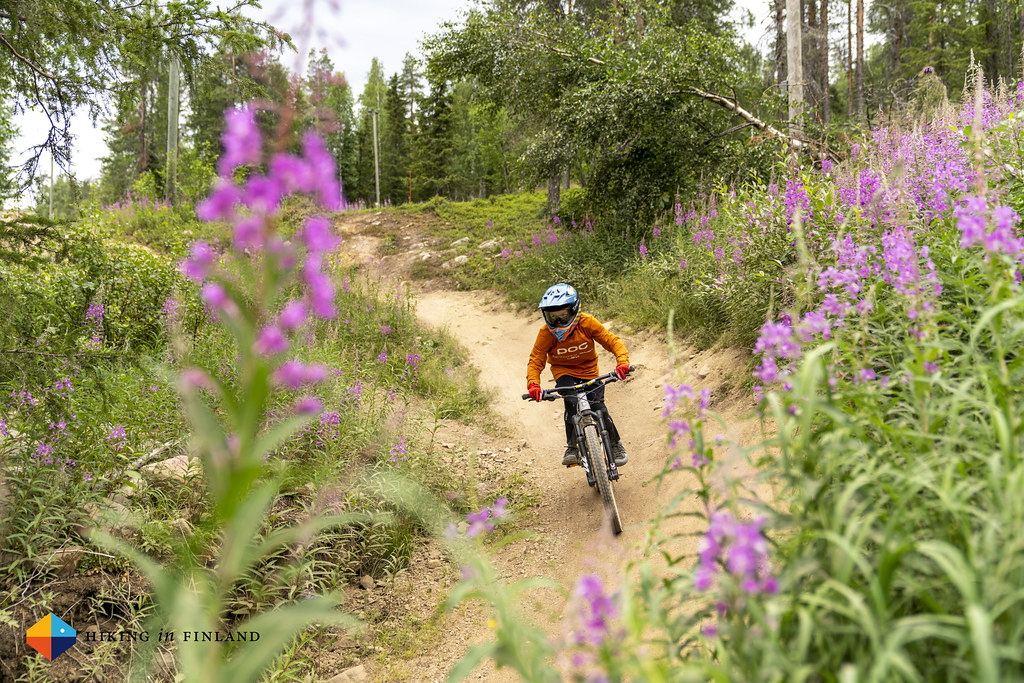
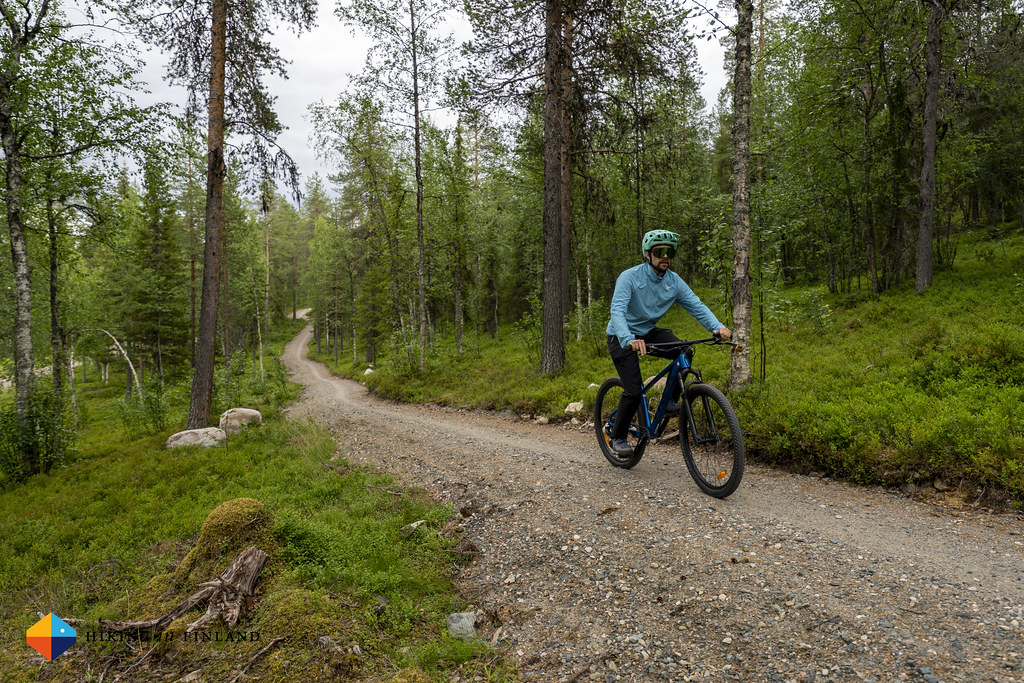
We pass through a small village, again with lovely wooden houses, and start to see quite a few cyclists who ride up the mountain. Mountainbiking seems to be popular here, and there are apparently a few very nice trails running through the forests back down - definitely something to keep in mind for the next visit to Liechtenstein! We pass three friendly donkeys along the trail, who are enjoying the autumn on this meadow with great views, just like us!
After a while the trail becomes a “Family Trail” - it’s a forest road which is well maintained, and means families with a stroller can hike here without problems. The trail is easy and meanders through the forest and lightly up towards another meadow with beautiful wooden hay sheds, where cows are grazing. The sun is shining in the blue sky, while some cows are grazing on the meadows.
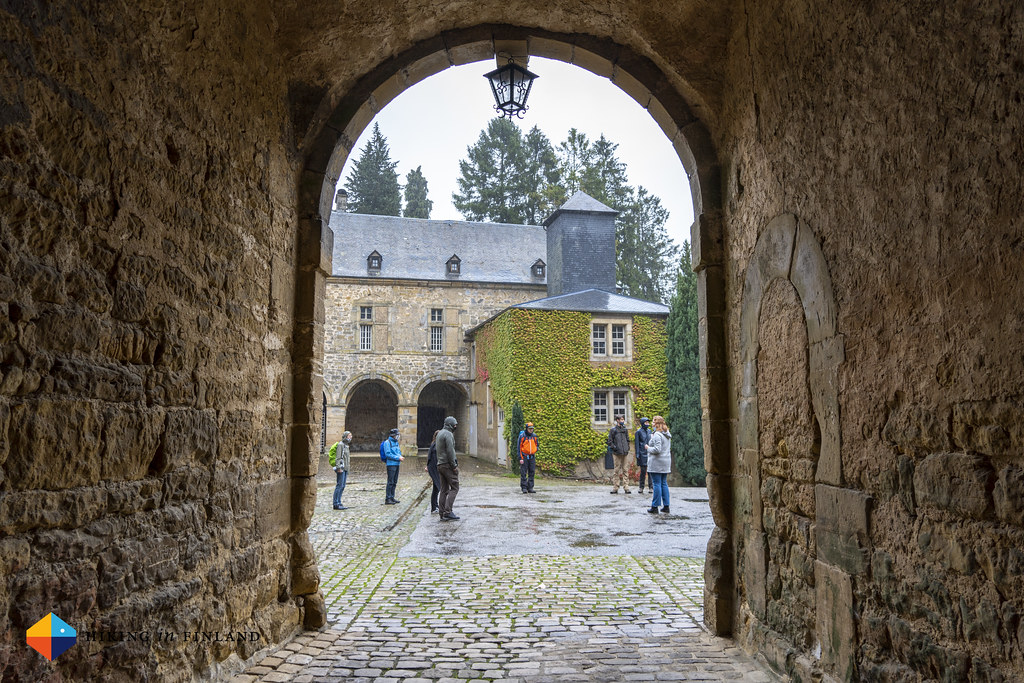
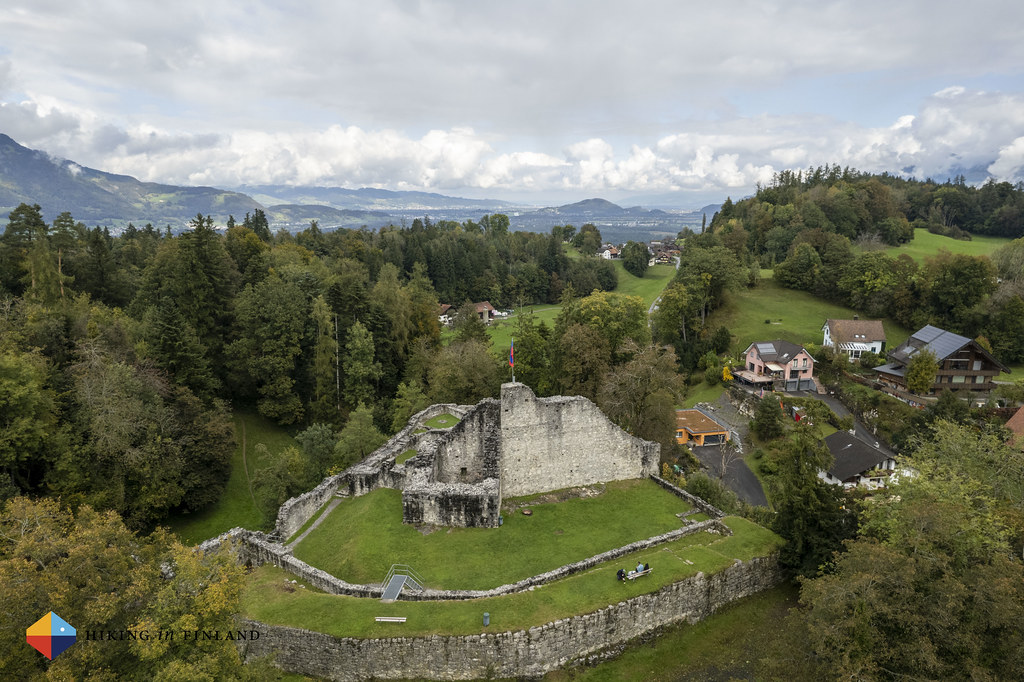
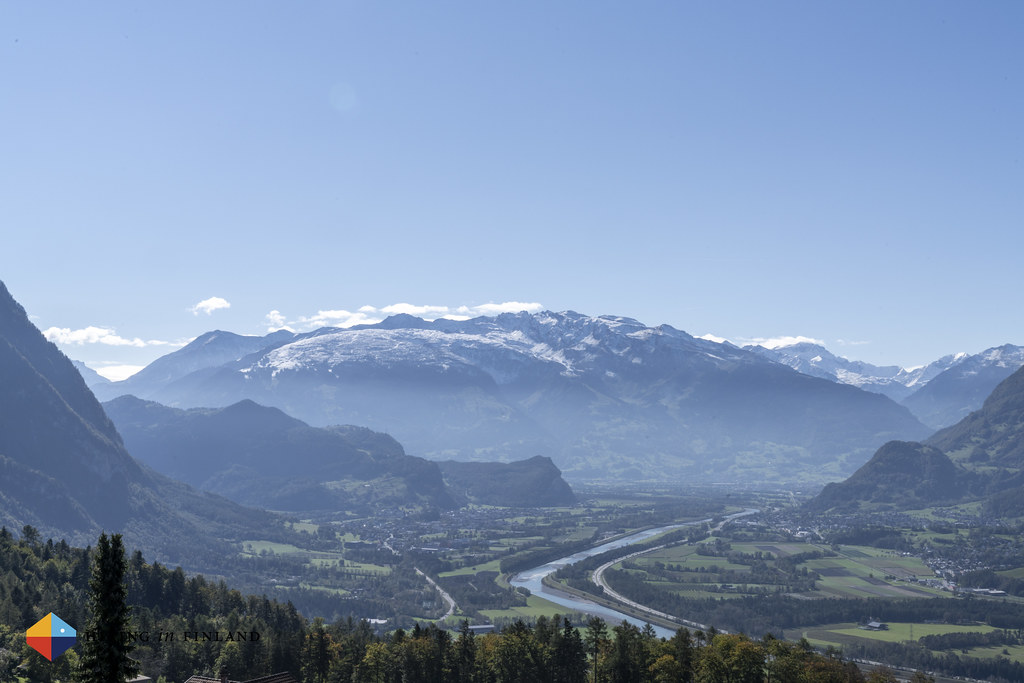
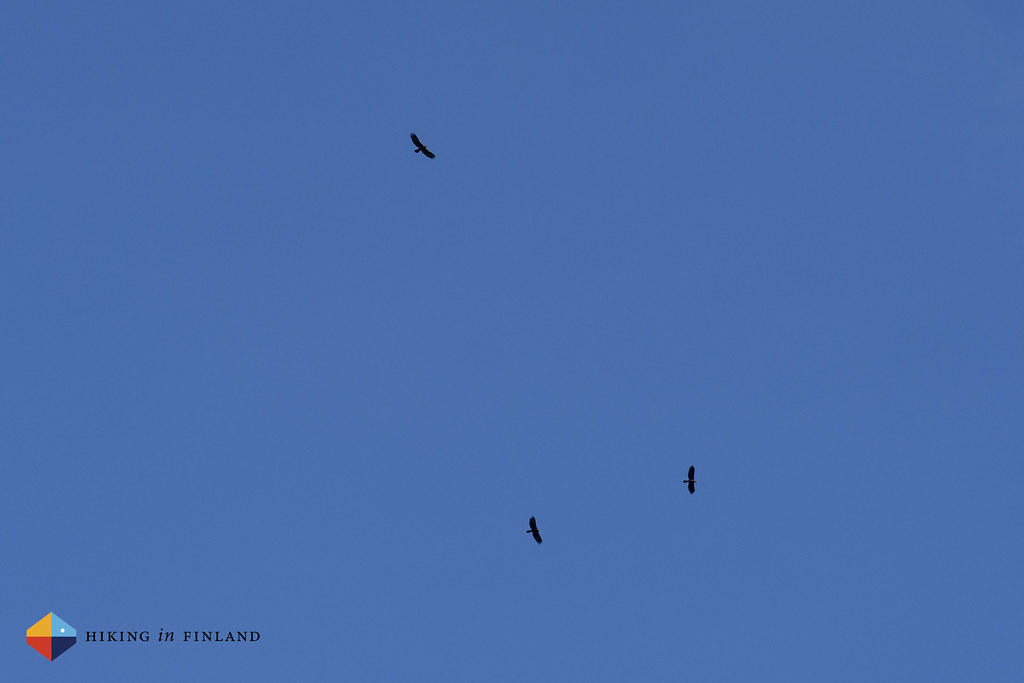
Soon after we reach the Wildschloss, a castle high in the forest overlooking the valley towards the south and north. It’s a beautiful spot, and the bench and table invite us to a break. I get out the 135 mm lens to take photos of the mountain tops, both over in Switzerland and behind and above us in Liechtenstein - that’s where we were supposed to be, if the snow wouldn’t have made things so difficult.
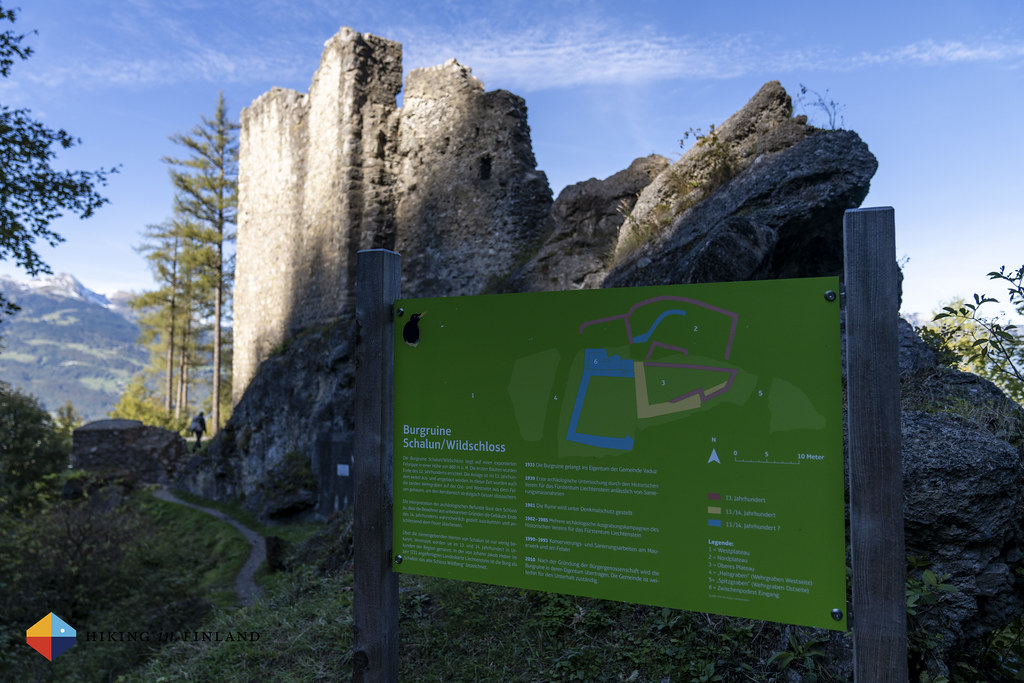
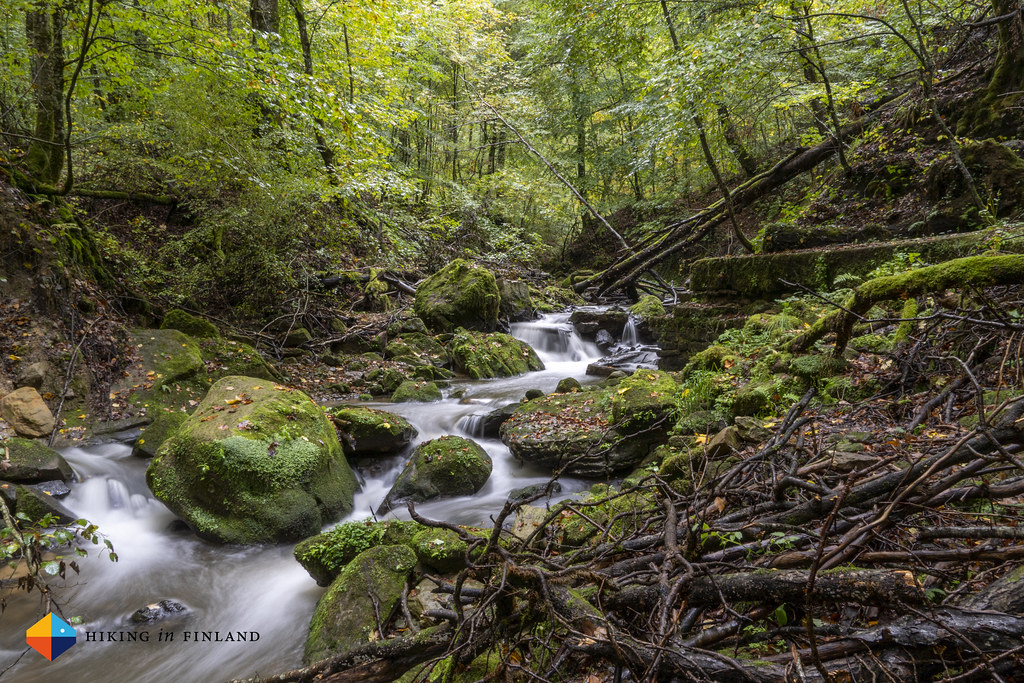
To round out a relaxing break three Golden Eagles (!) are flying high in the blue sky close to the castle ruin. Always a majestic sight, we are delighted to see three eagles who are circling higher and higher on the warm air rising up. After coffee and cookies in the sunshine we pack up and continue on the trail, which leads us now through the forest towards the valley on a nice single trail. We pass one of the channels where in the spring the melt water rushes towards the Rhine in the valley, and can just imagine the amounts of water that must come down here in the spring, judging from the amount of rocks in it.
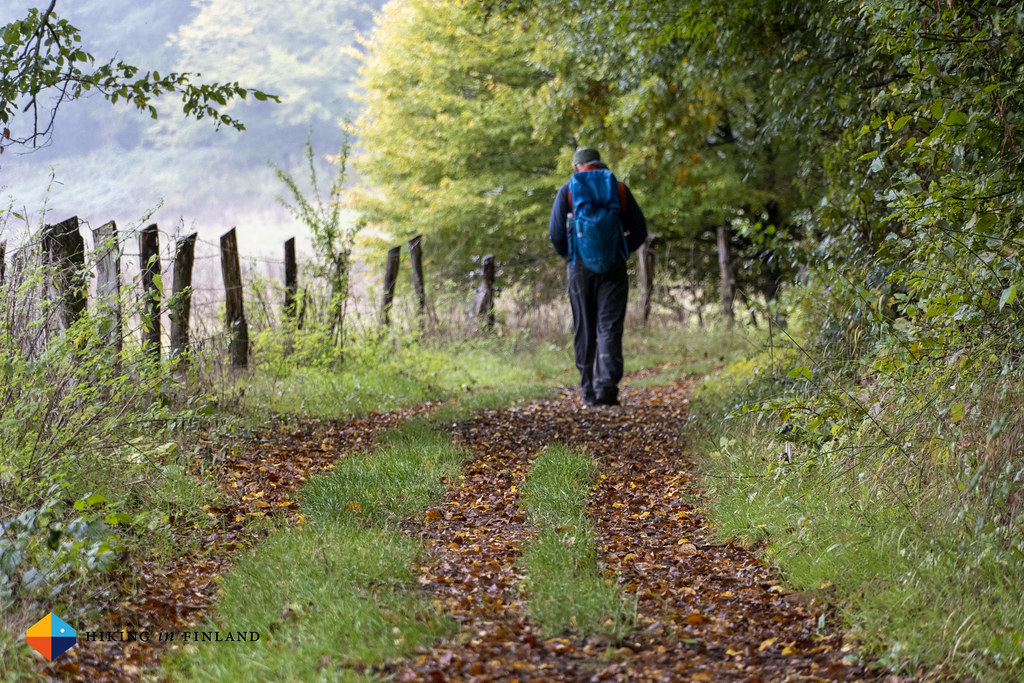
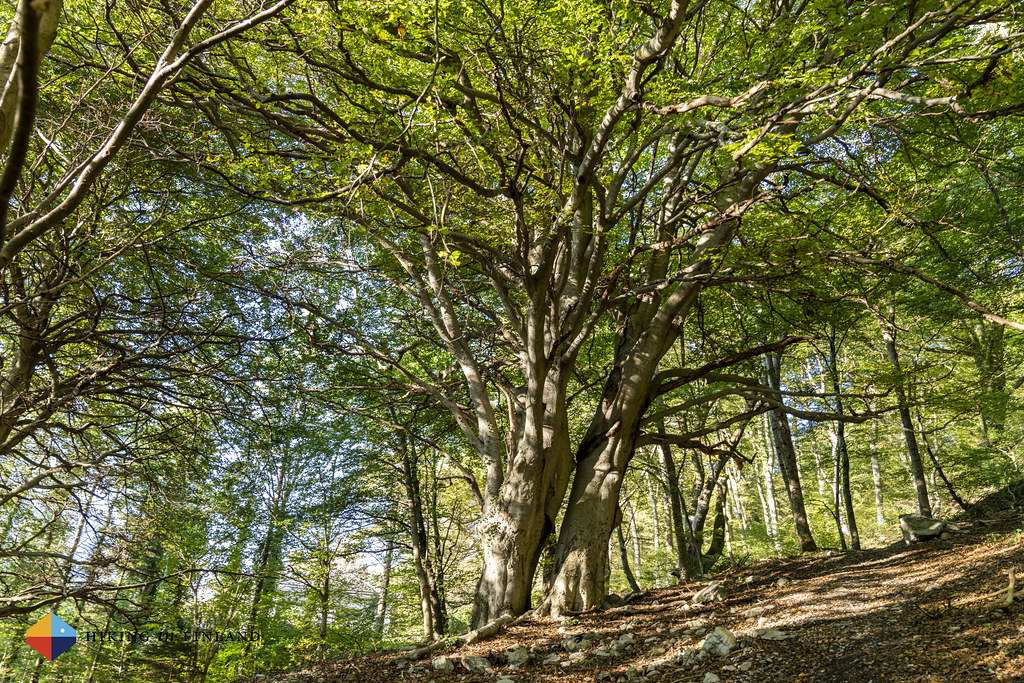
Past a green field which again looks perfect for pitching a tarp we soon are on one of the beautiful single-trail sections. It’s the kind of trail that’s perfect, under a pretty broad-leaf roof and with soft pine needles and roots making for enjoyable walking.
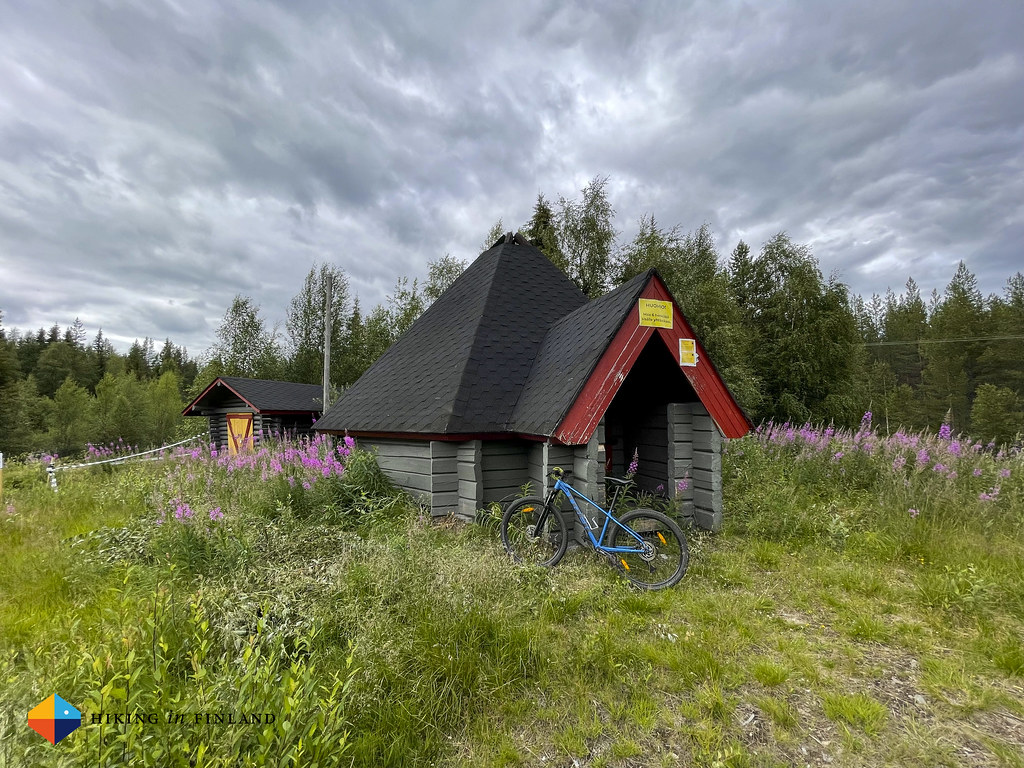
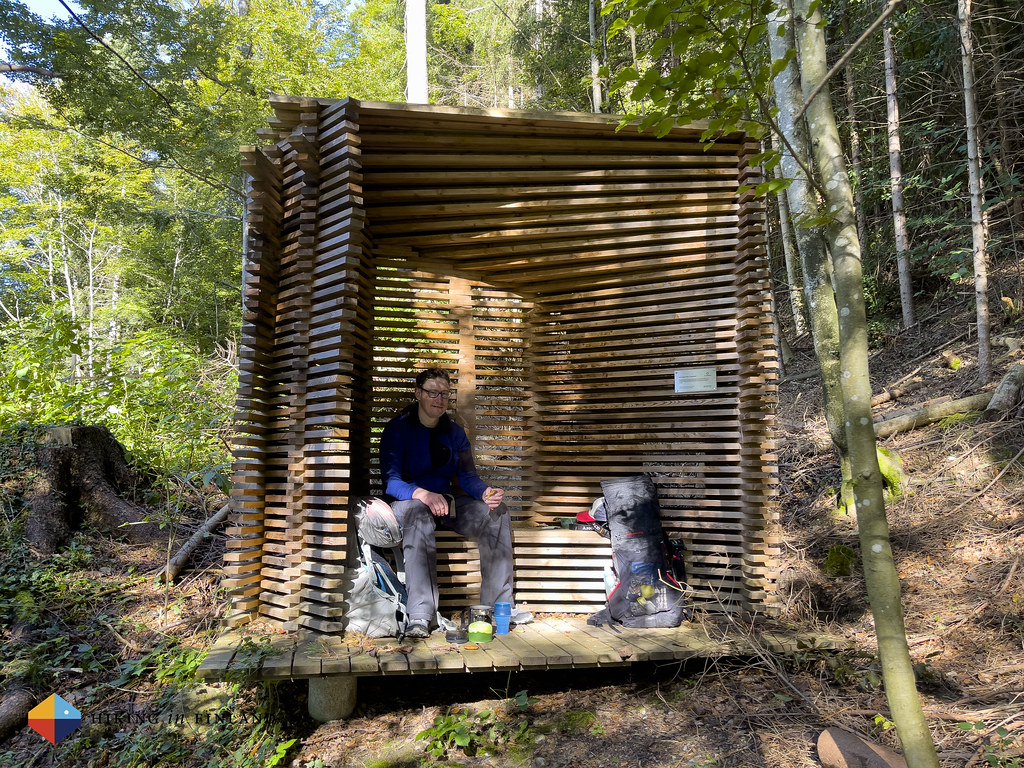
After we cross a road we find a very pretty break hut, which was made by two young wood workers. We decide it’s time for another coffee and tea break, as soon we’ll enter onto a section of the trail which goes through more civilization. So we sit down here in this hut, in the forest, and enjoy another cup of tea.
Even the little huts at the bus stops in Liechtenstein are absolutely photogenic, as we witness in the village of Planken, which we reach next. Ripe, delicious-looking apples hang on the trees, and we can’t resist to pick one as a snack - there’s nothing better than eating a tasty sweet apple when hiking!
We stroll through the village of Planken and reach a very scenic view point, where we meet a few other people who take in the view. Over on the Swiss Mountains 🇨🇭⛰ we see that the snow has melted - behind us, however, there’s still snow on the tops, a reminder of our adventure from yesterday.
And then we leave the views behind and start the final descent into Nendeln, the village where we started our trip a couple of days ago, and which will complete our thru-hike of the Liechtenstein-Weg: Hiking from the Swiss Border in the South through all of Liechtenstein towards the Northern Border with Austria and Switzerland. It was an inspiring hike through a beautiful little country, with beautiful scenery and on well-maintained trails. The autumn weather was beautiful and after we returned home we saw on the Liechtenstein Social media channels that the great weather continued for several more weeks, so the fall hiking in Liechtenstein can be enjoyed for a long time - after all, most of the broad-leaf trees hadn’t even started to go yellow, orange and red! Martin and me decided to return in the future and hike the Route 66 from start to finish - without snow! But then there’s also great family skiing in this small country… ❄️🏔⛷
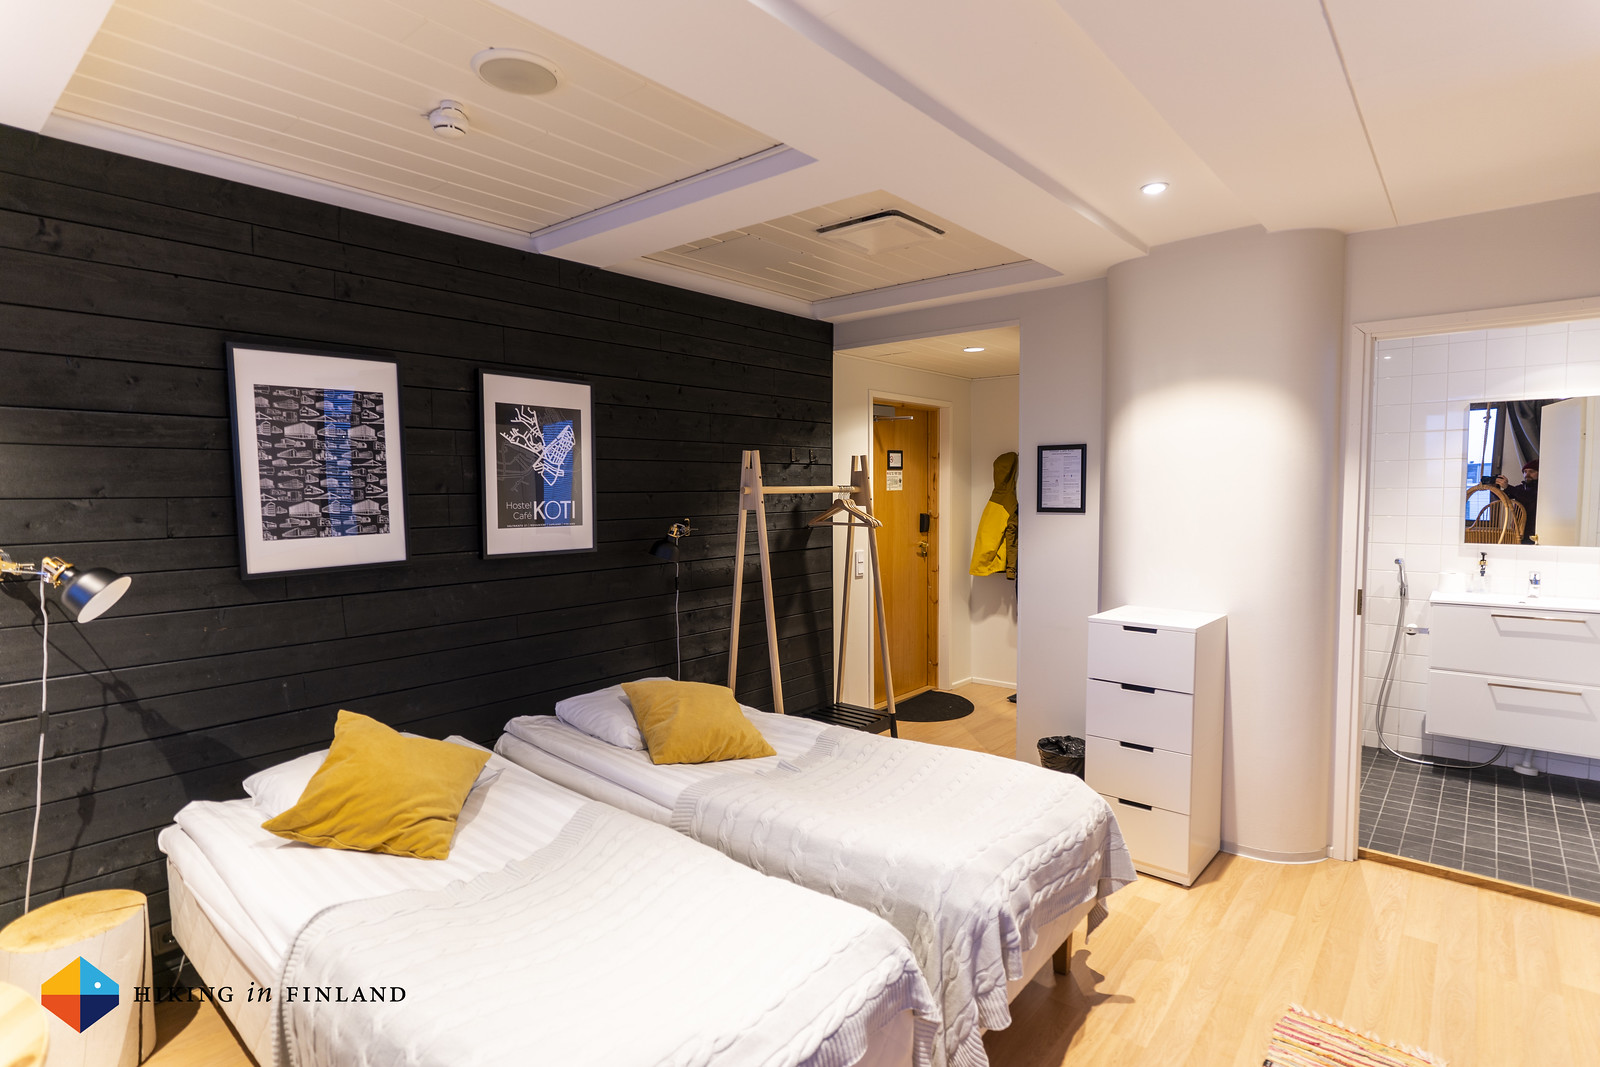
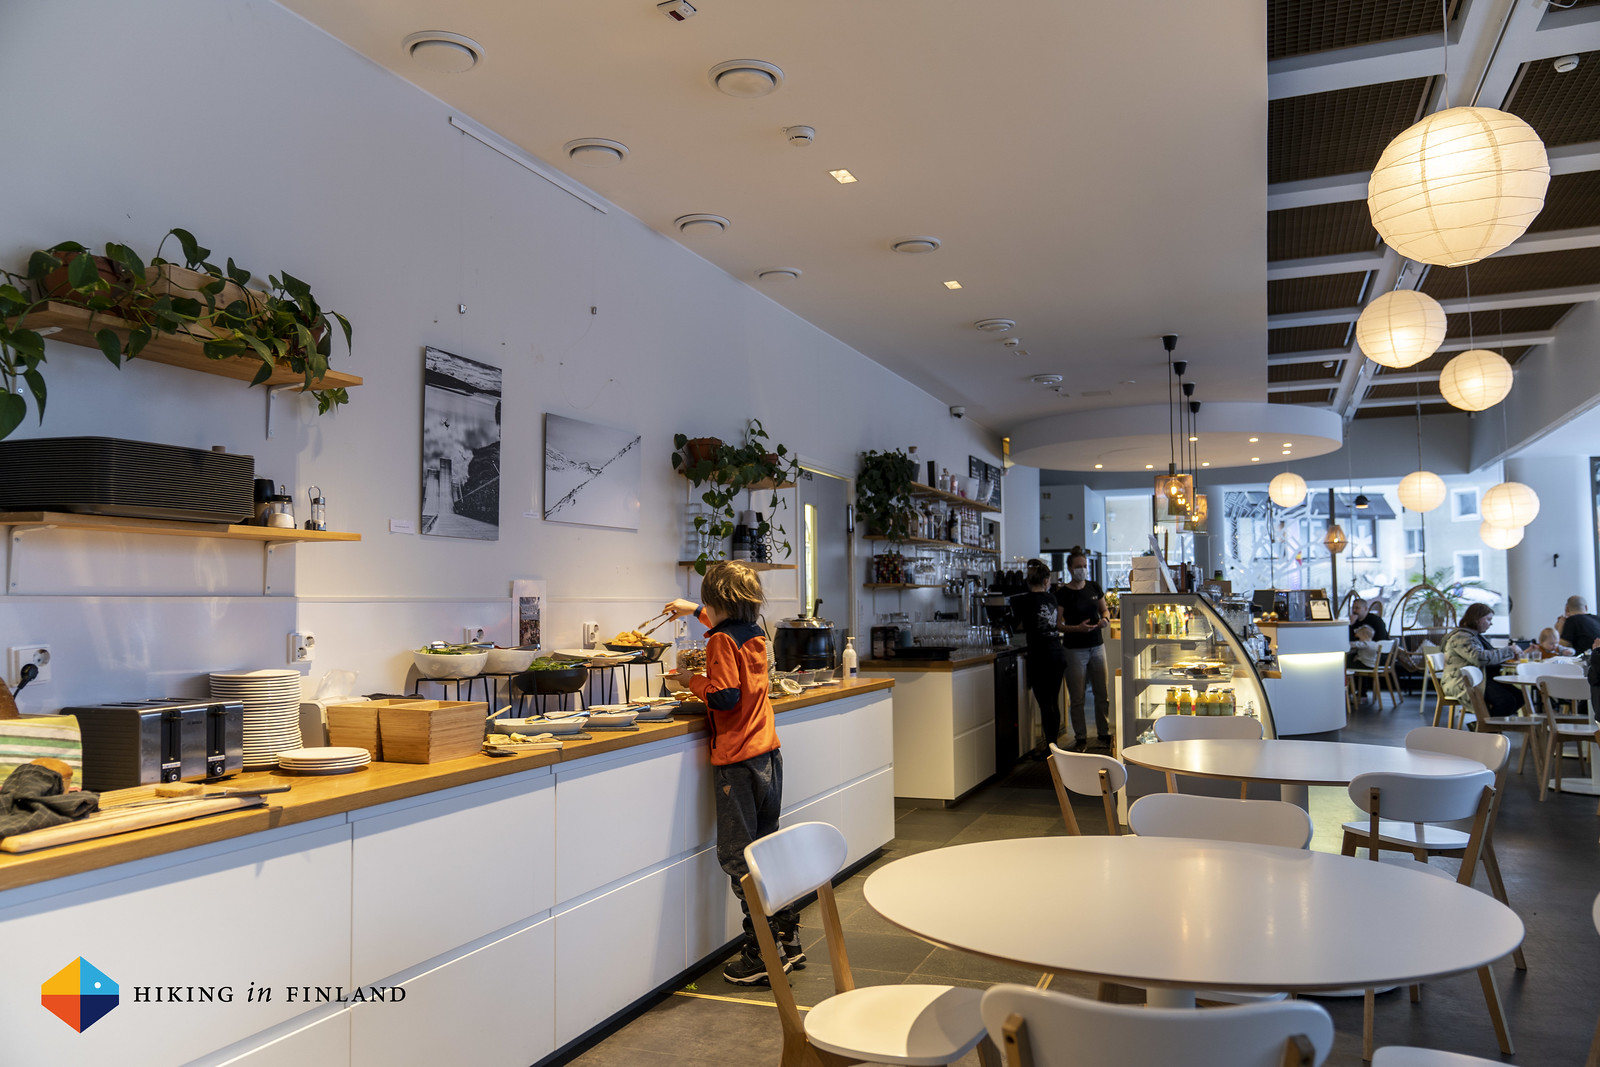
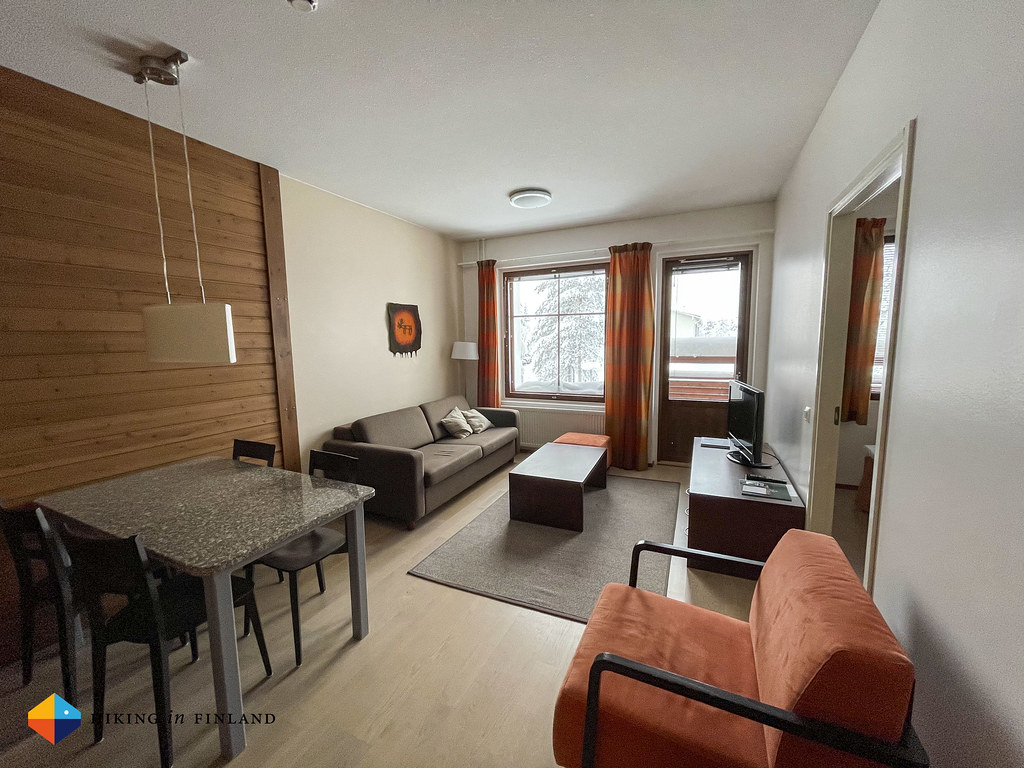
We stayed a couple of nights in Vaduz in the Hotel Vaduzer Hof which had very nice and spacious rooms with good views over the town, a very nice Sauna and a good breakfast buffet. It’s right in the centre of town and a good location to go visit Museums or go to the bus stop to catch a ride to the various trails.
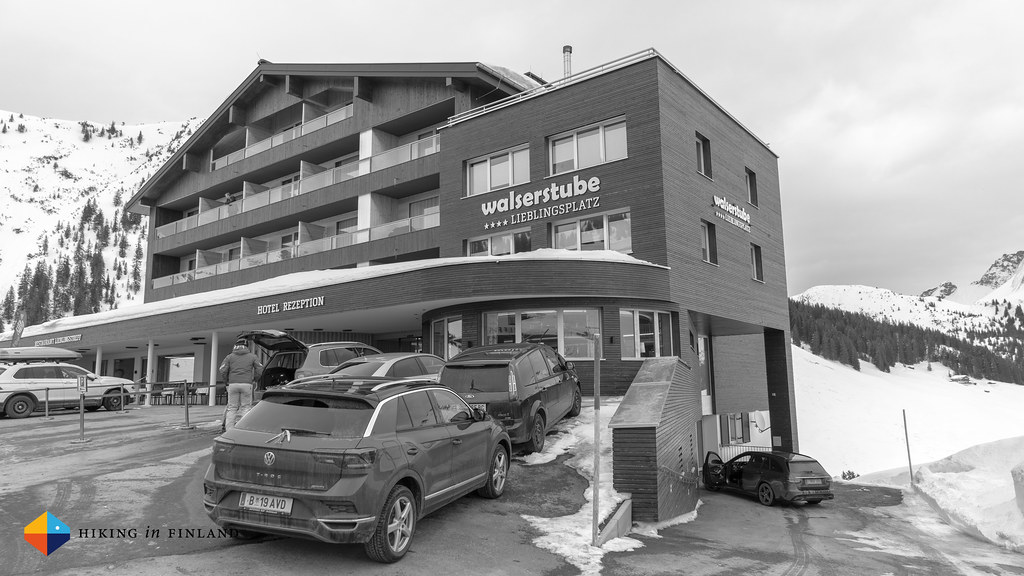
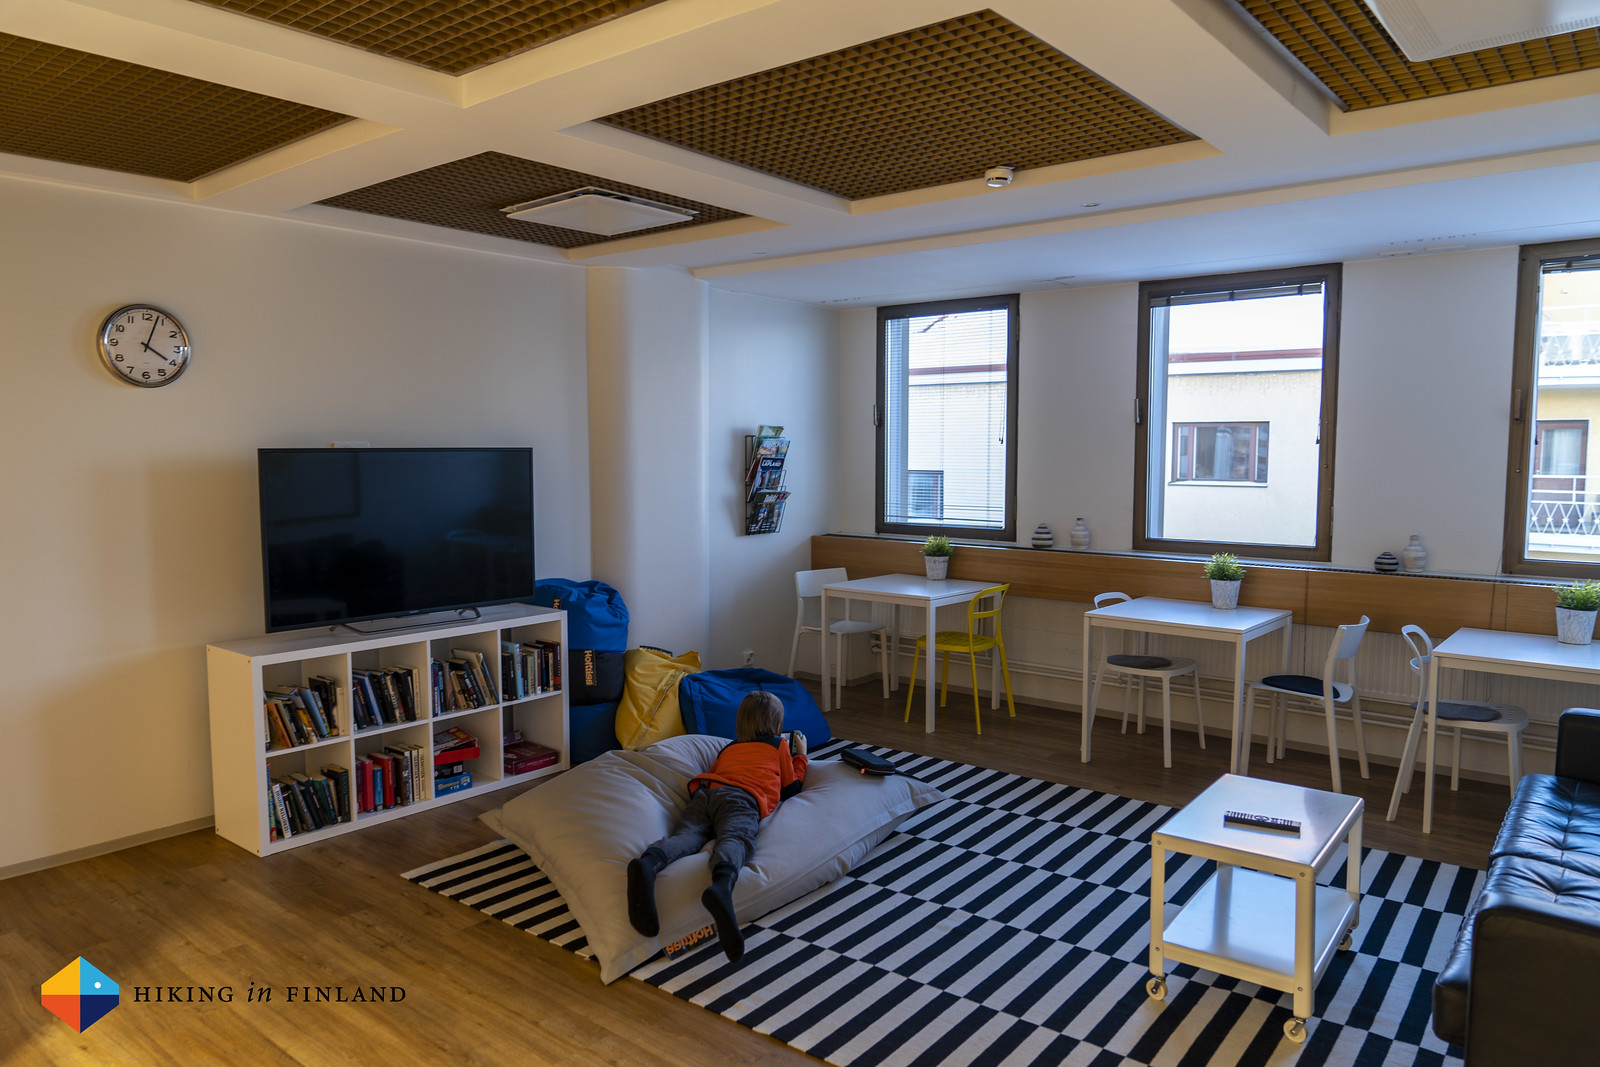
We spent one night at the Hotel Turna in Malbun, which was lovely - great service, tasty vegan food and a nice Sauna area for relaxing after a day of hiking. Kids will love the swimming pool and play room!
Wild camping in Liechtenstein is illegal. If you hike Route 66 in summer then there’s three mountain huts at which you can stay. We sadly weren’t able to visit none of them (we had planend to visit the Pfälzerhütte and Gafadurahütte on the Route 66), but they look absolutely lovely.
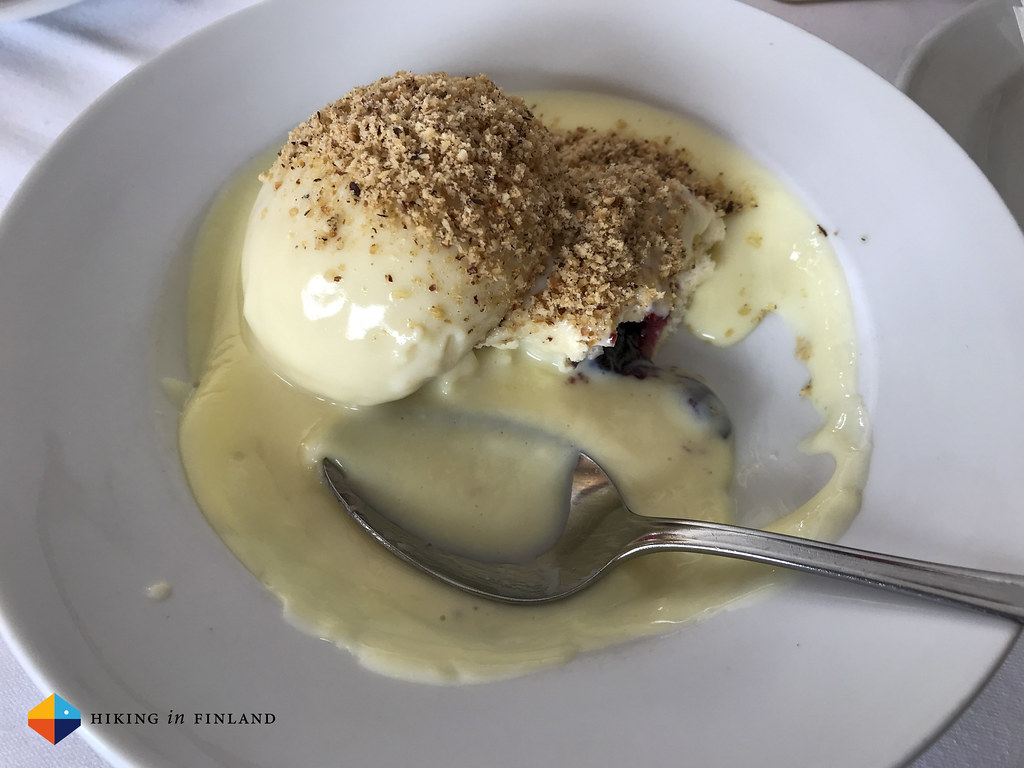
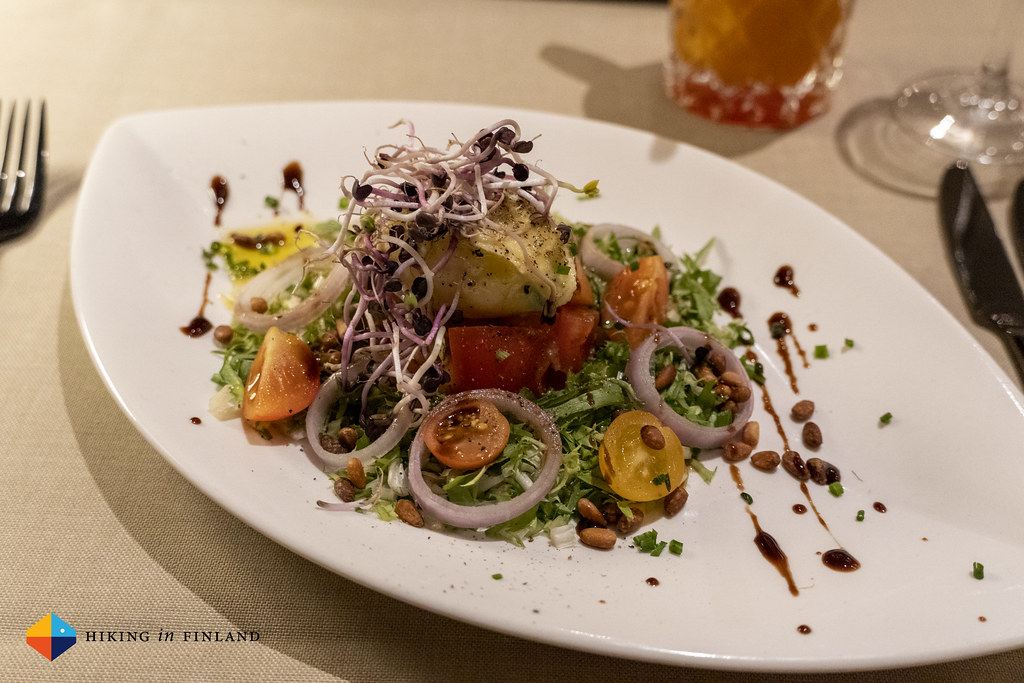
In Vaduz there’s plenty of great restaurants where hungry hikers can dine. We ate very tasty vegan Sushi at the Café im Kunstmuseum and very good (vegan) Burgers at the Brasserie Burg. There’s no shortage of other restaurants so just use Google Maps to find the place you want to eat at! In Malbun we ate at the Hotel Turna which had delicious seasonal food, the pumpkin soup is highly recommended 🎃!
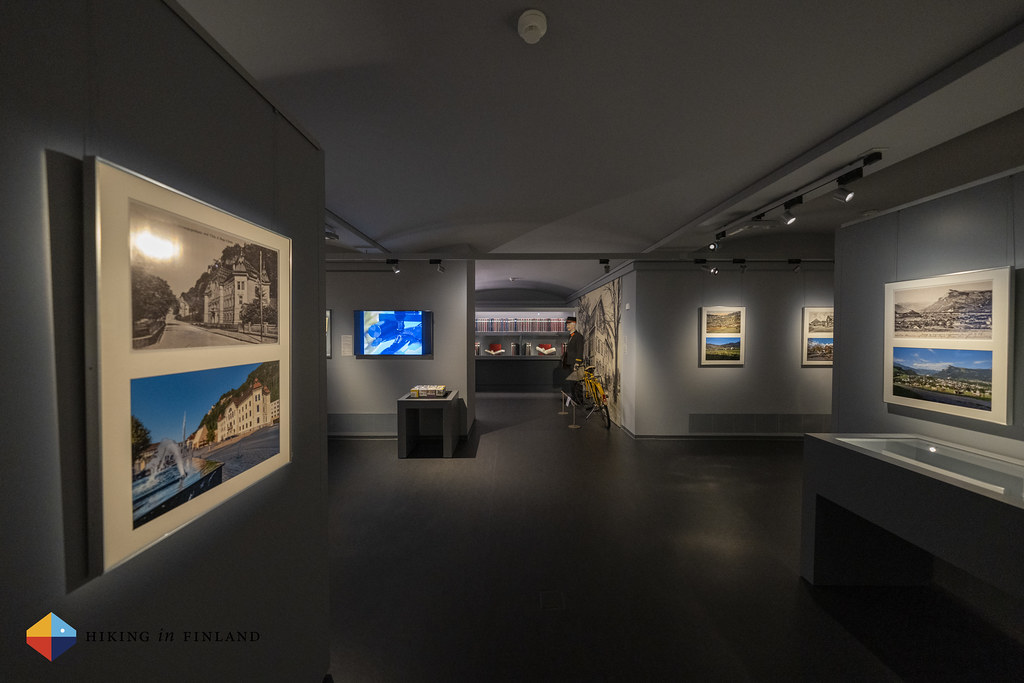
In Vaduz we also visited the Liechtensteinisches PostMuseum and the Liechtensteinische SchatzKammer, though there’s also an art museum and more to get a taste of the local culture. A hike up to the Schloss is great to get a feel of the size of the country, and you also can hike to and along the Rhine easily from Vaduz.
You can get around in Liechtenstein via the LieMobil busses. You can buy a ticket in the Bus or at the service centre in Schaan. There’s also a Bike-Sharing System in place if you want to ride around yourself. We used Google Maps for bus schedules, which worked just fine.
We came and left Liechtenstein via Bus and Train. The Swiss trains stop e.g. in Sargans from where you can hop on LIEmobil bus, while across the Northern border you can get a Austrian train in Feldkirch. It’s easy to get to Liechtenstein from abroad by flying in to Zürich and then using public transportation to get here.
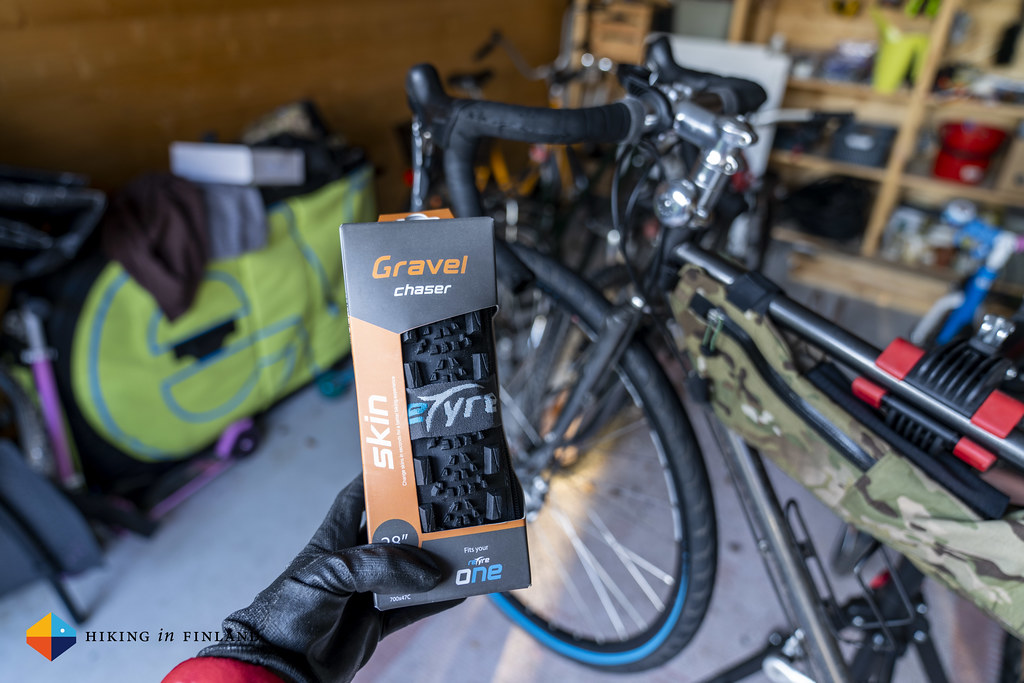
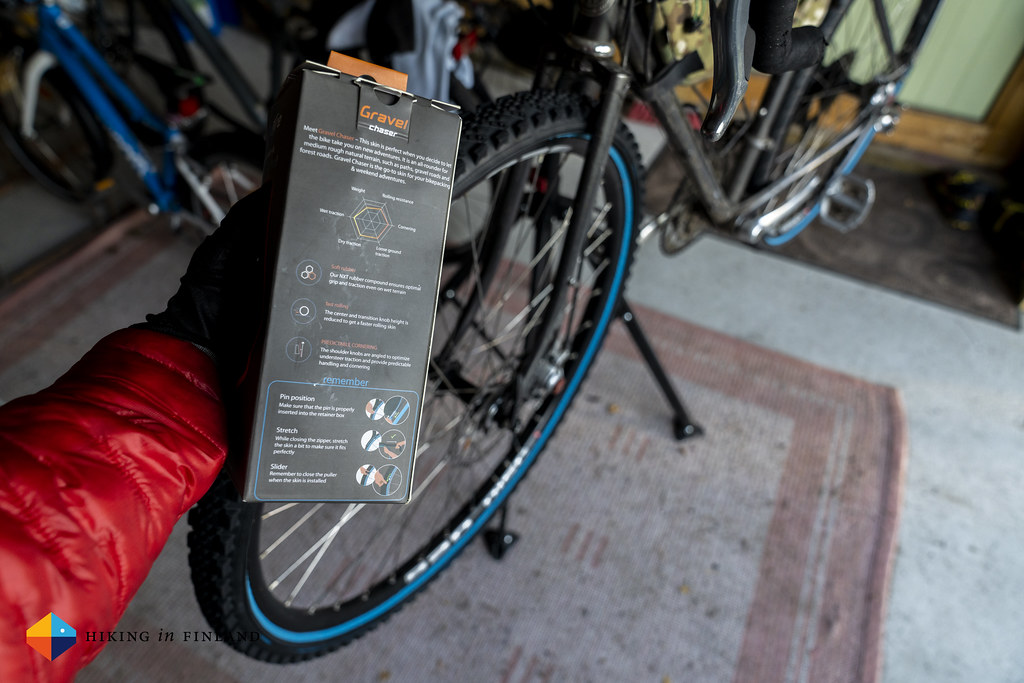
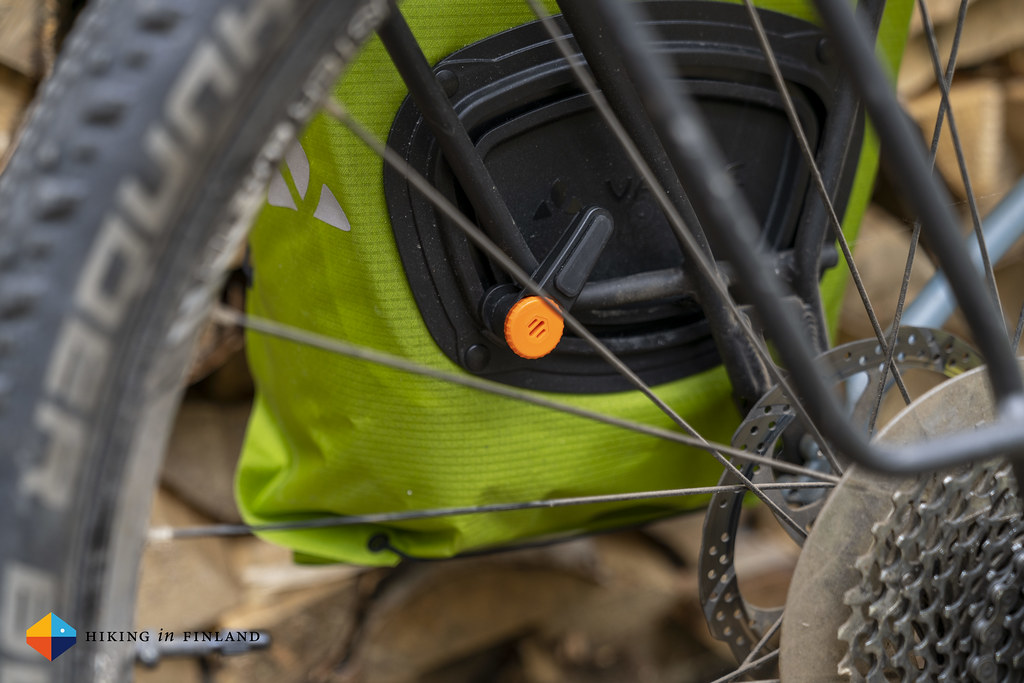
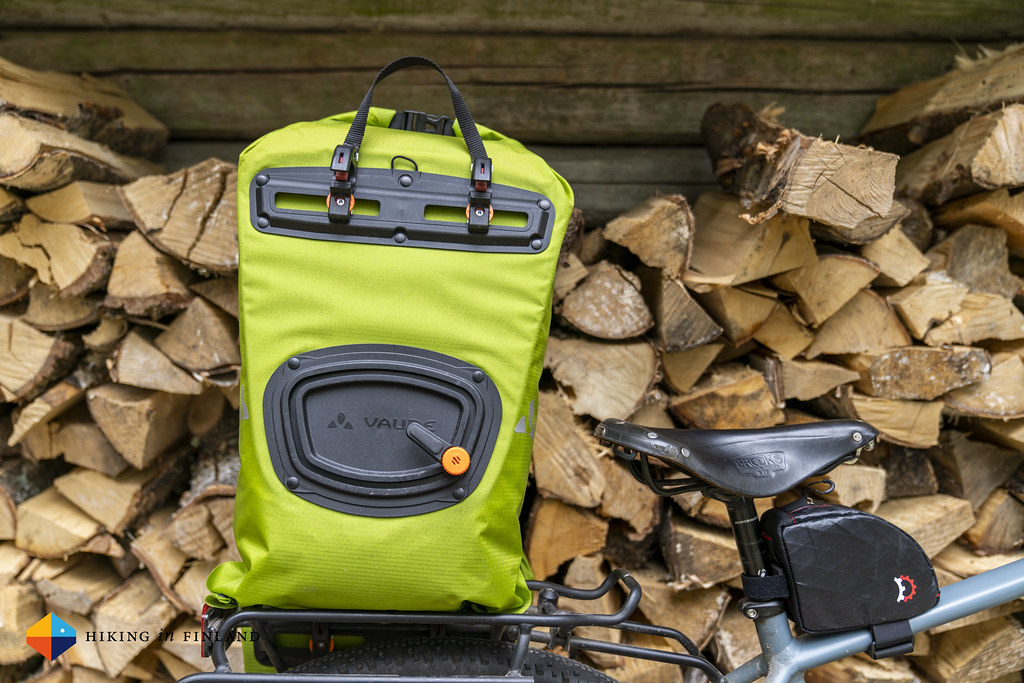
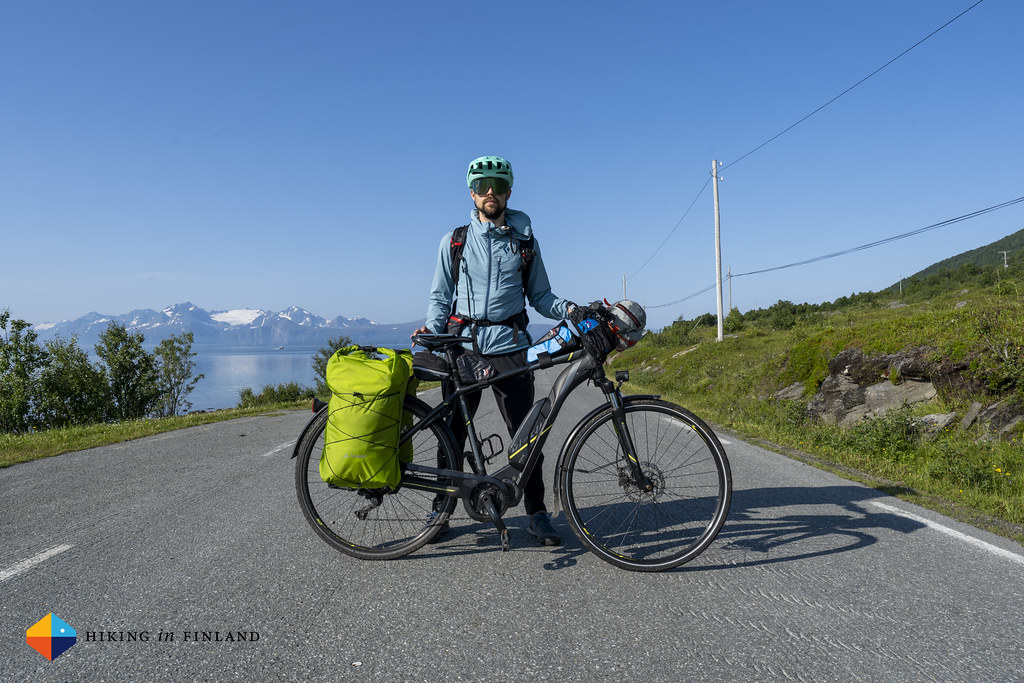
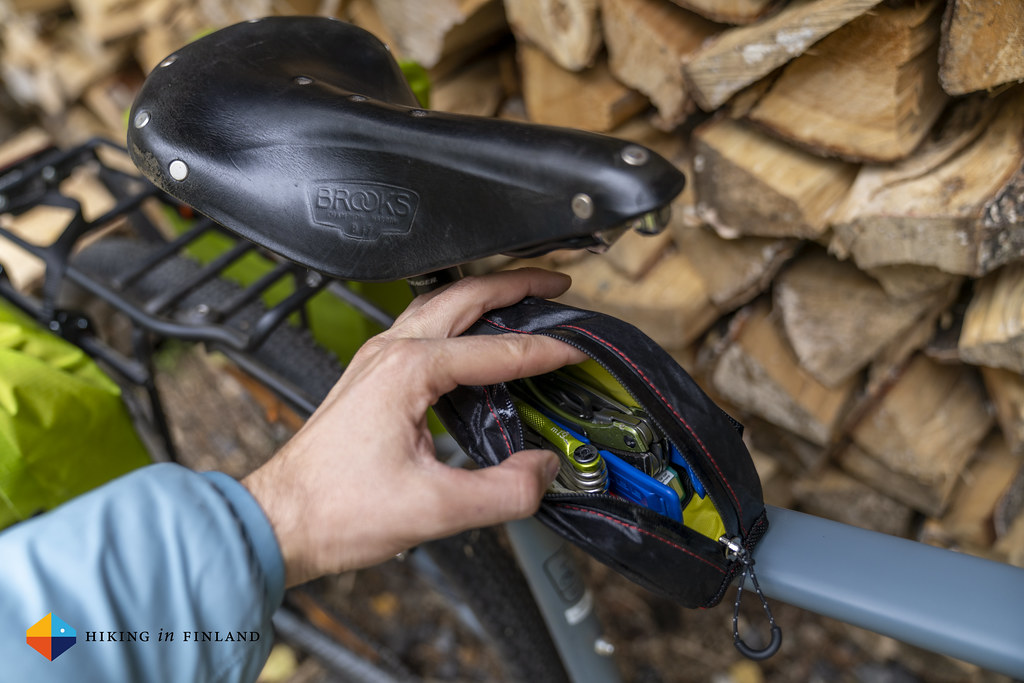
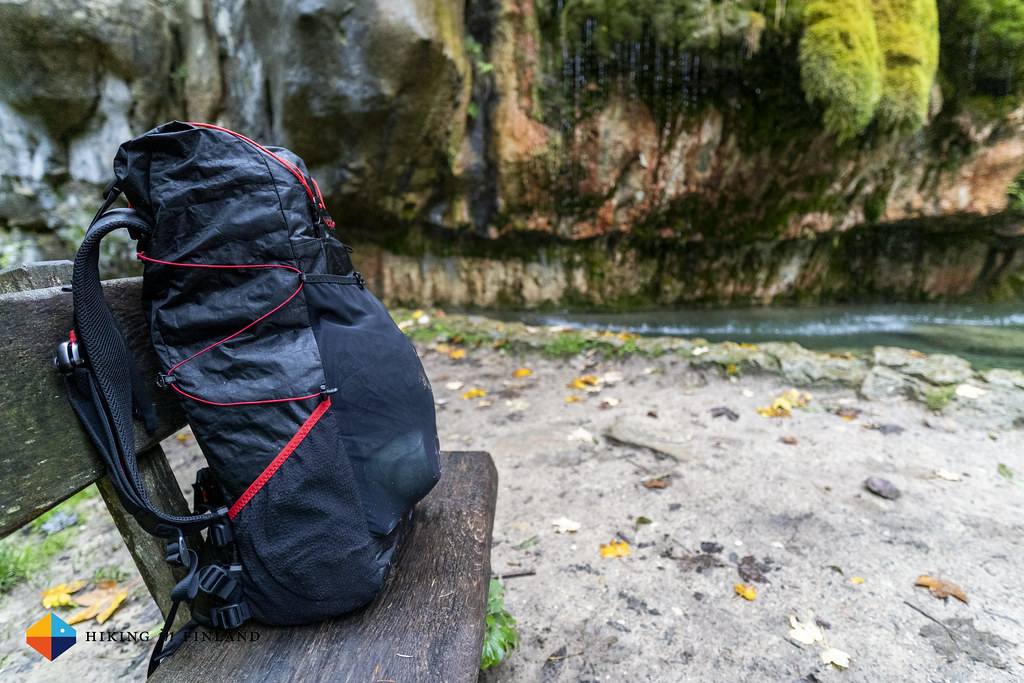
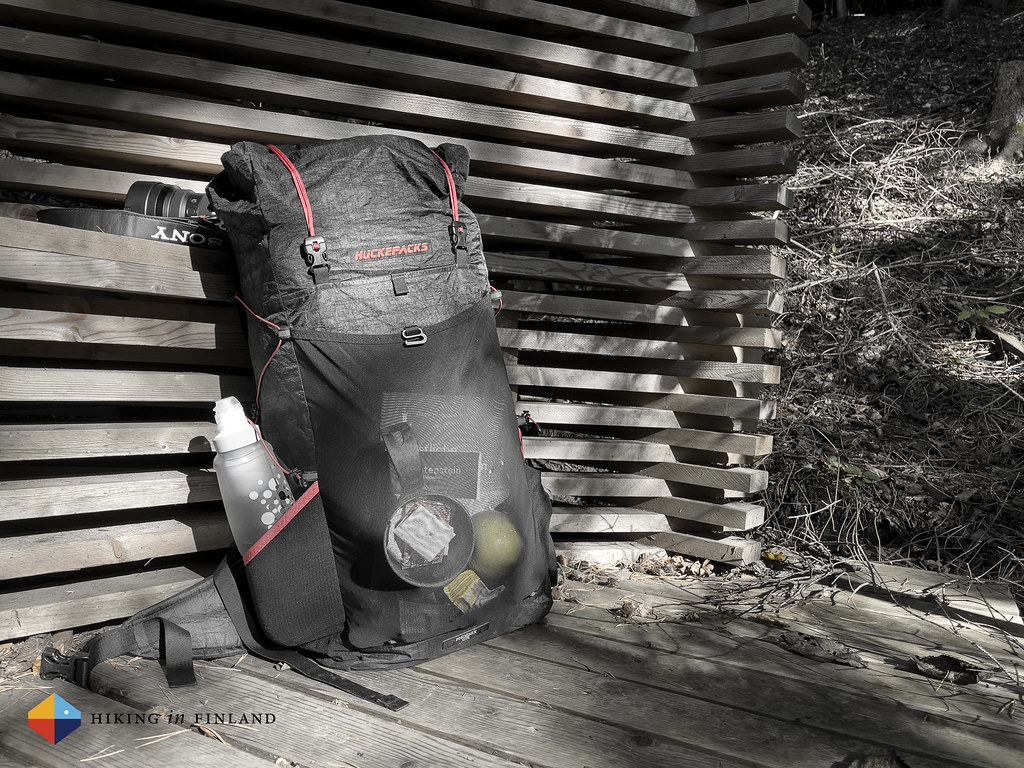
You really only need day hiking gear when you’re hiking in Liechtenstein, though my Gear Checklist for Backpacking Beginners is a good start to get an idea on the garments, backpack and other kit you might need. We had a stove along to make coffee and tea during the day, water bottles and ∞ BeFree water filter and a small emergency kit. I carried everything in the Huckepacks PHOENIX Lite.
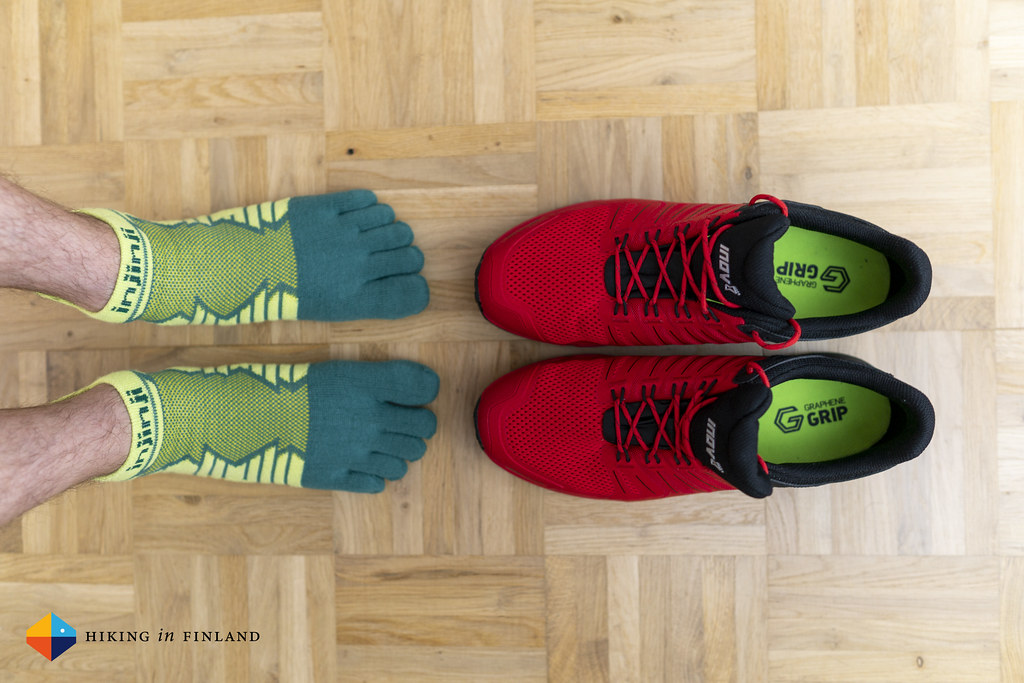
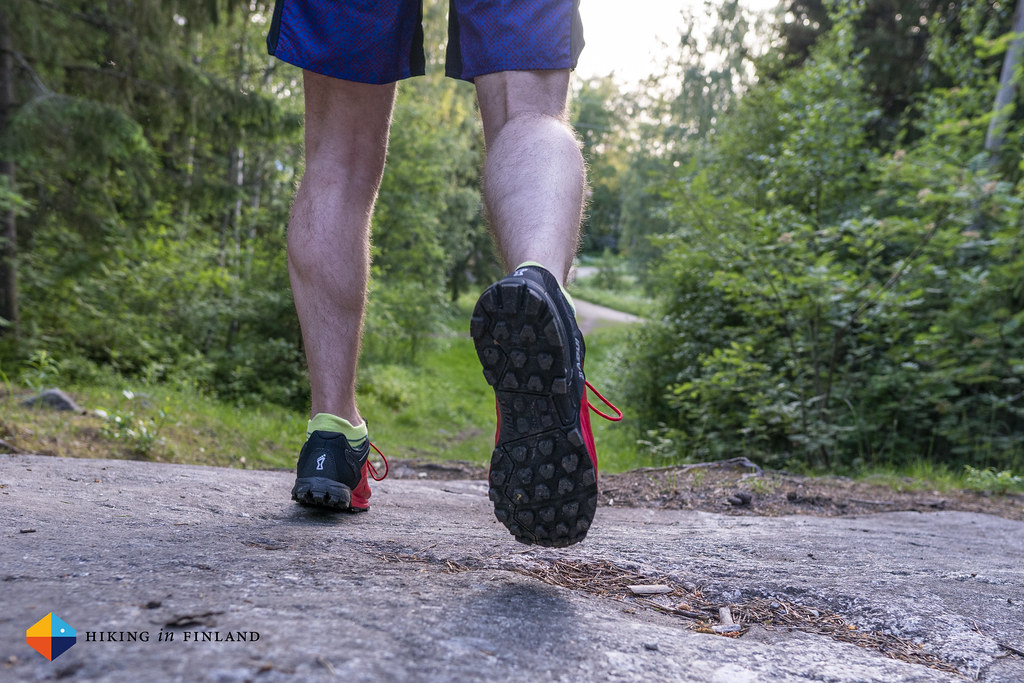
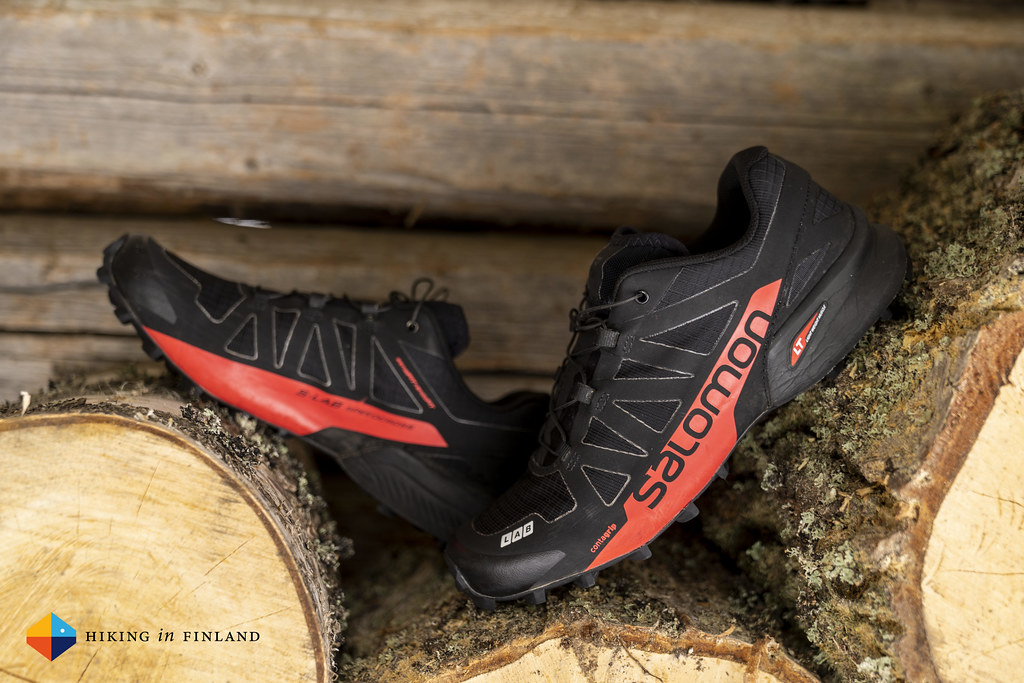
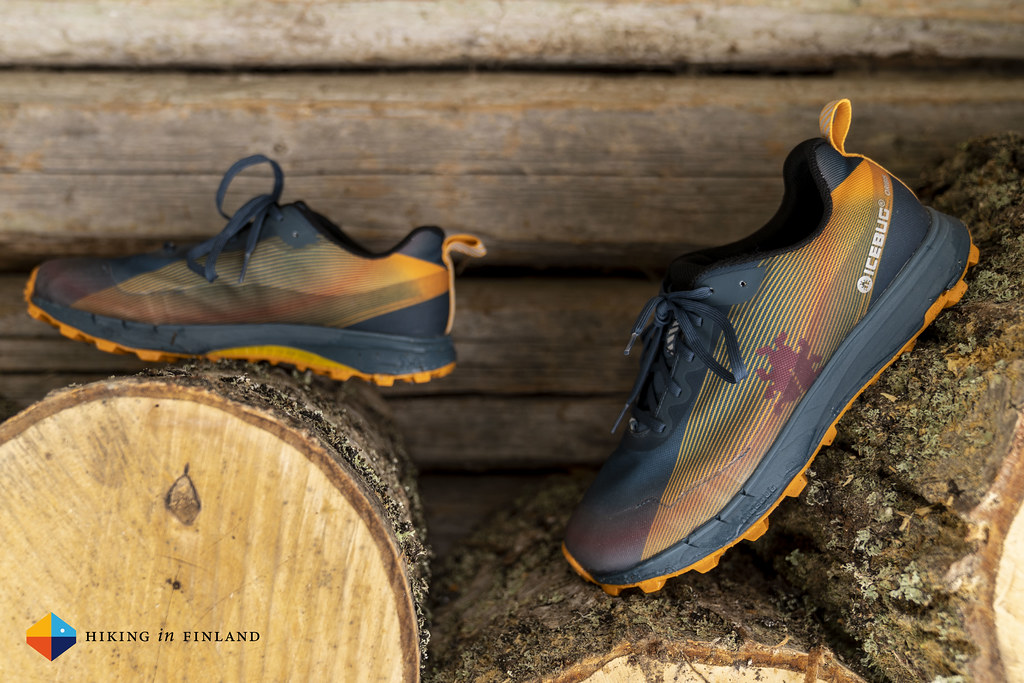
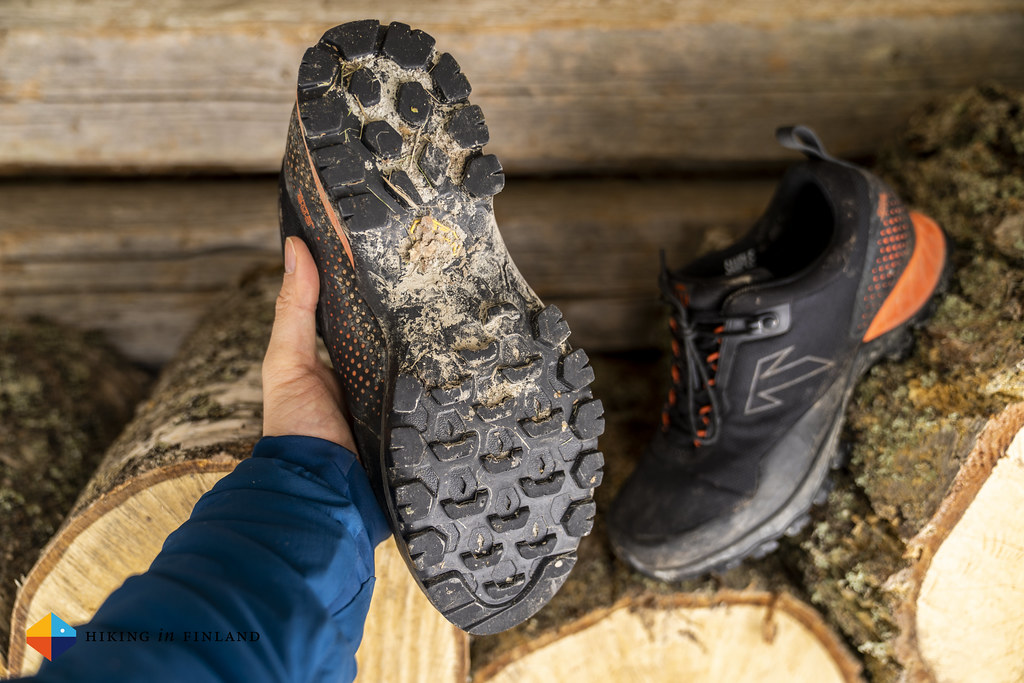
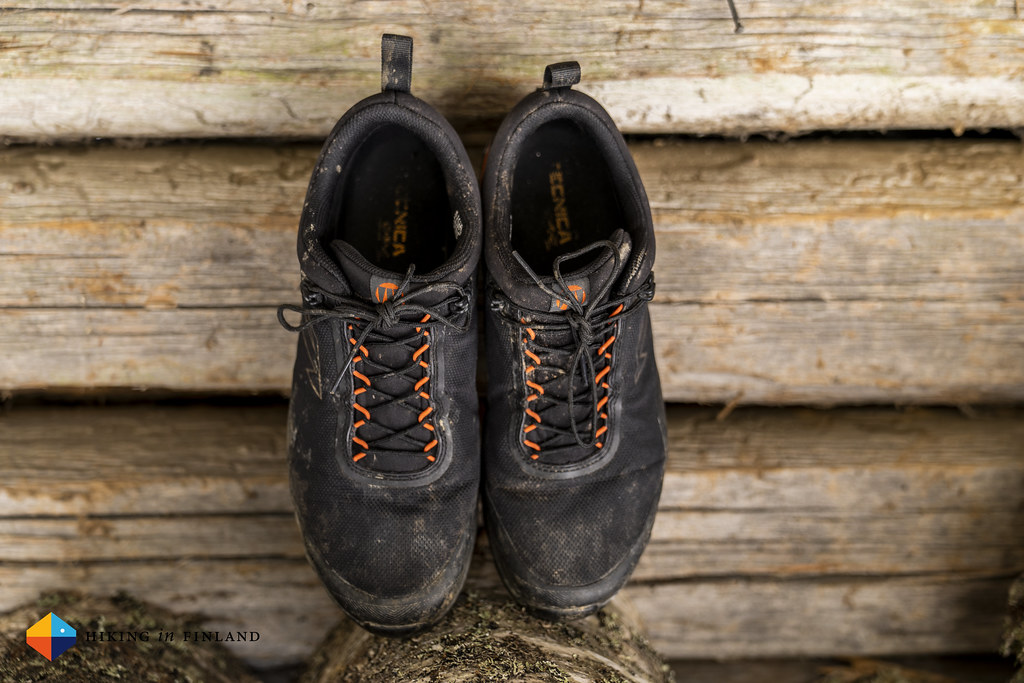
I hiked in my inov-8 RocLite G 275 Shoes and my standard hiking outfit of a ∞ Houdini Activist Tee and ∞ Black Diamond Alpinist Hoody on top, Houdini Motion Pants on the bottom. I had my Patagonia R1 Air and a ∞ Patagonia Micro Puff Jacket along for insulation, and a ∞ Klättermusen Asynja Jacket and Pants against the rain 🌧.
The next time I would try the Route 66 in autumn I’d take an ∞ ice axe, a ∞ light harness, a ∞ short rope and some ∞ spikes along. This is not necessary but would add a layer of security, especially if you’re out with someone who does not feel comfortable in exposed terrain - and obviously the other person would be carrying the same equipment minus the rope, too.
For navigation we used… our phones! Both the Route 66 and the Liechtenstein-Weg have great maps available on Outdoor Active, which you can use for free when out and about. I don’t know if it’s really necessary as the different trails in Lichtenstein are superbly marked by sign posts at all crossroads in between, but as it is free and you have your phone alonge either way, why ot download the app and tracks and make sure you know where you are.
I carried my usual camera gear and my drone, as well as a GoPro HERO 10 - which means you can expect a Video of this trip coming soon! I guess I should make an article about the camera gear at some point, too 😊
Our hike on the Route 66 and the Liechtenstein-Weg was a delightful adventure with it’s ups and downs. Sure it’s disappointing to not having been able to hike the original route, but it’s a sign of the possibilities in this small country that you can quickly adjust your plans and hike an equally exciting trail. The Liechtenstein-Weg was a beautiful trail with great views, interesting sights along the way and which brought us through many different natural environments - from high alpine mountains to green meadows, lush forests, small, quaint villages and to the Upper Rhine river! The weather was beautiful, we saw exciting wild life, made breaks in impressive castle ruins and hiked through a complete country from South to North - what else can you wish for from a hiking holiday?!
If you enjoyed this article buy me a coffee. You also could subscribe to the rarer-than-ever Newsletter and follow along on Twitter and Youtube for more outdoorsy updates!
]]>Disclosure: This trip was supported financially by the local tourism office. As you know: I’m keepin’ it real and tell you how it is - I maintain full editorial control of the content published on Hiking in Finland. Read the Transparency Disclaimer for more information on affiliate links & blogger transparency.
Autumn is our hiking time, the time my best friend Martin and me meet up and go backpacking for a week, give or take. We have been on the Mullerthal Trail, hiked in the Scottish Cairngorms, the Pyreenes and the Dolomites, amongst others, and it’s always a special time. This time we decided to hike through the Principality of Liechtenstein, as they have an absolutely STUNNING hike called the Route 66.
The whole Story about or hike through Liechtenstein you can read later this week here. Until then, I leave you with some more Impressions which might give you an idea what happened…
If you enjoyed this article buy me a coffee. You also could subscribe to the rarer-than-ever Newsletter and follow along on Twitter and Youtube for more outdoorsy updates!
]]>Disclosure: This journey was supported by the local tourism bureau and partners. There are Affiliate links in this article which are marked with an ∞ Infinity Sign 😊 You can use these AT NO EXTRA COST TO YOU but I get a small provision from the company. As you know: I’m keepin’ it real and tell you how it is - I maintain full editorial control of the content published on Hiking in Finland. Read the Transparency Disclaimer for more information on blogger transparency and affiliate links.
You like winter? The sound of crunching snow under your soles, the crisp cold air of the mountains blowing in your face, your breath visible in the minus temperatures and fresh snow on the hills sounds like Paradise to you? Then you probably are as excited about the winter season as me! Lets kick this trip report off with a visual feast from Warth-Schröcken in the Bregenzerwald Region of Vorarlberg, Austria.
These tiny villages lie just across the Border from Germany, but even when they are close to Germany it’s not too easy to get there so it has remained a calm ski area, but with over 300 km of ski slopes, 15 cable cars and 45 chair lifts it’s easy to get up the mountain - and there are also connections to the Ski Arlberg ski area, which has close to hundred lifts and hundreds of kilometres of slopes for you to explore. Overall there’s enough possibilities here for one to stay for a week and never ski the same slope twice. And if groomed slopes are not your cup of tea, then rest assured - there’s plenty of skitouring and lift-assisted skiing off-piste possible in Warth-Schröcken - just make sure you have your ∞ safety equipment along and know how to use it!
Björn and me spent a long weekend in the region, with three days on the hills and slopes. Out first day we spent with a local legend, Olympia Gold-Medal Winner Hubert Strolz. The idea was to do the Pfarrer-Müller-Ski-Tour together, but conditions were not perfect and so Hubert, Björn and me explore the local powder hills in vicinity of the lifts.
It’s a great morning and afternoon that we spend together, the three of us, and Hubert has many tips for us what to explore during the next couple of days. It’s starting to get dark when we say good bye to Hubert, head a final time together up with the chair lift and ride back down to our Hotel. It’s tempting to go and have a drink, but Björn and me are even more tempted by the Spa area in our Hotel, with the different Saunas!
The next morning we decide to do some lift-assisted off-piste skiing - a fresh layer of ❄️❄️❄️ makes this a very nice way to explore the ski area while not needing to put on the ∞ Contour skins and hiking up the mountains. The sun comes out, together with some blue sky, and Björn and me are really enjoying the pretty views and great snow just besides the groomed slopes.
Shredding through the powder with screams of joy, we take the lifts up again and again, happy about the great weather and conditions. Our common friends Nina and Dirk saw that we are in the area, and as they life here over the winter they suggest to meet up for an afternoon of skiing. Björn and me take the Gondola over to the Lech-Zürs ski area - we have a ski pass which allows us to use the lifts in the whole area - where we meet Nina & Dirk - though as it’s past noon we all feel lunch is in order, so we head to one of the many restaurants on the slopes.
With renewed vigour the four of us ski in the sunshine, laughing together, while Dirk and Nina share stories from local adventures in these pretty mountains. In the afternoon we decide to head up to the start of the Pfarrer-Müller-Ski-Tour, but after some tests of the slopes we decide together it’s better to head back down the way we came and enjoy the Powder Snow there.
And so we finish our second day in Warth-Schröcken, which we end once more in the Sauna of our Hotel and with a tasty vegetarian dinner!
The next day the Weekend starts, and it’s a lot more busy than it was the previous days. Additionally, in Warth grey clouds hang above us, so we decide to head again over to the Arlberg with our combined Skipass, which gives us access to hundreds of lifts and slopes. And see there - over on the other side of the mountains we find blue sky and sunshine!
We ski on the slopes and off-piste, finding some pockets of untracked powder, which on this busy Saturday is rather nice. Sadly our luck with the weather doesn’t hold too long, and soon also in Lech-Zürs the clouds hang above us. Ah well, there’s no bad weather - just bad clothing, and so we continue to ski and enjoy the good conditions on the slopes - and the tasty food in the Restaurants!
As we haven’t been to the village of Schröcken just yet, we decide to ski the long run to the village and take the local Ski Bus back to Warth. On the way beautiful wooden cabins stand alone under a blanket of snow, and we also find some more untracked powder runs!
Back in Warth we head up the mountain for one final run - one final run down to Warth, the small village which lays in a deep valley, with so many great ski mountains around it!
Warth-Schröcken is a “Secret Spot” because it isn’t so easy to get there with public transportation. When Björn and me where looking at going there from Munich with Public Transportation there were some options, but it was much easier to rent a car and drive there. So that is what I would recommend too, if you want to travel there the fastest way possible - for us it was actually more important to be in a timely fashion back in Munich at the Airport and Railway Station to catch our plane and train back north. If you don’t have such time pressure, then you can check via Google Maps the Options available with Public Transportation to Warth-Schröcken.
We stayed at the wonderful Hotel Walserstube in Warth, a ⭐️⭐️⭐️⭐️ Hotel with very beautiful and comfortable rooms, a magnificent Spa area and tasty breakfast and dinner. Björn and me shared a spacious room with a balcony and a great view, and what is very great about the Walserstube is also that it’s just across the street from the Lift Station and a Bus Stop. Overall a great place to stay and I can’t wait to return there in the future.
Warth-Schröcken has been everything I thought it would be - and more. Friendly locals, a superb skiing infrastructure and easy off-piste possibilities next to the slopes, with great powder snow. Add in many different possibilities of sleeping, eating and enjoying the village - you also can go winter hiking and sledding here, amongst other things - and it’s easy to see why people who have once visited Warth-Schröcken continue to come back to it!
If you enjoyed this article support me on Patreon (and you get great discount codes from partners - you could save 20% on your next purchase!) or buy me a coffee - I work Full-Time on Hiking in Finland to bring you inspiring trip reports, in-depth gear reviews and the latest news from the outdoors. You also could subscribe to the rarer-than-ever Newsletter and follow along on Instagram, Twitter, Facebook and Youtube for more outdoorsy updates!
]]>Disclosure: This trip was hosted by the local Tourism offices and ATTA. As you know: I’m keepin’ it real and tell you how it is - I maintain full editorial control of the content published on Hiking in Finland. Read the Transparency Disclaimer for more information on affiliate links & blogger transparency.
As usual this is just a photographic feast of my most recent trip, to get you in the mood for planning a visit to Switzerland. I will follow it up with more in-depth articles of the visit, and show you what kind of great hikes and adventures you can have in the Ticino, Andermatt, Valais and Interlaken areas! Lets start in Ticino - the sunny southern part of Switzerland, where Italian is spoken by a majority and you find an Mediterranean environment and usually lots of sun - unless you have a bit of no-luck with the weather, and it’s raining the whole time! Nevertheless, that’s not a problem for us outdoor people - hardshell on and outside!
Truth be told, after some rainy days in Bellinzona, Locarno and the Maggia Valley I also experienced an absolutely beautiful morning in the Balvona Valley, where we hiked through many picturesque villages before taking the Postbus and local trains back to Bellinzona.
The visit to Andermatt also started off wet, with plenty of rain, and continued the next day with climbing a Via Ferrata in the rain and mist, before exploring a “Cairngorn-esque” Valley (that’s what it looked like in the clouds 😆) on some sweet eMTBs with Jessie and Fredrik. Our final day in Andermatt we got to see the small village in the sun, and it looked fantastic, to say the least!
On this trip we only used public transportation, so the fantastic Swiss trains - punctual, clean, and a joy to ride in. Especially in the Glacier Express with it’s large windows!
In love I felt with Saas-Fee and it’s amazing views - add in that this is a car-free village, and I am considering moving there! We arrived there in the evening by Postbus, and then had something very typical Swiss: Raclette 🧀!
The Postbus took us to Leukerbad, another small village with impressive views, as it is surrounded by 900 m high rock walls. Here you can find Thermal Springs and the longest Via Ferrata of the Alps.
A beautiful morning hike took us up the Gemmipass and to Sunnbüel in the Canton of Bern. Here we continued our trip via Kandersteg, an ice-climbing Mecca in winter, to Interlaken. In this pretty town you can experience various kinds of adventurous activities, from Paragliding to Kayaking and Bungee-Jumping, or simply make a trip up the Jungfraujoch!
Expect detailed and in-depth articles in the not-too-distant future, but for now - head over to My Switzerland to start planning your trip!
If you enjoyed this article support me on Patreon (and you get great discount codes from partners - you could save 20% on your next purchase!) or buy me a coffee - I work Full-Time on Hiking in Finland to bring you inspiring trip reports, in-depth gear reviews and the latest news from the outdoors. You also could subscribe to the rarer-than-ever Newsletter and follow along on Instagram, Twitter, Facebook and Youtube for more outdoorsy updates!
]]>Disclosure: This article was supported with equipment and financially by reTyre. There are Affiliate links in this article which are marked with an ∞ Infinity Sign 😊 As you know: I’m keepin’ it real and tell you how it is - I maintain full editorial control of the content published on Hiking in Finland. Read the Transparency Disclaimer for more information on affiliate links & blogger transparency.
I want to start off with something I wrote in the late spring: The skins and the reTyre One have zippers which allows you to connect the Skin - and there’s four different Skins available for different cycling needs - to the reTyre One. The reTyre One itself is a fully functional bicycle tire but with the different Skins you’re able to put on a new “Tire” onto your bike without the hassle of actually switching the tire. Zipping on a Skin takes me about two Minutes and it’s even quicker taking it off. It’s a great way to adapt the bike to different terrains and seasons - zip on the Winter Traveler Skin as soon as the snow starts falling, and take them off in spring.
This still holds true and it is such a great invention as it makes my life as the bicycle-tire-changing person in our family so much easier (I still have to switch the tires on my son’s woom OFF AIR bike 😒). Financially speaking it is also a bit cheaper to own a set of reTyre One tires and Skins according to your need than two sets of summer and winter tires (a set of our good winter tires costs easily 120 € and the same I usually pay for good summer tires), wheras a set of reTyre On + e.g. a Set of Winter Traveler Skins would be 170 € - so around 70 € cheaper. The main benefit for me is, however, the amount of time saved. I can not stress this enough, it really makes the procedure so much faster, it’s wonderful.
The Gravel Chaser Skin was just as easy to zip on as the Winter Traveler Skin, even if the reTyre One was a bit dirty. I guess if you’re concerned about the zipper getting stuck you could clean the tire with some ∞ Muc-Off products but I didn’t bother at all and they went on without a hassle in a minute. There’s a wee gap between the ends of the skin but during riding I did not feel it at all, so it wasn’t a problem.
The most important aspects of a tire is for me that it has grip and is long-lasting. I can’t comment on the longevity of the Gravel Chaser yet, but the grip has been very good. It has brillant grip on gravel roads and muddy forest paths, and they give me great confidence when I go through muddy or rocky bends in the trails and roads. Thanks to the higher shoulder knobs on the tire you have more control on uneven surfaces, and I had not slip my tires once during my rides. At the same time it has a fast-rolling centre tread, which means you can get some nice speed with them when you feel like it. It’s a great addition to the reTyre line-up for those of us who like to go bikepacking and ride gravel roads!
In conclusion I can say that the reTyre System of a base tire plus different skins is an excellent solution for those who use one bike for all their riding and don’t want to go through the hassle of changing tires before a ride or when the seasons change. Soon I will take the Gravel Chaser skins off again and put the Winter Traveler Skins on, making my bike ready for winter. But I am already planning some rides in Pohjanmaa with the Stavanger and the Gravel Chaser skins next spring, and I am happy to know that I can switch tires in a couple of minutes and be ready!
If you enjoyed this article support me on Patreon (and you get great discount codes from partners - you could save 20% on your next purchase!) or buy me a coffee - I work Full-Time on Hiking in Finland to bring you inspiring trip reports, in-depth gear reviews and the latest news from the outdoors. You also could subscribe to the rarer-than-ever Newsletter and follow along on Instagram, Twitter, Facebook and Youtube for more outdoorsy updates!
]]>Disclosure: This article has been supported financially and with equipment by Bikester. As you know: I’m keepin’ it real and tell you how it is - I maintain full editorial control of the content published on Hiking in Finland. Read the Transparency Disclaimer for more information on blogger transparency and affiliate links.
My first proper bikepacking trip was 9 years ago with Peter and Toni - and yes, that’s quite a while ago! Things have changed since then, too, as big brands have picked up on the topic of bikepacking, there have been innovations in bikes, bags and techniques, and more and more people have started to explore single trails with bikepacking kit since. Good stuff!
I knew that on my Norway trip I will be mostly cycling on roads, using the Hurtigbåt to move from island to island to cycle and hike there. I also didn’t take my own bike with me, but loaned an electric Trekking Bike from Tromsø Outdoors to get around. All that made me decide to take more classic Pannier bags for the majority of my kit. To be precise, these would transport my quilt, bivy, mattress, stove, food and clothes, as well as some tech stuff. I own two small Porcelain Rocket Pannier bags, but I knew they’d be too small for the kit in question, so I had a look around and found the Vaude Aqua Back Light Pannier bags, which tip the scales at a mere 548 g for one or 1.096 g for the pair. These were super spacious with almost 20 l of Volume per bag and I also liked that they have on the inside two pockets (one zippered), which are ideal for storing documents and small stuff. The backplate gives the whole bag some form and a stable platform to load it up, while the welded 100% recycled Econyl fabric - it is also 100% PVC-free! - is 100% waterproof. And rain I had on my trip in Norway more than enough =)
The attachment tech on the bag of the Pannier, called Quick Mount Release Hook QMR 2.0, is 100% adjustable to the rack on your bike - the lower hook can easily be moved 360° around the plate, and the two hooks at the top can easily be moved closer together or wider apart, and the inner diameter can also simply be adjusted to the diameter of your rack. They are just as easy to remove from the bike, which means setting up the tent and moving the gear inside is super-easy. If you want you also can use these bags as shoulder bags with the included straps, but I found the two handles more than enough to carry the bags around. The roll top closure provides quick access, the cargo net - the bungee straps - at the front provide some compression of the content, but also allow to keep your rain jacket or spare shirt close at hand (I wouldn’t do that, but should be safe to do).
The total volume of both bags is a claimed 38 litres with a recommended maximum load of 10 kg per bag. Overall I was a bit sceptical and not sure if these would work for my needs, but after 10 days on the road in Norway with them I’m a convert and love these Aqua Back Light Pannier bags from Vaude! Add in that they are Made in Germany with a short supply chain from 100% recycled Econyl that’s 100% PVC-free and you have a great Pannier for your bikepacking and cycle-touring adventures! In terms of aerodynamic I didn’t find that they slowed me down - I usually had an above 20 km/h average speed, which is similar to what I cycle on my bike without any bags. For relaxed bikepacking and cycle-touring trips they shouldn’t slow you down at all, which is what I expect you’re planning to do too =)
Up next are the three Revelate Designs bikepacking bags I ordered from Bikester. I have been using bikepacking bags from various well-known brands since almost a decade, and it’s something I always want on my bikes for ease of access to important kit while riding. The three Revelate Designs bags I ordered are the Jerrycan, Mountain Feedbag and the amazing Mag Tank 2000. Lets start with the Jerrycan, as ideally this is the bag I access the least.
That’s because the Jerrycan holds on my own bikes all my repair kit: A bike tool, a spare tire + repair kit, a knife, some paper (in case the chain drops) and a Tire Lever or two. With these tools I can fix most issues I usually encounter on a trip (it are flat tires on my Tubeless rides 😆) and they are easily accessed but still out-of-the-way on the bike. The Jerrycan is durable, with a waterproof zipper and construction, and has about 500 ml Volume - really plenty for me. There’s a rubberized patch at the lower strap so it does not damage the paint job on your bike, and at the back strap a foam insert protects your seat post from damage. All in all a good piece of kit which does what it does, and that it does well!
More flexible in use is the Mountain Feedbag. It can hold your water bottle in the main compartment (also around 500 ml Volume) or all the snacks you want to stuff in there.
I am Team Waterbootle in the Mountain Feedbag, but with it’s three Stretch pockets you also can put bars, gels or even a GoPro HERO9 in there. It is a 102 g light and has three attachment points, and can be attached on either side of your handlebar (so yes, you could get two!). What I really love about it is that you can open and close it with only one hand, thanks to the smart attachment system Revelate Designs has developed. This means on bumpy rides you can easily close the Mountain Feedback and not have any of the content drop out. Some people also transport their cameras or lenses in them, which doesn’t work for me (lenses & cameras too big 😬) but could be a good way for some to have their camera close by.
“And where do all the Snacks go?” you might wonder. In the Mag Tank 2000 obviously! It is 149 g light and has a massive volume of around 1 litre or, all the snacks you might eat in a day or three. It also can hold a massive bike lock chain, but as you really can’t eat that I would put snacks of your liking in there. I absolutely LOVE the magnetic closure on it, it’s again such a feature which makes life while riding so much easier that you might wonder how you were able to survive without magnetic buckles on your previous trips. Also this piece has a durable construction that has kept the content dry on my trips, is easy to attach to the bike (also with the same protective features for your frame + paint job as on the Jerrycan) and it makes snacking while riding a breeze.
All in all these four (five) bag setup has held all my camping, hiking and bikepacking gear with room to spare. As I carry a Full-Frame camera + lenses + tripod + a GoPro + a Drone and spare batteries + cables I need a backpack, but if you are happy with photos from your phone or a small camera then you should be fine without a backpack and can ride without a sweaty back! The combination of classical cycle-touring Pannier bags + accessible bikepacking bags has worked well for me on my trips this summer, and while I own a handlebar bag and a seatpost bag for 100% bikepacking I find the Panniers easier and more comfortable to use - and on roads, be they asphalt or gravel, it is not a disadvantage at all in my experience.
If you currently are planning a biketouring trip and still are unsure of how to pack all the gear, I hope I could inspire you to try this or a similar setup. It has handled lots and lots of rain 🌧 really well, kept me well hydrated and fed, with easy access to all my gear. I also found it cool to find with Bikester a Store in Europe which carries a lot of gear from Revelate Designs but also many other brands - like Vaude! Shipping from Bikester was super-quick, with some of the kit being with me in Vaasa after just two days after ordering, for no extra costs! In the end I am very satisfied with this setup, and can’t wait to head out with the bike for a trip and camping out!
If you enjoyed this article support me on Patreon (and you get great discount codes from partners - you could save 20% on your next purchase!) or buy me a coffee - I work Full-Time on Hiking in Finland to bring you inspiring trip reports, in-depth gear reviews and the latest news from the outdoors. You also could subscribe to the rarer-than-ever Newsletter and follow along on Instagram, Twitter, Facebook and Youtube for more outdoorsy updates!
]]>Disclosure: This trip was supported by the local Tourism office and partners. As you know: I’m keepin’ it real and tell you how it is - I maintain full editorial control of the content published on Hiking in Finland. Read the Transparency Disclaimer for more information on affiliate links & blogger transparency.
Levitunturi, which means the “fjell of Levi” in Finnish, is a 531 m high hill which stands almost on its own in the south of Lapland. Go just a few hundred meters up and already you get amazing views on the surrounding landscape: The gorgeous Pallas mountains to the North-West, the Ylläs mountains are just some 35-ish kilometres far away to the West, as well as lakes, smaller fjells and lots & lots of forests. Nestled at the Northern aspect of the mountain is the small village of Sirkka, which is the home base for almost all guests and businesses. From here you can take the Gondel up the mountain and ride on the Summer Sled Track back down, or go for a hike on one of the various trails which take you across and around the mountain.
Levi is known for its Bike Park, to which I will come in a moment, but also for those who look for less downhill thrill on a bike Levi has plenty to offer: A large mountain bike trail network, which allows for fun day trips on single and forest trails. I tested a section of the Levi Tunturi Trail, a 18-ish km long trail which takes you around the Levitunturi mountain, and really enjoyed how well-maintained this trail is. Some might say it’s more a highway than a trail - but then I have seen many trails which have destroyed the nature around it as more & more people are riding on it; so a well-maintained trails in my experience much preferable in such a situation.
And especially with kids who just start to ride off-road these kind of trails are an ideal choice for riding their mountain bikes safely. Even for experienced riders I think the round around Levitunturi will be fun and rewarding, especially if you take a competitive approach to it and see how fast you’re able to complete the trail! Besides this trail there many more, for example could you ride to Ylläs and back, or even go bike packing and explore the less visited places around Levi with the bike.
Within Levi you most certainly don’t need a car as the village is very compact, though if you want to speed things up you can take your bike to get around town. We used our four loan bikes to ride to the Levi Bike and Activity Park, which was a short 3 km ride from where we stayed and no problem for our five-year old.
Speaking of our five-year-old, Levi does have plenty to offer for smaller kids which might not yet ready to ride down steep downhill trails. The Adventure Park at Gondolintie 1 for example has plenty of free options for toddlers and small kids, like a really fantastic play ground, a small Zipline parkour at ground level and the pedal-powered cars which our daughter really loved. All these are free and really fun in warm sunny weather - just make sure to bring sunscreen along as there’s almost no shade!
The large Zipline Parkour is for kids over 115 cm and my son and wife enjoyed this adrenaline-filled activity. There’s an introduction trail where you under supervision learn how to climb and use the different functions, and then you can pick one of several different routes - from zip lining almost 1.000 m or climbing really fun obstacles. It looked super-fun and I hope on our next visit to Levi our daughter is tall enough so her and me also can join in the fun!
On our last day we visited the Tonttula Elves Village which is a bit outside of Sirkka, so we took a short taxi ride there. Here you can participate in a guided tour where you craft holiday decorations, bake gingerbread cookies - which our kids absolutely loved - and visit the large cave. There were also several farm animals around which you could pet. We also ate lunch here, and took a small hike on their forest trail. Overall the visit was very nice, even when it was July and the holiday feeling felt a tad out-of-season for us parents, though nevertheless it was fun and the kids loved it.
After seeing my friend Kaddi loving Downhill MTBing so much I gave in a few years ago and learned thanks to Jesper in Åre how to ride a MTB down steep hills. It’s absolutely thrilling and a lot of fun, and actually a lot easier and safer as it might look. So I was very excited to go Downhill riding with my son in Levi Bike Park, which is one of Finland’s oldest Bike Parks.
We started off with picking up our Downhill Bikes at the Levi Bike Park Shop, where we also picked up all our protective gear - from ∞ POC Knee Protectors over the ∞ POC Body Harnesses and Helmets to ∞ Gloves and Shirts. After that we met our Instructor Pieto who also is a Trail Builder in Levi. Our group of six was very varied, but Pieto was able to accommodate all our different skill levels and also as a rider with some experience I learned and improved my technique during this class.
After some flat land techniques and getting familiar with our bikes we took the Gondola up the mountain, where we rode down the Village Trail, a Green Trail which is excellent for beginners - and thrown in some amazing Views and fun features and I think this will become a popular trail!
We rode the trail in sections and made several stops, where we had different “clinics” like learning to ride Berms the correct way and how to ride waves. After we finished the Village Trail back at the Levi Activity Centre we took the Gondola back up once more and then rode the Blue Groove Trail, which is one of Levi’s most popular trails with many great Berms and exciting features - all on a easy Blue Trail level.
In the afternoon my son and me rode with Pieto a couple more times the Village Trail and then the South Route, which we had for ourselves. Overall, while there was a constant flow of riders and bikes going up the mountain the trails were what I would consider empty - it was easy enough even on popular trails like Blue Groove to stop and shoot photos without anyone breathing down our neck. With over ten downhill trails of different levels the riders simply seem to distribute evenly across them, which is also great news for slower riders who might not enjoy the feeling of slowing others down.
During our two days of riding in Levi Bike Park we had many great rides with my son, and he shredded down the different trails without fear and with good technique after just one instruction session. He told me that he liked the experience and since we returned home he has been out with his woom OFF Air out on the local trails, having fun.
On a short side-note, many Ski Centres around the globe are closed during the summers and the villages are devoid of people. This is not good for the local communities, hence I am much in favour of villages where you can life year-around. Services like the Levi Bike Park make it possible that Hotels, Restaurants and also the expensive Gondola and Lifts infrastructure do not need to be closed down and stand still once the ski season is over. Because of such and other services the small village of Sirkka is open year-around and people can make a living here from January till December.
Most evenings I went out for a shorter or longer hike up Levitunturi. I love the long Golden Hour you have in Lapland in the summer, and my photographer heart was full of joy about the amazing weather and views in the evenings. There are a handful of marked trails going up and around the mountain, but I usually didn’t follow any particular trail and simply explored. I liked visiting Santa’s Cabin, going to the Summit, and simply following small trails which looked interesting. If you want more guidance, then there is for example an Ice Age Trail, which tells more about the history of how these mountains came to be. Of course there’s many more trails for hiking around Levi - a look at Retkikartta will help you find and explore them!
Back in Sirkka with its compact centre you find many different shops and services. One service the kids and me really liked was the Summer Sled Track which you can ride either alone or on a 2-Person sled. It’s a popular activity and going earlier in the morning or in the early afternoon is recommended, as after 16 o’clock it does get busy and you can wait up to an hour that you get up and down (because of the COVID-19 restrictions only people from the same family/ group are allowed into on Gondola cabin).
We loaned our four bikes from the Zero Point Store down by the Slopes in Sirkka. We informed them of our heights and needs in advance online, and just had to test fit the bikes - all were the correct size - and then got our loan helmets and could start cycling. They have bikes for kids of all ages, and for example our daughter was very excited about her pink Trek Bike!
In the Tourist Information you can book activities, accommodation and get tickets for the lifts, and in the same street you find sport shops in case you forgot something important at home. There’s a couple of Cafés for an afternoon snack and coffee as well as several Restaurants if you have more hunger. As we had a kitchen in our apartment we bought food at the S-Market Supermarket in the centre and prepared meals at home.
As I don’t drink alcohol anymore I didn’t have any need to visit some of the bars and nightclubs which are in Levi, though if you fancy a cold pint of beer after a thrilling day on the downhill trails then there’s the possibility to do so!
We stayed in a spacious apartment at Hullu Poro Hotel. It’s a five minute walk from the centre, the bus stops right in front of it when you arrive and leave, and it has a small Spa with a Sauna and Hot tub which the kids enjoyed going to every evening. Our apartment could accommodate up to six persons - there were three bedrooms, two showers and WCs, with a small kitchen and a nice eating and living room area. We also had an own Sauna, but as it was quite warm we didn’t use it. It was a comfortable base for us four, and the included breakfast was very good.
There are several more accommodation options available, so best is to check out the Accommodations website from Levi.
We travelled by train and bus to Levi, via Rovaniemi where we slept a night in the Hostel Café Koti. This allowed us to have shorter travel days and explore a bit of Rovaniemi, for example the fantastic (free!) Angry Birds playground. We spent several hours here, with the kids playing on the many [check what lapses calls the “installations”/ telinät]. There’s also a Futbol court and you can loan balls, so the kids and me also kicked some balls there.
But yeah, Bus and Train. We took the Train from Vaasa to Rovaniemi and back, which was affordable if you book early - we spent 75,00 € going-return for our train tickets. The trip takes between 6 and 8 hours with two transfers for us, but with some card games, audiobooks and some additional screen time it’s easy to make the journey pleasant for all. The Bus from Rovaniemi to Levi and back was more expensive than the train for a single journey, but only took around 3 hours.
You can fly to Kittilä with Finnair, which is the fastest possibility. Flights are still limited and apparently also bit more expensive, so if you want to travel by plane to Levi make sure to book in advance. There’s local busses from Kittilä to Levi and back which run in sync with the flights, so getting to Levi and to the airport is easy.
We travelled light as usual, with only the Arc’teryx V110 Duffel and our Eagle Creek Cubes for our four clothes and stuff. I carried my camera gear and MacBook in my trusted ∞ Peak Design Travel Backpack, and also had my HUCKEPACKS Phoenix Lite for hiking and the ∞ Vaude TrailSpacer 18 for all cycling activities along. My favourite piece of kit which I had along was probably my ∞ Luna Sandals OSO Flaco and my ∞ Houdini Daybreak Shorts, I wear these in the summer ALL THE TIME. As previously mentioned, we loaned the Mountain Bikes and Downhill Bikes + Protective Gear in Levi from the Levi Bike Park Shop (for Downhill Gear) and the MTBs in Sirkka from Zero Point, as it’s easier to travel without bikes by public transportation =)
Travelling during the on-going COVID-19 Pandemic seems strange, but the reality is that many families need a break. Levi offered a safe travel experience and proper Hygiene & Safety were observed almost everywhere, from the Bike Park Shop to the Gondola Cabins to Cafés, Hotels and Supermarkets. We very much enjoyed our stay in Levi, with interesting and fun activities for kids and adults alike. We especially liked that there were heaps of free activities available around the Adventure Park, and as our kids enjoy cycling it was great to simply explore the surroundings by bike. So if you and your family are looking for an active holiday destination where you also can relax, take a closer look at Levi. With its many different activities, plenty of accommodation options for any wallet and the great views from Levitunturi, it’s certainly a destination which you should keep in mind for your next summer or autumn holiday!
More photos you can see in this Flickr Album.
If you enjoyed this article support me on Patreon (and you get great discount codes from partners - you could save 20% on your next purchase!) or buy me a coffee - I work Full-Time on Hiking in Finland to bring you inspiring trip reports, in-depth gear reviews and the latest news from the outdoors. You also could subscribe to the rarer-than-ever Newsletter and follow along on Instagram, Twitter, Facebook and Youtube for more outdoorsy updates!
]]>Disclosure: This trip was financially supported by the local Tourism office. As you know: I’m keepin’ it real and tell you how it is - I maintain full editorial control of the content published on Hiking in Finland. Read the Transparency Disclaimer for more information on affiliate links & blogger transparency.
Arctic Island Hopping is a fantastic way to explore the Lyngen Alps area, with its dozens of smaller and larger islands. In Tromsø you get on the Hurtigbåt and then simply hop on or hop off where you want to go explore. As I am a big fan of the Lyngen Alps it was a great possibility to explore them in the summer ☀️ with the bike and on foot.
Besides many “Must-See” locations like Blåisvannet and Lyngstuva above I also visited some hidden gems. Generally my days consisted of biking to a hiking location, hiking for a few hours, and then biking back to my cabin or tent for the night. As on these islands is very little traffic the cycling is super relaxed and enjoyable, and also on my hikes I did not meet many people.
I usually am very spoiled with good weather when on trips, though that wasn’t the case this time around. It was un-usually cold and cloudy, and even if on these photos you see mostly sun and blue sky, I did have a lot more grey days. But even on these the sun did come through at some point, even if it was just at 22:00 o’clock in the evening to say Good Night to me. You can see lots of Insta Stories from the trip on my Instagram profile if you want to see already now what I all did and experienced, or just sit back and wait till the Article and Youtube Videos drop later this August!
If you enjoyed this article support me on Patreon (and you get great discount codes from partners - you could save 20% on your next purchase!) or buy me a coffee - I work Full-Time on Hiking in Finland to bring you inspiring trip reports, in-depth gear reviews and the latest news from the outdoors. You also could subscribe to the rarer-than-ever Newsletter and follow along on Instagram, Twitter, Facebook and Youtube for more outdoorsy updates!
]]>Disclosure: The woom Bike was provided for free to us for this review. As you know: I’m keepin’ it real and tell you how it is - I maintain full editorial control of the content published on Hiking in Finland. Read the Transparency Disclaimer for more information on affiliate links & blogger transparency.
The woom AIR OFF 6 is my son’s third woom Bike in four years - we started with the woom 4 in 2018, a great bike which our smallest is starting to ride now. In 2019 we got the woom 5 which he rode very happily in all seasons for nearly two years, before now in 2021 getting the woom OFF AIR 6. The numbers in Sizing of the woom Bikes is brilliant, it makes it very easy to know which bike to get next - and the Bikes themselves also grow nicely with the kids, and often can be used over a year or two as you can adjust the seat and handlebar. That just as a side note - now onwards to the woom OFF AIR 6.
The first question probably is: Why the woom OFF AIR 6 and not a regular woom 6 or the woom OFF? The answer is easy: The woom OFF AIR 6 gives us more possibilities. The possibility to go ride MTB Trails and some easier Downhill Trails - things the regular woom 6 also can do, but which are more comfortable, fun and safe with the woom OFF AIR. If you want your kids to go outdoors instead of sitting inside and playing video games all day, then good equipment is key in our experience. And getting the kids to want to go outside means they spend all that energy on something useful - in this case riding their bikes in nature - instead of fighting, nagging and other unproductive stuff. So, good gear gets the kids outside where they exhaust their power, and everyone in the family benefits 😊
The Specs of the OFF AIR are made for trail riding, with hydraulic disc brakes, an hydraulic air suspension fork with 80 mm travel, SRAM X5 gears and Schwalbe Rocket Ron tires for maximum grip on the trails. My son finds the woom saddles very comfortable and also long or rocky rides are no problem. Equally the handlebar grips are comfortable, with the brake and shifting levers in easy reach of smaller children hands. The bike also comes with flat pedals which is nice, so you don’t need to go hunt for some pedals when the bike arrives. Finally, the geometry of the bike is good for pedalling and not too aggressive, which means the bike also can be used for riding to school and the beach. You can check out the full specs on the woom website and be delighted about the high-quality components woom used on this kid’s bike - they are great!
This being a woom bike obviously also means it is light, something which is SO IMPORTANT for a kids bike that I can not stress it enough. The woom OFF AIR 6 weighs just 11 kg as it is made from high-quality 6061 T6 aluminum (with butted and hydroformed tubes), which makes this a nimble bike on the trails and despite “only” nine gears my son was racing up the hills and it was a joy to watch - if you ever had your child complain about not wanting to ride an uphill, you know what I mean! On the downhill and the singletrack trails the bike reacts fast and gets through tight corners with ease - even if these corners are full of roots and rocks. And even without much training it was easy for my son to lift the fork over obstacles like trees on the trail, which is another benefit of the light build and the good geometry.
Something I liked was that the bike has high-quality 6 x 2.35″ Schwalbe Rocket Ron tires with the addition of the ADDIX SPEED rubber compound, which makes the tires more durable. It’s great to see woom giving their bikes high-quality tires instead of cutting corners and saving some €£$ and go with cheaper non-branded ones. These Schwalbe tires have a low rolling resistance and great grip on trails and gravel roads alike. The tires are high-volume which means they helps absorb some vibration and provide a plusher ride compared to skinnier tires. I didn’t really care for the Car-type valves for easy filling at any gas station, but happily our tire pump has an adapter for these so it’s just a small issue =) You probably have noticed on the photos that the woom OFF AIR has thru-axles on both the front and rear wheel. These provide superior stability in comparison to the quick-release skewers you’ll find on most kids bikes, and shows once more the bike’s trail credentials.
Now the Suspension fork is made my RST, it is an AIR fork as the name suggests which means you’re easily able to adjust the pressure to the weight of your child. The Suspension fork works great (and also gets a lot of use, even on normal non-trail rides 😊), with the stanchions sliding effortlessly through the lowers with a super smooth feel, without any noticeable friction. The rebound is smooth, even with the lower pressure we put on it as our son is lightweight. The 80 mm of the AIR fork provide plenty of travel for most types of riding, and it has a lockout switch which is useful on longer climbs. Once I explained what it’s for and how to use it, it was also easy to operate by my son himself. If you feel your child doesn’t need a suspension fork - there’s the woom OFF which comes with a rigid, light carbon fork and which is only 9,3 kg heavy in Size 6. It’s also cheaper than the AIR version, but otherwise nearly identical to the OFF AIR 6 in this review.
The handlebars on the woom OFF AIR 6 are 680 mm wide, which is a good size for our son. Sure, you could have a wider handlebar but he feels this is fine at the moment and does not need to be changed. In the beginning my son had some problems with the SRAM trigger shifter on the OFF AIR, as he was used to the grip-shifter found on his old woom bikes. After I explained how to use them (something you always should do, it’s too easy to think “They will know!” as an adult!) he is now easily shifting gears - though still sometimes forget on an uphill climb that he can shift in a lower gear 😆
We have not rode on very technical trails (as in, very rocky and full of roots) yet, but on the “normal” trails here in Vaasa with a normal amount of roots and rocks the fork has absorb everything well. But it’s still a hard tail, so make sure your kid knows to have a good riding posture so it doesn’t get thrown around. I imagine my son should be fine to ride green and blue Trails in most Bike Parks with his woom OFF AIR 6, which means if you as a parent enjoy going to the Bike Park then with this Bike you can take your child along and don’t need to rent a bike!
In the end the woom OFF AIR 6 is a great addition to our bike shed, and allows us to spend more time together in nature on our local trails. If your child is completely new to riding singletrack trails and easy downhill runs at the Bike Park, then this bike is a solid choice - also because with its light weight and child-friendly geometry it works well as a everyday bike for riding around town. But it’s obviously made for riding mountain bike trails, and that it does superbly - even with a beginner rider in the saddle. The suspension fork works great for our lightweight child, the hydraulic brakes make stopping a breeze, the SRAM X5 gears make climbing uphills fun and the Schwalbe Rocket Ron tires give the rider good grip and confidence on even the most loose surfaces. Overall we are very happy with the OFF AIR 6, and while we wish the bike would come with a quick-release seatpost collar to easier change the height of the seat, and internal cable routing, for more protection of the cables on trails, our son and us parents are very happy with this bike. I see us riding many trails in Finland and hopefully also Norway and Sweden in the future with this superb kid’s bike!
If you enjoyed this article support me on Patreon (and you get great discount codes from partners - you could save 20% on your next purchase!) or buy me a coffee - I work Full-Time on Hiking in Finland to bring you inspiring trip reports, in-depth gear reviews and the latest news from the outdoors. You also could subscribe to the rarer-than-ever Newsletter and follow along on Instagram, Twitter, Facebook and Youtube for more outdoorsy updates!
]]>Disclosure: This trip was supported by the local Tourism office. As you know: I’m keepin’ it real and tell you how it is - I maintain full editorial control of the content published on Hiking in Finland. Read the Transparency Disclaimer for more information on affiliate links & blogger transparency.
The last time I was in Levi was in Winter - and I had a great time skiing its slopes and enjoying the views. Now it was summer in Levi, which, thanks to the hightening Climate Emergency, means we had several days where the Thermometer almost showed 30°C - so longsleeves and sunscreen were mandatory. Nevertheless, all four of us had a good time - on foot, on bikes and in the summer sleds! Here are our first impressions from the trip, the rest will follow in a couple of weeks =)
If you enjoyed this article support me on Patreon (and you get great discount codes from partners - you could save 20% on your next purchase!) or buy me a coffee - I work Full-Time on Hiking in Finland to bring you inspiring trip reports, in-depth gear reviews and the latest news from the outdoors. You also could subscribe to the rarer-than-ever Newsletter and follow along on Instagram, Twitter, Facebook and Youtube for more outdoorsy updates!
]]>Disclosure: This article was supported with equipment and financially by reTyre. As you know: I’m keepin’ it real and tell you how it is - I maintain full editorial control of the content published on Hiking in Finland. Read the Transparency Disclaimer for more information on affiliate links & blogger transparency.
Strangely, installing the reTyre One made me happy. I wasn’t 100% sure if it would fit on my Pelago Stavanger bike as the reTyre One needs some “large” clearance but in the end I had plenty of space with room to spare. But from the start. Knowing that this might be the last time ever for me to switch tires on this bike, I was looking forward to installing the reTyre One. Installation was easy - I have many years practice in this after all, doing it for the three to four bikes of our family twice a year. Old tire off, reTyre One on, test-fitting to check clearance: Perfect, with plenty of room to spare for the Skins. The same procedure with the back wheel and then installing the Winter Traveler Skin as we still had ice and snow on the roads back in March when I installed the reTyre One.
I also want to briefly write about the installation of the Skins, which are zipped on to the reTyre One. The skins and the reTyre One have zippers which allows you to connect the Skin - and there’s four different Skins available for different cycling needs - to the reTyre One. The reTyre One itself is a fully functional bicycle tire - indeed I have been using it the past two months - but with the different Skins you’re able to put on a new “Tire” onto your bike without the hassle of actually switching the tire. Zipping on a Skin takes me about two Minutes and it’s even quicker taking it off. It’s a great way to adapt the bike to different terrains and seasons - zip on the Winter Traveler Skin as soon as the snow starts falling, and take them off in spring. Then just as easy I can zip on the Gravel Chaser Skin when I head bikepacking and offroad.
The Winter Traveler Skin was my first experience of riding with the reTyre Skin System. We had a good winter this year in Vaasa and had snow till late March, with some more snow in April and even May. Especially the snow in April was a good way to see the benefit of these zip-on tyres: I already was riding with just the reTyre One but when the snow and subsequent ice came, it was easy to zip on the studded Winter Traveler tire in a few minutes and the I could continue to safely cycle in these Takaa Talvi conditions. reTyre has two different Winter Skins, besides the Winter Traveler which I am riding there’s also the Ice Racer which has more studs. The Winter Traveler however has been perfectly adequate for the icey roads I rode on, and I had no feeling of insecurity while riding with these tires in slippery conditions. I reserve long-term judgement for a later point in the future, but in the few weeks I rode them on snow and ice I was satisfied and can recommend them.
One of the best things about the Winter Traveler skins where however the ease of use to get rid of the “Winter Tires” once all the snow was gone. In a few seconds the Skins were off and I could ride on the reTyre One on the ice-free asphalt roads. What previously was accompanied by a few swear words when changing the complete tire was now done with a smile on my face =) I do not know how the zipper system will live up to prolonged use, dirt and the elements but thus far it has been a fantastic experience and worked flawless.
So the reTyre One is not only the base tire to which you can zip-on skins, but it also is a fully functional bicycle tire on its own. I’ll test and use the Gravel Chaser Skin soon on a few bikepacking trips, but at the moment, when all my cycling is to the beach, supermarket, to different hobbies and around town the reTyre One feels like the perfect tire for my needs in town. It has good grip both on dry and wet surfaces (though with the current heatwave going on, we have had really little rain so no idea how it is on very wet surfaces). Besides the grip the rolling resistance is good => which means it is low and fast-rolling. I rode over the past 7 years a mix of different tires from different brands on my bikes, from smooth slicks for fast road cycling to hardcore gravel and downhill tires which were slower on Asphalt but had great, secure grip on offroad surfaces. I usually prefer something in the middle, with a tendency towards more offroad capabilities, but I really like how fast I can go with the reTyre One (you see, I go towards 40 and a fast bike is for me more attractive than a fast car!). Maybe also because I know how quickly I could zip on a more offroad worthy Skin to get that additional grip on gravel roads.
The reTyre One is also very competitevely priced at 29,00 € - similar tires from other brands easily cost just as much or more (as you often pay for the brand name) while with the reTyre One you also get the additional benefit of its multifunctionality. For example, you could now get a pair of reTyre One tires and use them for all you cycling this summer and autumn, and then get a pair of Winter Traveler Skins in November, zip then on and continue using your bike without the massive hassle of switching tires the traditional way.
Overall I am really happy with the reTyre One tire and the Winter Traveler Skin - the ease of use of zipping of the studded winter tire was amazing, and the reTyre One is a great tire for my everyday kind of cycling. Also, those blue details on the reTyre One look amazing - so 👍 for the great design! The Set of Winter Traveler and reTyre One are also similar in price, if not cheaper, than two pairs of tires - plus they use a lot less space than normal tires in storage!
However, there’s maybe one thing that I hope reTyre will come out with in the future, and that’s a Tubeless Version of their reTyre One tire. I much prefer riding tubeless and while I always had tires with an inner tube on my Pelago Stavanger bike, I prefer the peace of mind of a Tubeless setup. Sure, the reTyre One has a puncture protection and with a Skin on there would need to be some serious sharp/ spikey thing 🌵 coming my way to give me a flat tire - though then I seem to have some knack for finding just these 😆 After three months of riding nothing like that has occurred yet, and I remain hopeful that it won’t.
In a future article I will share also my experiences with the Gravel Chaser Skin, so if you’re interested in that please keep subscribe via RSS or Follow along on Twitter and Facebook where new articles always get posted, too!
If you enjoyed this article support me on Patreon (and you get great discount codes from partners - you could save 20% on your next purchase!) or buy me a coffee - I work Full-Time on Hiking in Finland to bring you inspiring trip reports, in-depth gear reviews and the latest news from the outdoors. You also could subscribe to the rarer-than-ever Newsletter and follow along on Instagram, Twitter, Facebook and Youtube for more outdoorsy updates!
]]>Disclosure: This article has been supported financially and with equipment by addnature. As you know: I’m keepin’ it real and tell you how it is - I maintain full editorial control of the content published on Hiking in Finland. Read the Transparency Disclaimer for more information on blogger transparency and affiliate links.
Truth be told, because of my new job I worked out less than in the winter and spring. After a long work day I rather wanted to dive into my man cave and paint than sweat and be bothered by the Mosquitos when running. But when addnature approached me and asked if I’d be interested in a cooperation, it was a great opportunity to get back into the healthy habit of running regularly after a work day!
I knew addnature before, and they carry many of the brands which I value and like - La Sportiva, Houdini, Rab, Patagonia, Black Diamond, Salomon and inov-8 - so it was very easy to find gear which I liked. Ordering is easy - There’s all the usual Payment Options via Klarna and shipping was via PostNord, which was even faster than DHL: The parcel arrived in five days in Vaasa. My environmentally friendly packed addnature order arrived in a durable plastic bag, which I like a lot as these are easy to recycle and take much less space to store than a package. Anyway, everything I ordered - more on that in a moment - fitted me well so it was time to put the new kit on after a day in the office and go for a run!
In April I wrote about my short runs and back then I was still running in my winter running gear on old snow, ice and mud - but by the time my new running kit arrived it was full-blown spring here, and so now blooming flowers, lots of bilberries, lingonberries and green birches line the trails I run on. Oh, and then there’s Mosquitos. 2021 is a really bad Mosquito year and they are out in force here in Finland, and even if I am running they seem to be able to catch up with me and feast on my delicious blood. Maybe I need to run faster?! Anyway, running in this wonderful green nature is for me a great motivator to go out. Even if I run only 4 km being out in the green is a very positive experience for me, and helps me to recharge my mental batteries. I feel better, more relaxed and it’s good to maintain the healthy habit of being outdoors every day.
I know, I know - you wanna know what I got and how I like it! So here it is 😊 First I got some new running socks from Injinji - the Ultra Run No-Show Socks and the Sport Original Weight Mini-Crew CoolMax Socks as I really like Injinji socks and find them super-comfortable. I really like running in the Ultra Run No-Show Socks and think I’ll need to pick up another pair or two in the future for every day use and hiking. I love that it almost feels like I don’t wear socks with these Injinji socks, and that I also can wear them with my Luna Sandals. If you’re not fond of socks, you might actually find these good, so they are worth trying in my opinion. I really love them.
After my only OK experiences with the inov-8 Mudclaw G 260 I decided to try the inov-8 RocLite G 275 Shoes as I have hiked and run in Roclite 295s waaaaay back in time and wanted to see how I like these new version with the Graphene Sole. So far the shoes have been great - comfortable, breathable and with great grip on different surfaces. It’s to early to say anything about durability yet but at the moment it looks like these are a keeper and more durable than the Mudclaws. I think also for hiking these will be great, the lugs are not as deep as on the Mudclaws so I expect them to be both more durable and long-lasting while still giving me good traction on difficult terrain.
As you already saw in the photos - I picked a more relaxed outfit for running. I have usually ran in compression garments from Salomon - which I still use - but it felt a bit too much for my current running routine. So I picked something which is a bit more toned down but still fun. I ended up ordering the adidas terrex Primeblue Trail Graphic Shorts and an inov-8 Organic Cotton Tee. The shorts are great - they are made from Parley Ocean Plastic - and not only because of their purple colour and material I really like them. They are comfortable, breathable and have two small zippered pockets in which I can store the phone, keys and some snacks. They are for me ideal running/ sports shorts as they have a relaxed cut and fit me perfectly, and they look less like I’m an Ultra-Runner and more like someone who enjoys running to stay fit.
The shirt I am not that fond of - it’s simply too thick for my taste. I like the cool print on the back (if you follow me for a while you know that I like smart prints on my T-Shirts!) but I run too hot in this - it’s made from 100% Organic Cotton, which I like, but I prefer it in a thinner strength. As I often wear Patagonia Capilene Cool Shirts I might try one of these or a Cap Cool Lightweight Shirt instead. This inov-8 shirt is cool, but for me not a good choice for running.
Which leaves the two inov-8 Running Wrags I got. These basically are Buffs and I use them when running to keep my throat a bit better protected from the wind, if it’s really sunny as a headband and also to wipe the sweat away. I was surprised that there were two in the package but that means I always have one clean one waiting for my next run!
And that’s the new gear I got for trailrunning. I was tempted to also pick up a Race Ultra Pro 5 Vest but then it’s not really needed for my short runs at the moment 😁 Overall I’m very satisfied with the kit (and also the fast delivery from addnature) and it has performed well on my short runs over the past weeks. It’s nice to go out running, and feeling better after it! If you still need a good reason to go (back) to running more regularly, maybe also treat yourself to some new running gear and go outdoors! If you need some additional Motivation: With each run you build up more stamina and walking skills for hiking, so maybe simply few trailrunning as training for backpacking!
If you enjoyed this article support me on Patreon (and you get great discount codes from partners - you could save 20% on your next purchase!) or buy me a coffee - I work Full-Time on Hiking in Finland to bring you inspiring trip reports, in-depth gear reviews and the latest news from the outdoors. You also could subscribe to the rarer-than-ever Newsletter and follow along on Instagram, Twitter, Facebook and Youtube for more outdoorsy updates!
]]>Disclosure: I maintain full editorial control of the content published on Hiking in Finland. Read the Transparency Disclaimer for more information on affiliate links & blogger transparency.
In March 2019 I blogged that not owning a car isn’t a problem for us, as we can do everything with the bike. This still holds true 95% of the time today, but then there’s those 5%. Much of these 5% involve kid’s hobbies, especially during winter (so the time between November and April here in Vaasa), where it’s not easy to motivate kids (and adults) to ride at -15°C on badly ploughed roads to a swimming lesson in the evening - and back home. You might think: “Don’t complain, just cycle there!” and it’s definitely the attitude I also have - but forcing a child to go cycle in such weather is a sure way to make them hate the hobby as they don’t want to bother with the cycling there and back in such weather. So this past winter we cheated a bit, as we had a car loaned to us (I’m calling it “The Coffin” as it’s 30+ years old and has a lot of problems).
One Day has 24 hours and thus a week has 168 hours. We moved with the car around 3 hours a week, which means it sat 165 hours in the driveway - or 98,21% of the time. Is it worth it to own a car so that it can sit 98% of the time in your driveway? I think not. Sure, we are again an exception to this situation, as our neighbours have one, two, three, four or more cars sitting in their driveways and seem to move around with them a bit more than us (because we still cycle almost everywhere), but even they probably don’t move their cars for more than 20 hours a week - which would be 12% of the weekly hours and means a car is sitting idly on a parking spot for 78% of the week.
Do you see where I go with this? The majority of cars only stand around. Yes, it’s nice to jump in a heated car in winter and drive the 10 minutes to the swim lesson if there’s a snow storm raging outside. If you want to support a local restaurant it’s nice to go pick-up tasty Take-Away Food. Have to transport four bags of cement? That’s one easy ride with the car. But it still means the car stands around, in our case, 98% of the time. Which for me means it’s a waste of space (I don’t like that it blocks the bigger part of the driveway) and also resources, as even this loaned car has costs - gasoline for use, insurance, Parking fees in the city and electricity costs for pre-heating it in winter.
So over the past months we have had many discussions about if we should buy a car once “The Coffin” leaves us in a few weeks. There are happily many good Electric Car Alternatives available today, which at least make the driving part more environmentally friendly - I want to avoid buying a gasoline powered car for many reasons. Thus we looked at many small EVs or electric car alternatives - from the Arcimoto FUV over the Citroën Ami and Next e.Go to the BMW i3 and “bigger” cars like a Skoda Enyaq, Volkswagen ID.3/ ID.4 and even a Tesla. But we always came back to the same conclusion: We don’t want to buy a car. We don’t want to own a car. But for these two to three hours a week where a car is useful, it would be AMAZING to have easy access to a car without needing to travel (by bike or Taxi) to a pick-up point to get a loan car for an hour or less.
As we don’t want to own a car, we looked at Mobility as a Service Options. It would be great to have a MaaS Provider like GreenMobility in Vaasa, alas they are at the moment only in Helsinki (and Copenhagen, Gothenborg, Ghent and more). It’s a modern System that works with an App and the thing I like the most is that it are all Electric Vehicles and that it’s a Pay as you need System - so if you only need a car for driving 10 Minutes to the Swimming Hall, you pay for 10 minutes - all within the App. And something which is very convenient too is that Insurance is also included, and it should be very easy to find a Parking Spot thanks to the App and the VIP Parking Spots of GreenMobility in the cities they are. The single best thing is that you can unlock the car with the App, so if you see the car in on the street you simply can walk there, unlock it, and drive away. It’s super easy and really how I envision MaaS to work 🚙😊 And no, sadly this article isn’t sponsored by them!
Whim is another MaaS Provider in Helsinki (and Turku, Vienna, and more) which is including even more options: You can easily buy a (seasonal) ticket for Public Transportation, rent a car, drive a Citybike, E-Scooter or a Taxi. It also works with an App and makes it very convenient to e.g. ride a Citybike to a Metro Stop, ride the Metro to your destination and then there walk (or use a E-Scooter) to your final destination. This has a lot more mobility options which makes it a great All-In-One Place to book transportation of any means.
Here’s an interesting case study on the creation of the Whim App.
In Helsinki you also have the City Car Club, a real innovator in the Car Sharing area as they exist since 1999. If you join you can use their cars to do your driving, from one hour to several days. There are many benefits to car sharing, like one car sharing car replaces between 8 - 10 private cars and there are less cars standing around (remember that in my example above our car would be standing around 165 hours a week!). Sharing a car with multiple neighbours or people from our neighbourhood could work great, as long as not everyone needs the car at the same time. There’s things like working out the insurance stuff and such, but generally car sharing would be a great way for us to have access to a car, but not owning a car. Sadly, such an option is currently not available in Vaasa, so we might need to bring up this idea with the neighbourhood.
A MaaS Provider which is available in Vaasa is 24Rent. Sadly they only have Vans available for renting, otherwise this would be a good opportunity to rent a car for short amounts of time. But if I need to transport large amounts of stuff, this will come in useful in the future!
Update 02.06.2021: Matti from 24Rent reached out to me to inform me that they soon also will offer passenger cars in Vaasa for rent. And even better, they also have a service called 24Go which is already available in the Capital Region, Tampere, Lahti and Oulu and they also are planning on launching it to Vaasa at some point - which would another perfect solution for us as it works easy with an App and would allow us to loan a car for simply 15 minutes when needed!
Yeah, that is a good question. If you don’t want to have a car standing around in your driveway for 98% of the time you are sadly in a minority, as most people seem to be happy to have one or more cars standing in front of their house. There’s no good MaaS Provider available in Vaasa (yet!) so currently the only option is to either start a Car Sharing Initiative in the neighbourhood/ city or get an own car. Happily right now it is summer, our daughter & son are very enthusiastic about cycling, so for the next three months we won’t need to think too much about a car. But once November rolls around with lots of rain, darkness and then winter with snow and cold temperatures, the discussion of how to get to the Hobbies will come up again, and till then we’d like to have a viable solution on the table. Of course being able to drive to hiking trails which are a bit further away during the summer is nice, too! If you have an idea, feel free to reach out on Twitter or Facebook! And if you are living in Vaasa and want to start a car sharing initiative - get in touch, too 😎
If you enjoyed this article support me on Patreon (and you get great discount codes from partners - you could save 20% on your next purchase!) or buy me a coffee - I work Full-Time on Hiking in Finland to bring you inspiring trip reports, in-depth gear reviews and the latest news from the outdoors. You also could subscribe to the rarer-than-ever Newsletter and follow along on Instagram, Twitter, Facebook and Youtube for more outdoorsy updates!
]]>Disclosure: The stay in Hostel Café Koti was part of a cooperation and free. There are Affiliate links in this article which are marked with an ∞ Infinity Sign 😊 You can use these AT NO EXTRA COST TO YOU but I get a small provision from the company. As you know: I’m keepin’ it real and tell you how it is - I maintain full editorial control of the content published on Hiking in Finland. Read the Transparency Disclaimer for more information on affiliate links & blogger transparency.
If you travel to and from Lapland, plan in an overnight stay in Rovaniemi for less hurry and more relaxation. Hostel Café Koti is the place to sleep if you want comfortable beds and rooms with a Nordic Design, and as it’s in the centre of Rovaniemi you can walk everywhere in a few minutes! A stroll along the shore of the river is a must in Rovaniemi, with scenic views on the city. Visit the Arktikum Museum if you want knowledge and culture, or take a hike up Ounasvaara on the (Winter) Trail. If you need even more action - rent a Fatbike from RollOutdoors!
When my son and me travelled back from our winter holiday in Saariselkä we decided to spend on the way back home an afternoon and night in Rovaniemi - simply as travelling south with public transportation is quite long and difficult to organize in a smooth way (VR and Matkahuolto haven’t realized yet that they could synchronize their schedules).
So instead of an awfully long travel day with lots of hurry and stress we slept in, ate a good breakfast in our Hotel in Saariselkä, and then took the 11 o’clock Bus to Rovaniemi, where we arrived several hours later. The next day, again after a good breakfast at Hostel Café Koti, we walked with our ∞ luggage to the Railway Station and took the train back south. As you can imagine, such a travel arrangement is much more comfortable than a day where you get up at 6 am and are stressed till 22 o’clock when you finally arrive at home. So what did we do in Rovaniemi?
Our Bus from Saariselkä dropped us off in the centre of Rovaniemi, just a short stroll from our accommodation, the beautiful Hostel Café Koti. This beautiful Hostel is a few years old and is located in a completely renovated bank building - the old offices are now rooms - there’s singles, doubles and family rooms, as well as dormitories. Downstairs you have a Café where breakfast is served and where throughout the day you can drink good coffee and tea, and also enjoy some snacks.
After checking in we brought the ski bag to the very safe luggage storage - an old strong room - and went to the top floor, where our beautiful room was. While I usually sleep in tents in the middle of nowhere, I do appreciate good design and beautiful interiors, and our room at Koti - which means Home in Finnish - was delightful. Natural materials, natural colours, lots of windows with great views - it’s the kind of room which is very inviting. The beds were fantastic, too - and I already felt like a wee nap wouldn’t be harmful 🥱 But we had some other plans - we wanted to explore wintery Rovaniemi!
Hostel Café Koti is located 2 minutes form the main square of Rovaniemi - but we were headed to the Angry Birds Playground which is also just 300 m away from the Hostel, and was more what we wanted after a day of travelling by Bus. This Playground is free to use, and has many really cool Angry Birds-themed playground equipment - perfect for a child, even if he’s more familiar with other games!
After enjoying the playground we went for a stroll along the shore of the river. If you’re inclined, you also could go XC Skiing here, as there’s a Track going along it. We sticked to walking, and took in the view over to Ounasvaara - a real outdoor paradise if you’re living in the city, where you can go Fatbiking with RollOutdoors, trailrunning and hiking.
We continued more direction town again, though - our stomachs were wishing for food, and my son wished for Hamburgers, so we visited Kauppayhtiö where we both enjoyed tasty (vegetarian) Burgers 🍔. They claim to have the best Burgers in town, and we definitely were happy with ours. The whole place is nicely decorated too - if you like a sort of 50s/ 60s Punk-Rock-Galleria Vibe, that is!
On the way home to Koti we strolled through the centre of Rovaniemi, which was very nicely illuminated and also still had some Christmas decorations up - Santa Claus doesn’t life far from here, so I guess that natural =)
Back at the Hostel we checked out the Sauna and then went to play ∞ Carcassone at the common room. We love boardgames and if a Hostel/ Hotel/ Café has Boardgames available it’s just a question of time till someone suggests a game! After several games it was time to hit the hay, and finally we were able to lay down in these inviting and comfortable beds.
We slept great in our room, and woke up fresh the next morning - but with rumbling stomachs! Off to the breakfast we went, in the beautiful Café. It was pretty full - the Breakfast is also open to people who do not stay at the Hostel, and of these there were quite some. I guess that alone tells you it’s a good place, if locals come to eat Breakfast there!
The breakfast options for Vegans were a bit limited, but I got enough to eat nevertheless - and the coffee was very good, so that definitely was a big plus. After that we went to play some more Boardgames and chill at the common room, before we walked to the railway station to travel south and home to Vaasa.
While it might seem we didn’t do a lot in Rovaniemi, we feel we did exactly the right amount of things in Rollo - explore the town a bit, relax, eat good food, and make the trip South a lot less stressful. That’s what we wanted, and that’s exactly what we got! If you travel with public transportation (the on-the-ground-kind) to Lapland, we can recommend travelling in two days south. Getting to discover more of Rovaniemi is always worth it - there’s so much to see here, and the Hostel Café Koti is a great place in the centre of town to stay. On our next trip North and South, we’ll make sure stop here again, that’s for sure - we love relaxed, slow travelling!
If you enjoyed this article support me on Patreon (and you get great discount codes from partners - you could save 20% on your next purchase!) or buy me a coffee - I work Full-Time on Hiking in Finland to bring you inspiring trip reports, in-depth gear reviews and the latest news from the outdoors. You also could subscribe to the rarer-than-ever Newsletter and follow along on Instagram, Twitter, Facebook and Youtube for more outdoorsy updates!
]]>Disclosure: This trip was supported financially by the local Tourism office. There are Affiliate links in this article which are marked with an ∞ Infinity Sign 😊 You can use these AT NO EXTRA COST TO YOU but I get a small provision from the company. As you know: I’m keepin’ it real and tell you how it is - I maintain full editorial control of the content published on Hiking in Finland. Read the Transparency Disclaimer for more information on affiliate links & blogger transparency.
Are you more the viewing kind-of-type? Then brew a good ☕️ and put the Video on in 4K!
We start in Mullerthal on Route 3 and after a while we pass the Schiessentümpel waterfall again. We continue past it in a southern direction, climbing some stairs which take us high above the stream where we walk on a soft trail under green beech trees. It does not take long for beautiful rock formations to appear on the side of the trail, and I enjoy the view of them - it appears like a large wall, just very pretty! We cross a street and hike onwards to the Kalktuffquelle, two small pools which are “The Source of the Sandstone of Luxembourg” as a sign tells. It is a pretty spot and I spend some time taking photos and videos at it - there’s a handful of brown trouts swimming in the lower pool and Martin and me try to count how many we can see.
The clear and turquoise water of the spring is beautiful, and we understand why this is a popular spot amongst locals and hikers alike. Right now we have the place for ourselves, and no one is there to share it with us.
After many long exposure photos and videos we continue on the trail to Blumenthal, this time on a wooden bridge which runs next to the “Black Ernz” stream. As it has been raining the wooden planks are unbelievably slippery and we are very careful while hiking over them, sort of relieved when we reach the end and hike up into the forest again.
At the small Rippsmuer Swamp there’s a big wooden table and benches, and as we picked up some Picnic goodies from the Heringer Millen Tourist Centre in the morning we have a long and relaxed lunch - it’s even not raining, so we enjoy the good food we carried along. After Lunch we take a look at the small swamp, but as it is autumn there’s not much to be seen in terms of flowers and insects.
The trail continues on a forest road and we avoid large puddles of water along the tracks, but soon we’re back in the forest on a dry single trail. We make the small detour to the sun dial up on a cliff, but with the absence of the sun - it’s cloudy and grey - we simply continue hiking.
Green and wet beech trees surround us, and it is calm. There’s an occasional bird song, but mainly we only hear our own steps and the wind when it goes through the leafs of the trees. Along the ground we can see toadstools with their red heads and white dots on them through the ferns and undergrowth, and then it does not take long and we hike through a steep ravine down to the village of Blumenthal.
We cross the busy road next to the Black Ernz stream, and on the other side have again a short break. I do some stretching as I had some pain in my foot, but after taking off my shoes and air my feet I feel better and can continue. A trailrunner overtakes us on the path, which runs next to a meadow. Then the trail takes a turn to the right and climbs up into the forest, just to spit us out into a field, where we continue. We reach a pair of trees - an Apple and a Walnut tree, which are the highest point of today and are at the Houbierg view point. We can see Berdorf and its water tower in the distance.
On small tracks we walk between the fields and keep an eye out for the signs here in the open, but miss one and make a small detour before we find back on the track. Along the way we did pick some very tasty apples from a tree, a tasty snack and available in abundance in this region!
Soon we pass through the tiny village of Soup, and in this grey weather a warm soup would have been welcome! We’re now only concentrating on reaching Larochette - a view on the weather forecast says it might start to rain any time soon, and we’d rather avoid getting soaking wet. The next bit of trail is pretty, especially the sections which take us through a beautiful green tree tunnel and then high above the town of Larochette, from where we observe the castle which towers above it.
We hike down into the town, along the square and continue onwards to the Larochette Youth Hostel, which is located in a beautiful blue building not far from the centre of the village. We moved into our small apartment, and the usual spreading out of all gear so that it can dry, a warm shower and putting on the clean clothes which were waiting for us, thanks to the MoveWeCarry, the free service which transports your luggage from accommodation to accommodation while we only carried our day hiking gear!
After a plentiful breakfast at the Youth Hostel we drop off the ∞ luggage again for MoveWeCarry and… decide to skip the next section to Beaufort. It’s raining so much, and with the morning section of the trail going over the highest part of the complete Mullerthal Trail, over fields without any protection from the forest, we simply take the free Bus to Beaufort.
When we arrive in Beaufort it still is raining so we continue to walk to the Beaufort castle - or actually castles, as there’s two next to each other. We buy a ticket for the guided tour which starts at 11:00 o’clock and explore in the meantime the old castle with its towers and dungeons!
It also was a good thing that we were wearing our ∞ waterproofs, as it continued to rain, and rain, and rain 🌧 I tried to hide away from the rain in the torture chamber and prison, but they’re not really very cozy places to hang out 😆
And then our Guided Tour started, and we went across a small bridge into the Renaissance Castle. We stood with our small group in the rain, listening to the Guide telling the Stories in Dutch and German, and then also got to go inside!
It is a very beautiful castle and I understand why my good friend Kathrin from Helsinki likes these castles so much. My favourite part was the garden, though - and we got to see it briefly in the pouring rain…
There was a lot of interesting things to see and the guided tour went quick - but at the end of it it stopped to rain! We ate the rest of our picnic lunch in the castle, tried the famous Cassero blackcurrant liqueur which is still today produced in the castle and then bade farewell to it, ready for hiking. As the Mullerthal Trail goes past the Beaufort Castle we didn’t have to go far till we reached the trail either, and soon we were again in the pretty surroundings of beech trees and rock formations!
I did not expect anything of this section of the trail, but was very positively surprised: It was gorgeous. The trail runs next to the small “Haupeschbaach” which offers lots of small waterfalls along the way, which meant: More long exposures! I carried the Sony a6600 camera, which Sony loaned me, on this section and it did really well with the long exposures, even if I didn’t have any Filters for it!
Now while I was very pleased about the possibility to take long exposures of the waterfalls, Martin was less enthusiastic about the constant breaks.
It was also busy on this section of the trail - a group of US Americans passed us, as well as some Dutch Hikers and a photographer who was here for the same reason as me. But this only seemed “busy” as we hadn’t seen other hikers on the other days, or as many. I guess on a sunny weekend it will be a lot more busy than on this rainy & wet October afternoon!
After a while we entered the Hallerbachtal, a narrow valley with the small stream running through it, and many wooden bridges making you cross from side to side. It’s a beautiful valley with impressive rock formations, but before long we left the forested valley and came out into an open, wide valley where we were greeted by black cows.
We passed the Mansion from ∞ Resident Evil on the way and were wondering what the kind people of the Umbrella Cooperation were doing up there, and were happy to put some kilometres between the centre of the Zombie outbreak and us. As the trails here down in the valley were great and it started to rain 🌧 again it didn’t take us long and to leave that Mansion on the hill behind us. Hiking along the fields and under the yellow leafs 🍂, with a light mist hanging in the air, it was beautiful. And so we were soon back at the Heringer Millen in Mullerthal and finished the Route 3 of the Mullerthal Trail.
We stayed at the Hôtel-Restaurant Le Cigalon in Mullerthal for one night, where we also ate. It was a good room and tasty food, though the portions were possibly a bit small for hungry hikers =)
In Larochette we slept in an apartment at the Larochette Youth Hostel where we also ate. The food was really good, as was the service, and our small apartment was actually pretty large and a group of six could easily sleep in there.
As mentioned before, we only carried our hiking gear and our luggage was transported for free by MoveWeCarry - a service which is available to all hikers on the Mullerthal Trail, and an excellent service for those that do not want to carry everything from accommodation to accommodation.
At the Tourist Information Heringer Millen in Mullerthal you can buy a picnic basket with tasty local & regional food. If you still need some hiking boots, a day pack or umbrella - that you also can loan at the Best of Wandern station - for free! SO it’s definitely a good spot to start your hike, and also if you need more Infos.
Public bus transportation in Luxembourg is free. Jump on a bus to get from one corner of the country to the other one (it’s a small country, so easy to do). The busses are plentiful and seem to stop even in the smallest villages, so hiking the Mullerthal Trail - or skipping a section in the rain - is easy to do.
See all photos from all three Mullerthal Trails here and read about Route 1 and Route 2 of this fantastic trail!
If you enjoyed this article support me on Patreon (and you get great discount codes from partners - you could save 20% on your next purchase!) or buy me a coffee - I work Full-Time on Hiking in Finland to bring you inspiring trip reports, in-depth gear reviews and the latest news from the outdoors. You also could subscribe to the rarer-than-ever Newsletter and follow along on Instagram, Twitter, Facebook and Youtube for more outdoorsy updates!
]]>Disclosure: I bought all of the gear in the photos from my own money. There are Affiliate links in this article which are marked with an ∞ Infinity Sign 😊 You can use these at no extra cost to you but I get a small provision from the company. As you know: I’m keepin’ it real and tell you how it is - I maintain full editorial control of the content published on Hiking in Finland. Read the Transparency Disclaimer for more information on blogger transparency and affiliate links.
All photos in this article were taken with the iPhone 12 Pro Max.
In my Social Media bubble (so the people I follow and interact with) the average person runs a 5:30 min/ km Pace, runs almost every day of the week and usually runs for an hour or longer. That wasn’t me even at the best of times: I have a family and going out for a run every day for more than an hour is impossible - unless I want to get up at 5:00 o’clock in the morning to realize that, and that is not going to happen either. At the best of times - during holidays for example - I can manage to get out two to three times a week for 30 to 60 minutes of training, and that’s already a lot.
This had as a result that during a normal week I ran less and less. I was trapped in the thinking of “If I can not go run for an hour I don’t need to bother at all”. And with two small kids, a partner I also want to spend time with, household work and another hobby I really enjoy finding 1,5 hours or more - because I need to change into my running clothes, go run, come home, go to the shower and clean up my running kit - it’s not just “One hour of running” - is in my current life situation impossible.
But for me less running is also not good. Running is my stress-relief, a time where I don’t need to think about work stuff, doing the Taxes, articles to write, videos to edit and household work to do. I only concentrate on the trail in front of me, and where I should place my next step or two. I also can stop a moment and listen to the sounds of the forest, or observe the swan couple which has moved to the stream in our neighbourhood and smell the trees, moss and mud. But generally I simply enjoy running on the beautiful and varied single-track in the forest, and the exercise it gives me - because working from home means for me also that I don’t move as much as I’d like to.
So a couple of weeks ago I decided “Whatever, I now go run for 20 Minutes” and it has been a revelation, to say the least. Going running for 20 minutes gives me all of the above benefits - moving and exercising, getting my head free, enjoying the forest and nature - and including changing clothes and taking a shower afterwards I have a turn-around time of less than 40 minutes. That means I basically can set the iltapalaa (evening snack) for the kids on the table, change into my clothes, go run 20 minutes, take a shower and be back with them when they are finished, ready to go to sleep.
And so I have been running every day since that revelation. Yes, “only” 20 minutes - a stark difference to 99% of my Social Media bubble - but I know that I don’t intend to run an Ultra Race or Marathon any time soon and these short runs are perfect for me. After all, I run for myself, and not for some Strava records or people I don’t know on Social Media. I run for me, my health, my mental well-being, and running just 20 minutes a day makes me happy!
And that’s what I want to pass on to you, too. If you haven’t been running or exercising because you don’t have the one or more hour it takes - because that’s what everyone else around you does - break out of that bubble, do what makes you happy for 20 minutes and then be double happy - happy that you were running/ exercising and happy that you were able to fit it inside of a busy day, which would have prevented you of doing it any longer! Trust me, doing what you want to do, even just for a short amount of time, is better than not doing the thing at all because you feel you can not dedicate an hour or more to it. We are doing this for fun, so it is better to do it just for a bit than not at all!
I bought a couple of years ago some cold weather/ winter running kit from ∞ inov-8 so that I could continue running in the winter, which after all last some six months here in Vaasa, Finland. While it is “spring” according to my calendar at the moment, when I go out run in the evenings it usually is around 0°C so I am very happy for my toasty warm ∞ Winter Tight in combination with their ∞ Base Elite Longsleeve and a ∞ Synthetic insulation Jacket which keeps my torso warm. If it is really cold I also put on some ∞ gloves but usually these stay in my ∞ hip belt where I also store my phone and water. On my head I have a ∞ Buff Beanie which is really thin and which I usually wear under a helmet when I go skitouring, but it works well for running, too! I track my runs with the ∞ Suunto Spartan Ultra which I use now since 5 or so years on all my trips and for training, and which is a superb smart watch. As I wrote in my All the Shoes article a few weeks ago, I mix things up shoe-wise but for the last muddy weeks I only have used the ∞ inov-8 Mudclaw G 260 and they have been performing great on the mud, snow and ice which currently is all over my trail. This kit has worked well for me now for three winters and gets a big 👍 from me!
If you enjoyed this article join the Patreon tribe (and get great discount codes from partners!) or buy me a coffee - I work Full-Time on Hiking in Finland to bring you inspiring trip reports, in-depth gear reviews and the latest news from the outdoors. You also could subscribe to the rarer-than-ever Newsletter and follow along on Instagram, Twitter, Facebook and Youtube for more outdoorsy updates!
]]>Disclosure: I bought some of the shoes from my own money while others I have received for review. There are Affiliate links in this article which are marked with an ∞ Infinity Sign 😊 You can use these at no extra cost to you but I get a small provision from the company. As you know: I’m keepin’ it real and tell you how it is - I maintain full editorial control of the content published on Hiking in Finland. Read the Transparency Disclaimer for more information on blogger transparency and affiliate links.
I own more shoes than my wife. I blame the multitude of activities I partake in for the amount of shoes in my closet, as well as my desire to try out new technologies. In this article are all but one pair of shoes which I have used in the last 16 months - the notable absence are the ∞ Luna Sandals OSO Flaco which are my much-loved summer sandals, which I will review at a later point. Many of the shoes in this article are made for specific activities but I tend to use all shoes at a minimum for hiking and some every-day use. Anyway, let’s jump in!
Weight: One Boot 697 g, Pair 1397 g // Size: 42 // Buy them at ∞ La Sportiva, ∞ Bergzeit (currently 12% off), ∞ Bergfreunde, ∞ Backcountry or find the best deals on Outdoordeals.com!
The La Sportiva Trango Ice Cube GTX are my ice climbing boots (which means they are fully crampon compatible!) - but as I climb less ice nowadays (simply less time) I have used these boots for the most part as winter hiking boots. For many years I have tried to get away in winter with using trailrunning shoes, but as soon as some snow is involved low shoes fill up with snow, which equals wet socks, which means cold feet. I am not fond of cold & wet feet, and hence the La Sportiva Trango Ice Cube GTX come since two years on every time I go into the snow in winter - these are mid-high boots with a super nice integrated gaiter, which closes around my leg and hence there’s no snow coming inside the boot or socks!
Another problem of trailrunning shoes is that I mostly use unlined shoes, and that means the wind goes through - and again cold feet are the result. The Trango Ice Cube GTX have an upper which is made in a seamless construction method and have an Gore-Tex Insulated Comfort lining that keeps my feet toasty and warm, even at -25°C in Lapland. I have used these boots for hiking, cycling, skiing with OAC Skinbased skis and also ice-climbing and mountaineering, as well as pottering around in the snow. I like that they are relatively lightweight, the high gaiter is ideal for my kind of activities and keeps the snow out, and they are toasty warm when moving around in the cold. If you need a warm pair of winter boots which you also can take climbing in the mountains, then I can strongly recommend the La Sportiva Trango Ice Cube GTX!
Weight: One Shoe 254 g, Pair 506 g // Size: 42 // Buy them at ∞ ON Running, ∞ Bergzeit, ∞ Bergfreunde, ∞ Backcountry or find the best deals on Outdoordeals.com!
I have been trailrunning in these shoes for over two years now (switching around with other shoes!) and really like them. They have a wide-ish toe box, a good fit in the heel cup, a very thin tongue which make these shoes almost feel like a sock and the sole gives great grip on all sorts of surfaces: Mud, granite rocks and trails full of roots. On asphalt sections and hard gravel roads they weren’t perfect - the “Clouds” as these open sections of the sole are called do have good cushioning on trails, but on roads I find them less good - and as they are not made for road running, I only use them on the short sections to get to the trail. But yeah, the sock-like fit, together with the thin, breathable upper, make this a great shoe for running in the summer. The laces are really good, too - a tad long, but they stayed closed, even on long runs. And the sole has good grip and cushioning as mentioned already. But do the Zero-Gravity heel Clouds provide softer landings, as they claim? I can not agree nor disagree with it to be honest. Does that make them less good? Hell no! I’m always happy to go running in these shoes - and they fit well in with my trailrunning outfit, too!
Weight: One Shoe 333 g, Pair 666 g // Size: 42 // Buy them at ∞ Black Diamond, ∞ Bergzeit, ∞ Bergfreunde (currently 30% off!), ∞ Backcountry or find the best deals on Outdoordeals.com!
I received these in January 2020 and they have become my Every-day use shoes after the snow is gone and before it gets really warm (as then I prefer to wear Sandals). Besides walking to the Kindergarden and along the coast I also use them for easy day hikes, cycling and scrambling =) These are Black Diamond’s first entry into the Footwear market, and after using them for over a year I think they have done a good job. The sock-like fit is great: It’s easy to slip into the shoes for example, and if you have them on there’s nothing rubbing you the wrong way, so they are really comfortable. The upper is made from one piece and claimed to be very breathable, which is true to a certain temperature - at temperatures over 20°C I do get sweaty feet in them. The rubber sole is really excellent on rock and it’s nice to scramble up the big rocks which the last Ice Age left here in Vaasa - precise placements are no problem. The sole is also surprisingly durable for all the asphalt walking I have done in them over the past year, which is very positive. Overall a really lightweight and grippy shoe, which I use with pleasure - I hope to test them in the mountains soon, approaching some climbs!
Weight: One Shoe 338 g, Pair 648 g // Size: 42,5 // Buy them at ∞ inov-8 (currently 30% off), ∞ Bergzeit (currently 20% off), ∞ Bergfreunde, ∞ Backcountry or find the best deals on Outdoordeals.com!
I bought these shoes last year and used them on my backpacking & packrafting trip in Lemmenjoki National Park, and was a bit disappointed that the toe cap came lose after just 60 km of hiking. Also the Graphene rubber sole, which is claimed to be more durable, has not lived up to the hype in my opinion - but then maybe I hiked too much over very hard granite rocks for long stretches, which is a very taxing underground on all soles - especially if I consider that these Mudclaw shoes are made for muddy and wet trails. In those conditions they have been very good, giving great grip with their deep lugs in the mud, and no chance of slipping. I love the close feel to the ground in these shoes, and they have been comfortable even on 40 km days across the wilderness of Lapland. The overall durability is a bit of a let-down though, as I expected more from the Graphene soles - maybe I have to pick up the ∞ Roclite G 275 and see if it is lasting longer on hard rock surfaces. For the time being, I’ll continue to go running and hiking in these Mudclaw G 260 though.
Weight: One Shoe 281 g, Pair 559 g // Size: 42 // Buy them at ∞ Outnorth, ∞ Bergzeit, ∞ Bergfreunde, ∞ Backcountry or find the best deals on Outdoordeals.com!
After years of not using any Salomon Speecross Shoes I got these S-Lab Speedcross shoes three years ago - and damn, are they good! As I wrote in 2018: These S-Lab shoes are light, have great grip, are comfortable and have “no ankle support”. But after running in them for 2+ years I can report I haven’t had any problems running in them and the lack of “ankle support” is not an issue for me. I still don’t like that the pocket for the laces is designed badly (newer Salomon shoes do that much better!), but other than that these are great Speedcross shoes which convince with great grip, fit and comfort also on long runs. I expect these will continue to be good for a year or two, as I pretty much only use them for running or the occasional hike so the durability of the sole has been very good.
Weight: One shoes 313 g, Pair 626 g // Size: 43 // Buy them at ∞ Bergzeit, ∞ Backcountry or find the best deals on Outdoordeals.com!
I bought these in February 2020 as I am fed-up with the super slippery roads we have in winter in Vaasa, and after I fell on my buttocks a few times over the past years I decided enough is enough. These are trailrunning shoes with spikes, and have no lining - which also makes them somewhat “cold” in really cold weather. But the main reason these shoes are brilliant are the 16 studs which ensure bomb-proof grip on even the smoothest of ice! That grip is absolutely fantastic and I haven’t felt insecure on icey roads even once this winter! The bluesign upper is smooth, pretty durable and also water repellent but not waterproof - I have gotten moist feet when using them in deeper snow, so I try to stay clear of that. The sock-like fit is very comfortable and also on runs these have performed very good, ensuring I can continue to run in even the most slippery conditions. Overall a great shoe that ensures I stay upright even on mirror-like ice roads and trails!
Weight: One Shoe 423 g, Pair 884 g // Size: 42 // Get a pair at Tecnica or find the best deals on Outdoordeals.com!
These shoes I got as a Test sample on the last #OutDoorFN fair in Friedrichshafen, and have used them on-and-off over the past three years. The footbed and upper are fully customized to my feet for a personalized and unique fit, as much like a ski boot these shoes can be moulded to your feet. And yes, these are comfortable shoes, which I have used hiking, cycling and walking around in town. The Vibram Megagrip sole is great on wet and dry trails alike, but the black mesh upper does tend to get dirty and it’s not that easy to clean. The shoe is also pretty warm and nothing I can use in the summer, but for right now and these wet, cold and ice-free seasons I find them really good. However, it’s also a “heavy” shoe and it stands quite high above the ground - something I had to get used to, as I prefer to use shoes with a low or Zero Drop which allow me to be close to the ground. But even if they aren’t the shoes I’d use on long hikes, I do think that these are good shoes, especially for people who want a perfect fit, great grip and don’t mind the higher weight.
And that are all the shoes I used in the last 16+ months - quite a wide selection, and several shoes actually have been used for even longer, but as I continue to get plenty of DMs and question on Social Media about my shoes I though it is about time to answer all these questions in one go! By the way, I also used the previously reviewed La Sportiva Crossover 2.0 on several hikes in the past year - but then they started to smell after the last hike so badly I had to dispose them! So, which of these shoes have peaked your interest? Let me know on Instagram or Twitter!
If you enjoyed this article join the Patreon tribe (and get great discount codes from partners!) or buy me a coffee - I work Full-Time on Hiking in Finland to bring you inspiring trip reports, in-depth gear reviews and the latest news from the outdoors. You also could subscribe to the rarer-than-ever Newsletter and follow along on Instagram, Twitter, Facebook and Youtube for more outdoorsy updates!
]]>Disclosure: This trip was supported financially by the local Tourism office. As you know: I’m keepin’ it real and tell you how it is - I maintain full editorial control of the content published on Hiking in Finland. Read the Transparency Disclaimer for more information on affiliate links & blogger transparency.
My son and me were in Lapland in February, by now already something of a little tradition for us two. It’s a great way to bond, talk, have fun together and experience the beauty of our home country. I this case we went to Saariselkä, a small village in the North-East of Finland, which I have visited numerous times over the past years as it’s located very close to several National Parks, Wilderness areas and is simply a great starting point for outdoor adventures. While we were hiking and skiing in Saariselkä also this time, we went on three different Fatbike rides in Saariselkä and Kiilopää. As our family are cycling enthusiasts - we still don’t own a car! - trying out Fatbikes was something that my son and me both looked forward too!
Read how we do everything by bike in and around town!
Our first trip was with Tuija from the MTB Project and Raili from Roll Outdoors. These two women were fantastic guides and showed us the best and most scenic trails around Kiilopää, and they even organized some glorious weather for us as you can see in the photos ☀️❄️😎 My son and me took the Ski Bus from Saariselkä to Kiilopää, a short 20 minute ride which takes you through the beautiful landscape. We met Raili and Tuija at the Roll Outdoors HQ and picked up our Fatbikes: They have e-Fatbikes, Kids Fatbikes, and the Canyon Dude 8.0 Fatbike which we rode. After a short introduction to the bikes and the plan for the day we started to ride through the Gates of the Urho Kekkonen National Park, and headed along the border of the National Park towards the Kiilopää Snow Bike Park, a good area to get familiar with the bikes in easy terrain and to see what they are capable off. The trails were freshly groomed and it was great riding on these fine trails.
The trails are well marked, and you can get a map to see where you are allowed to ride. Not all trails are allowed for Fatbikes - as tempting as it is to ride on the hard, flat XC Skiing trails: These are off-limits! There are over 50 km of Fatbike Trails, either pure bike trails or then open to both hikers and cyclists. We did encounter on our rides just a handful of hikers, who were always very friendly and excited to see us. Just make sure to slow down or even get off when you pass people, and all can use these trails together happily! We had a short break at the bottom of the Snow Bike Park at a Laavu, and then cycled a different route back to Kiilopää, where we made a proper lunch break.
After good coffee and hot juice, tasty vegan food and chocolate bananas we rode the trail up to Ahonpäät. The views from the trail - we were there right at the Golden Hour, which always gets me a bit excited and I have the urge to just stop every 100 m and take photos 😆 - were breath-taking. Not just because of the long up-hill, but also because of the magnificent views.
The trees were absolutely beautiful, fully hiding beneath the snow, a warm, golden light was making everything look beautiful and all four of us were just smiling from ear to ear. A moment to remember.
After all the uphill it was time to turn the Fatbikes around and point our tires down and back to Kiilopää! Timo, the local trail builder, has created a wonderfully flow-trail which gives you great views while you descent. You should watch the video to see what I mean, the photos simply don’t do it justice of how beautiful this trail is!
Happy, and a wee bit cold, we arrived back at the Roll Outdoors Shop in Kiilopää, and went inside of the Suomen Latu building to have a hot chocolate. It was a fantastic day, and both my son and me look back fondly to it!
The next day we rented bikes from Lapland Safaris in Saariselkä and went on a self-guided trip. As it was snowing and again pretty cold, we decided to ride to the Savottakahvila Café in Laanila, which was a good choice. It was at some point almost a wee Blizzard and it was hard to see far, so we both were happy when we reached the Café and could have a hot chocolate and a Laskiaispulla!
There was an old Prospector’s cottage close by, and as we both are interested in geology we tried to go there - sadly there’s no Fatbike trail going to it, and as we didn’t want to break the Rules we headed back on the same trail to Saariselkä. By now the weather also started to be a bit more sunny, so it was nice to ride the trails with a fresh cover of snow and in the sunshine ☀️❄ !
On our last day in Saariselkä we went Fatbiking with Guide Janne from Lapland Safaris. We got the same bikes as on the previous trip, which was great as they were all dialled in to our heights, and then we took off after Janne!
This time we went a bit off-the-beaten-track and road our Fatbikes towards the west on a Trail which I had hiked back in the autumn of 2019, before turning south and then east again towards Laanila. It was yet again a very snowy and cold day, and big snow flakes were coming down from the grey clouds. The trail was well-maintained but the snow kept growing on it, making for good riding.
In the middle of the forest we had a break, drunk some hot, tasty juice which gave us back some warmth, and ate a little snack, while playing with the new, soft snow around us, all while it continued to snow. So much beautiful snow! After this wee break we rode on, arriving at Laanila and then continuing on a familiar trail back to the village.
Fatbiking in Saariselkä and Kiilopää was a fantastic winter activity for us. My son got better at riding with each time we rode our Fatbikes, and he really enjoyed the flowy downhill sections of the trails (he didn’t care that much about uphills, but then: Few do 😁). While he didn’t fall he did at some points simply on purpose fell into the deep, soft snow which is surrounding the trail, which makes for a soft and safe landing. I was happy about the variety of trails available for us, and that many are easy enough for younger children - though I do hope more demanding and longer trails will get built in the next winter! Overall this was a great alternative to XC or downhill skiing, and allowed us to explore the nature at our own speed - faster than hiking, but slow enough to take in the details of the nature surrounding us. Right now in March and April, with the hankikanto (that time of the year where the top snow layer is carrying people and bikes without that you break through) it is also possible to ride almost everywhere, and especially on the open fells and lakes this makes for fun, good riding. But then you still have these awesome trails, which you really should ride!
We stayed in an Apartment at the Lapland Hotels Riekonlinna Hotel which has an ideal location: 5 minutes from the Store and even less time to be on a trail for skiing, Fatbiking or hiking. The Ski Bus stops in front of the building, as are the buses to the south and north.
Our Apartment had all the amenities we could have wished for: A Sauna, comfortable beds, a well-equipped kitchen and a drying closet for drying all our sweaty and wet clothes!
We ate breakfast and dinner at the Hotel, and they served great Vegan food - I really appreciated that! In the afternoons, after we returned from our activities, we usually would sit down at the fire place in the lobby and have a hot chocolate. There are several other Restaurants and Take-Away options in the village, or then we also could have cooked in our apartment.
As usual we travelled by public transportation to Lapland, but if you are not alone then drive your car north - then you are mobile there. Taking the Bus from Rovaniemi to Saariselkä is a short and scenic 3 hour ride, and it really gets you in the mood for the outdoors as you ride past lakes and forests and every so often slow down to let the Reindeer get off the road. Taking an (overnight) train to Rovaniemi from Southern Finland is also very convenient, as you wake up well rested and just a short ride away from your next outdoor adventure. This is also a good way to travel if you want to explore Helsinki before or after a visit in Lapland - or stop for some days in Rovaniemi while you are here. Finally, if you come from abroad you also can fly directly to Ivalo, from where you can take a bus or Taxi to Saariselkä.
In Saariselkä you have a great outdoor shop, several Cafés and Restaurants and a grocery store. Make sure to read the Travel Safely website, use a Reuseable Face Mask and do all those things which you should do to minimize the risk of getting ill. Other than that - enjoy your holiday in Saariselkä, Lapland!
If you enjoyed this article join the Patreon tribe (and get great discount codes from partners!) or buy me a coffee - I work Full-Time on Hiking in Finland to bring you inspiring trip reports, in-depth gear reviews and the latest news from the outdoors. You also could subscribe to the rarer-than-ever Newsletter and follow along on Instagram, Twitter, Facebook and Youtube for more outdoorsy updates!
]]>