Tired of punctures & flat tires? Go Tubeless and don’t worry about them anymore. In this article I show how you can convert your bike to tubeless tires with the help of the Schwalbe Tubeless Easy Kit, your one stop solution with everything you need to go Tubeless.
Disclaimer: Schwalbe has provided me the Tires, Tire Booster and Tubeless Easy Kit for free for this article. This did not influence the article as I maintain full editorial control of the content published on this site. Read the Transparency Disclaimer for more information on affiliate links & blogger transparency.
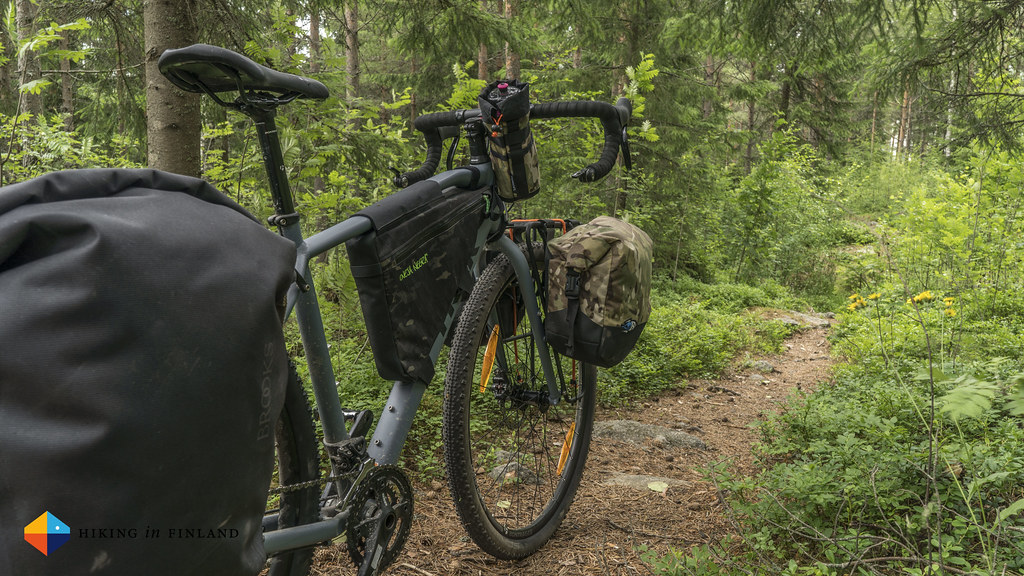
Flat tires on 29” wheels, they where common for me back with my old 29er. Happily I started to drive more careful and punctures have been rare in the last several years, but as I welcomed the Trek 920 Disc to the family I decided I wanted to ride it Tubeless. There where some good reasons for that:
- You can save weight. I’m still a ultralight backpacker at heart and if there’s a possibility to save weight then I’ll take it.
- Adiós, Punctures! Don’t like that sound of your inner tube going flat? I hate it, and with a healthy dose of your Latex liquid in your tube that sound is unlikely to reach your ears again.
- Traction, baby! Less pressure on the tires means you have more traction - pretty useful in sharp curves and lose trails.
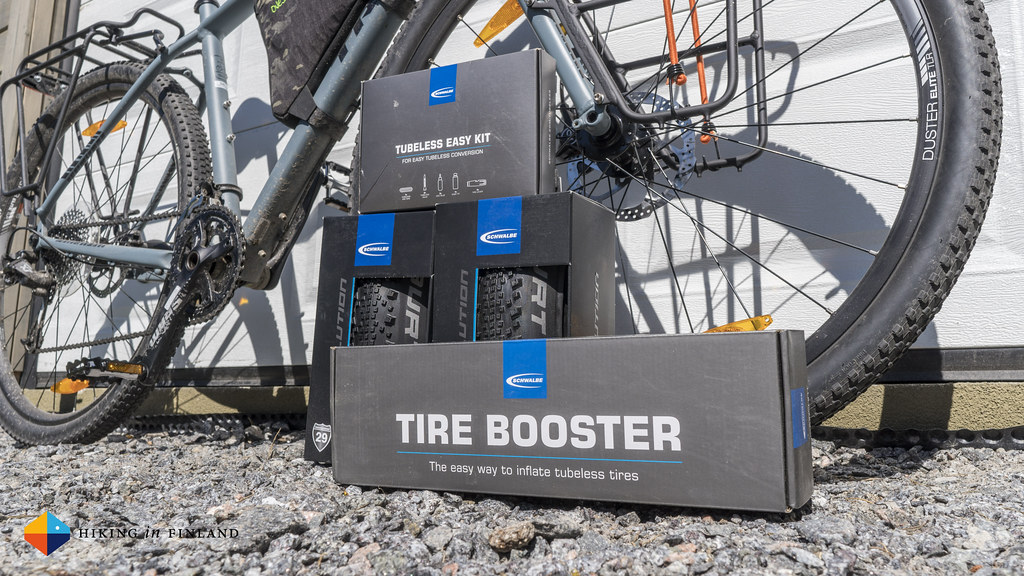
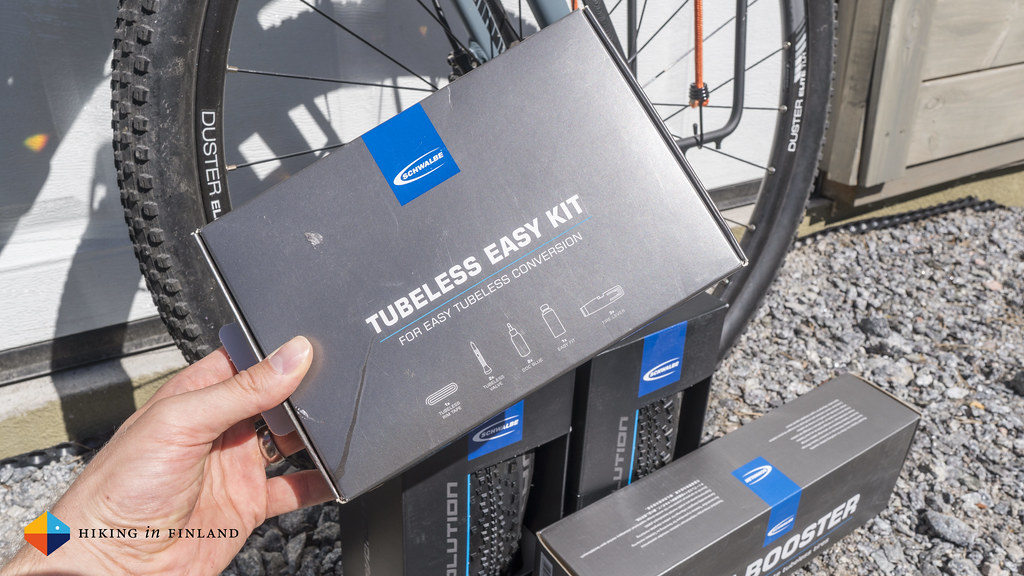
So, with three good reasons to get rid of inner tubes I set out on a sunny afternoon to convert my 920 Disc to Tubeless. It isn’t a quick operation by all means so make sure you have a couple of hours of peace to go about this. Here’s what you’ll need:
- Tubeless-Ready Rims
- Tubeless-Ready Tires, I chose the Schwalbe Thunder Burt Evo SnakeSkin PaceStar 29x2,10” TL-Easy Folding
- Schwalbe Tubeless Easy Kit
- Schwalbe Tire Booster or a compressor
- Floor pump
- A bucket with soapy water and some rags
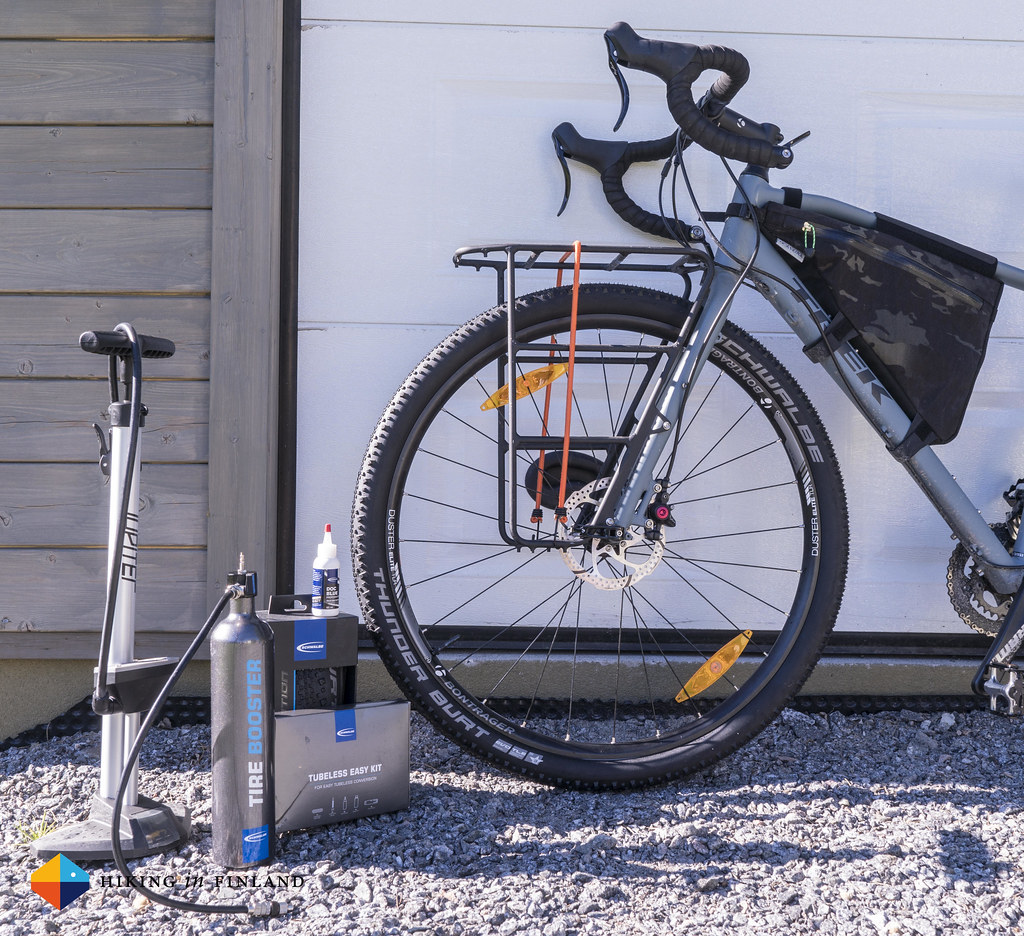
Alright, with all your tools and gear ready it’s time to start.
-
Preparation is KEY! Your Tire Booster needs to be “primed” first, so take your floor pump and put some 11 bars of air in it - that way you don’t need to do it later. Also, a good thing to do is to unfold your tire - if you’re using a tire that comes folded like I did - before you start the whole operation - and hang it into the sun. It will warm up and get a tiny, tiny bit more flexible which makes it easier to put on the rim later.
-
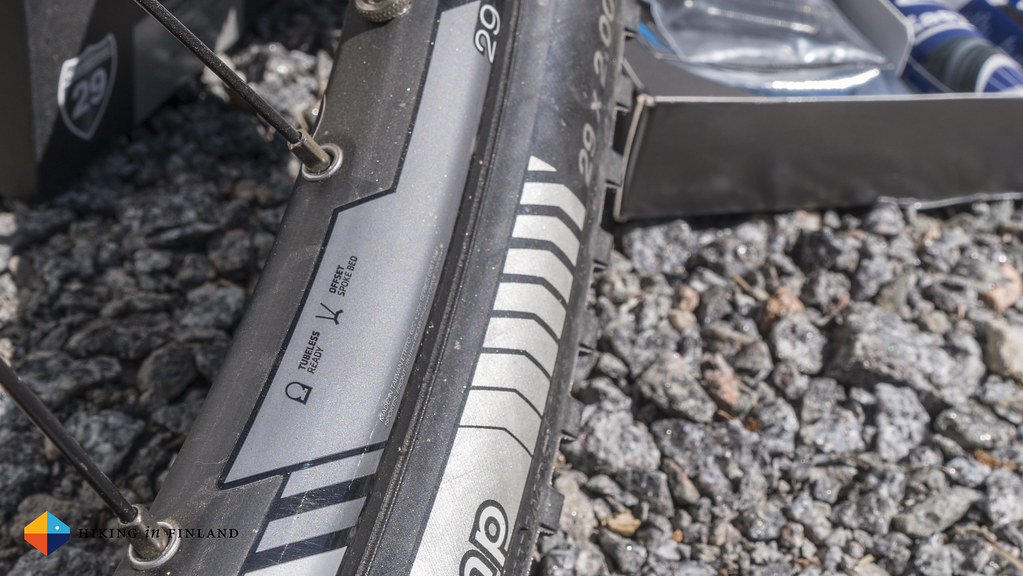
Lets first check if your rim is Tubeless-Ready. If it is it should be written on it somewhere - either it reads Tubeless Ready or “TLR” somewhere. If they are: Great, that saved you several hundred Euros for new Rims!
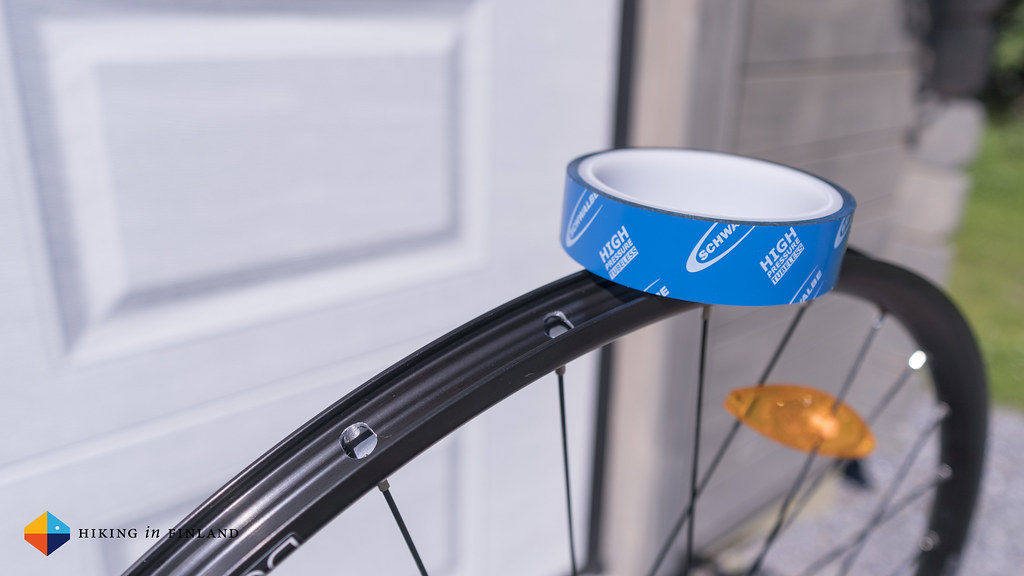
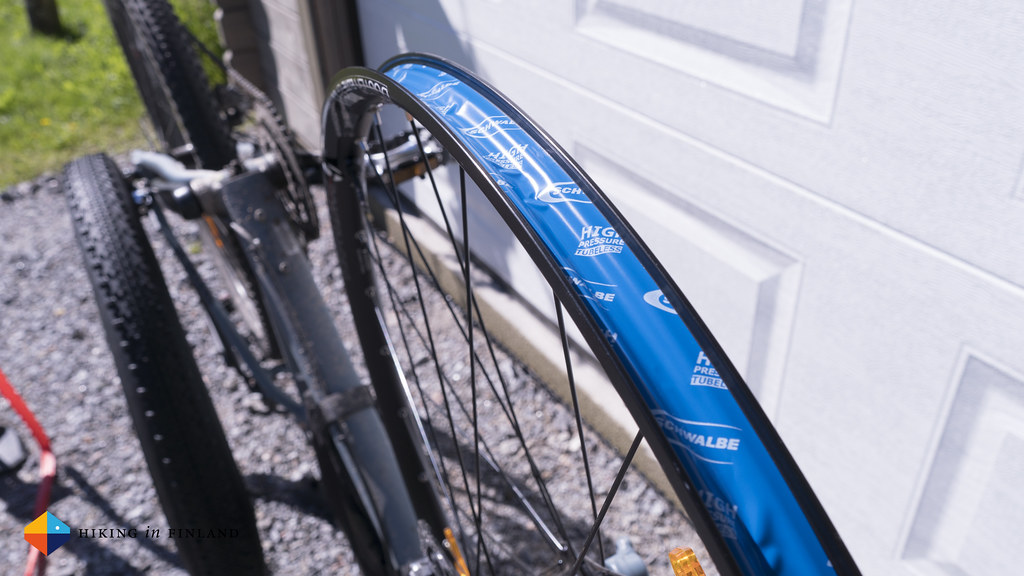
- Time to deflate the tube, remove tire + tube + old rim tape, and get cleaning. Take a soapy rag and clean the inside (and while you’re at it, also the outside) of the rim, remove all dirt & dust and then dry it well off. That’s because the next step is quite crucial for the success of the whole operation, and if you hurry through this you might do it twice, so calm and relaxed proceed you shall. Now you grab the Tubeless Rim Tape (these are available in different widths, make sure to buy the one which works best for your rim!) and apply careful and precisely the tape to the inside of the rim. Start opposite of the hole where the valve will go through later, and apply it carefully and cleanly with a lot of pressure to the rim, and avoid air bubbles. I say it again: This is a very important step, so don’t hurry and take your time. If you’ve gone once around and reach the start go another 5 to 10 cm and then cut the tape. Now take the Tubeless Valve from the Tubeless Easy Kit and put it through the rim tape where it belong. Make sure to screw it tightly onto the rim, as the area around the valve can be a point where air easily escapes.
-
Time to take your Tubeless Tire and mount it carefully onto the rim. If you can don’t use the tire lever as it might damage the rim tape - if you had your unfolded tire hang in the sun this should be possible. Make sure that the tire’s beads are on each side of the valve before you head on.
-
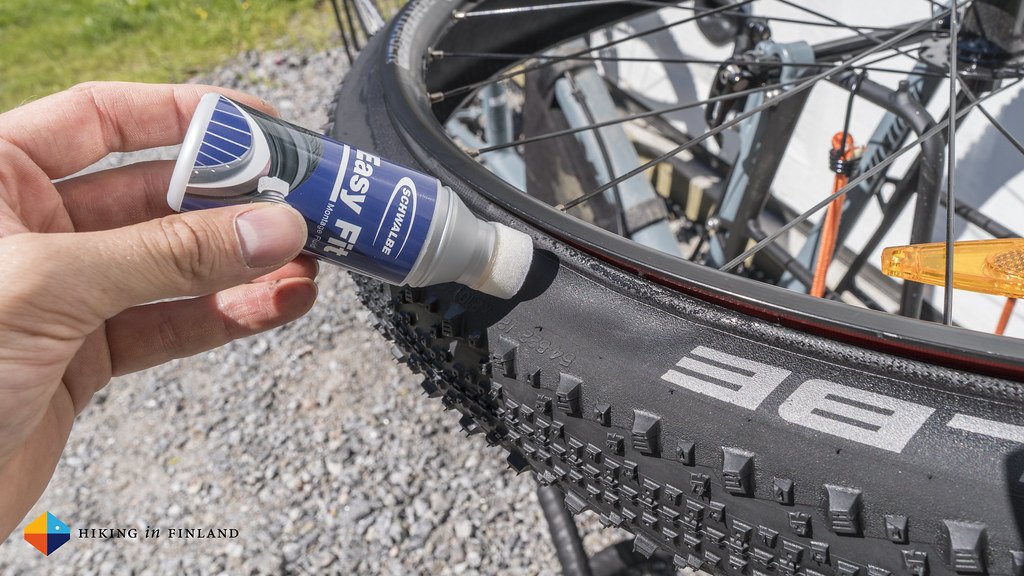
Time to inflate! Apply a generous coating of the Easy Fit assembly liquid to both sides of the tire beads, the (clean!) soapy water would work too. For the first inflation a powerful burst of air is needed so take the Tire Booster (or if you have one, the compressor) and attach it to the valve. It makes sense to take the top of the valve off to allow more air through-flow, you get a wee tool for that in the Tubeless Easy Kit. Alrighty, this is the moment of truth: Open the Tire Booster and see how your Tubeless Tire inflates. It should set with several loud BANG! sounds onto the rim, only if you hear that you know everything went as planned. You need to check the line on the tire to control if the complete tire is correctly mounted, if not knead and push the tire to get it into the right position.
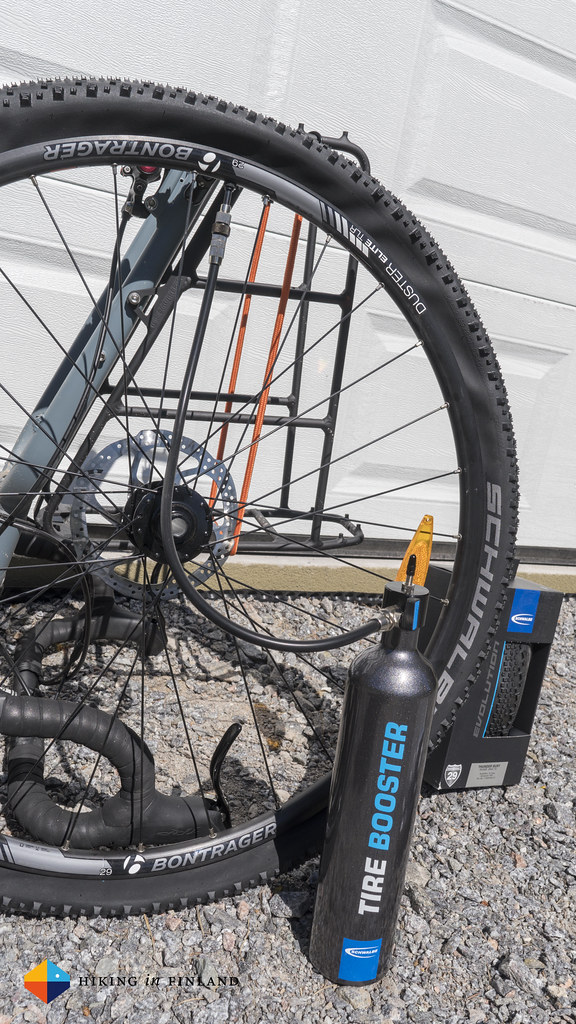
This can be a stressful moment if you don’t hear that loud bang which indicates that the tire beads have engaged the rim - I tried for over an hour to get it to set down. The thing is that 29” tires (and Fatbike Tires even more so) take a lot of air to fill and that in my case the Tire Booster didn’t have enough power to engage the complete tire - it didn’t set down on a couple of places which means that the air was escaping and I couldn’t move on. The solution is to empty the whole Tire Booster into the Tire to get the Tire to set down on as many places on the rim as possible, and then switch to the Floor Pump and keep on inflating the tire. This did the trick for me - the tire looked almost like it was going to burst but in the end I heard the several loud bangs which meant the tire was now fully engaged to the rim. Success, at last!
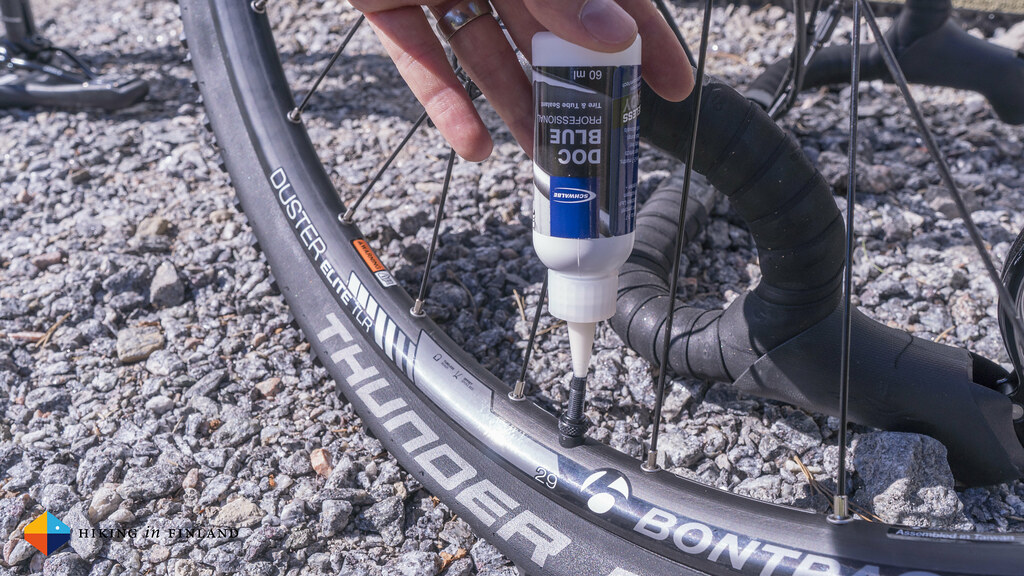
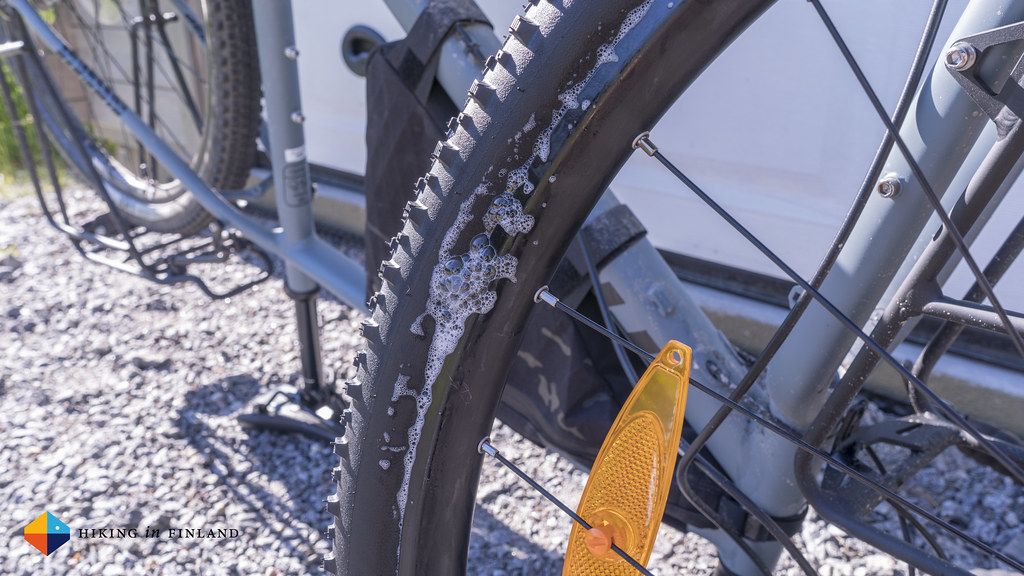
- Now that the tire sits on the rim you can take the pump/ compressor/ Tire Booster off the valve. This will deflate the tire a wee bit, but that’s not a problem. Remove the valve insert if you haven’t done that already in the previous step and take a bottle of the Doc Blue puncture protection liquid - now it’s time to put it into your Tire and make it Tubeless! You can easily fill the bottle through the valve into the tire - for 29” tires you use the whole 60 ml, smaller tires need less. Once the bottle is empty you put the valve insert back, take the floor pump and inflate the tire again - around 2 bar for these 29” tires is good for starters. Remove the pump, close the valve and now you’ll need to roll and shake the tire for quite a bit - the goal is to distribute the puncture protection liquid everywhere in the tire so that an even cover covers it from the inside. To check the tire once more for leaks you can cover the outside of the tire along the rim with your soapy water - there where there’s bubbles building up you need to move the puncture protection liquid on the inside to cover it better.
If the tire now stays inflated you can attach it back to the bike and get started on the second wheel, after which you should head out for a test ride. All good? Then pack up your bike and head out on a bikepacking Microadventure - Tubeless Edition!
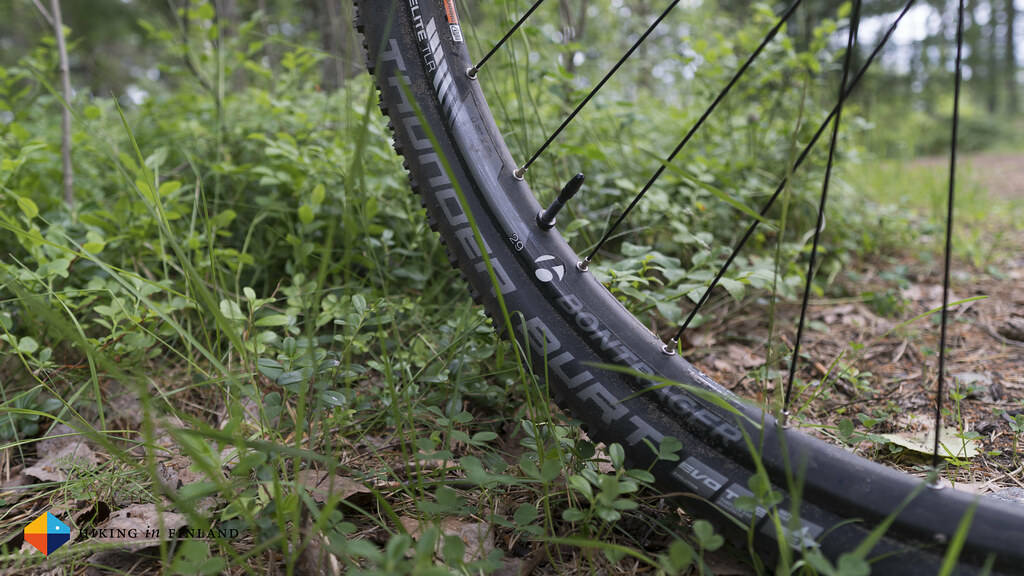
I’m now riding since over a month Tubeless and love it. I can ride my tires with less pressure on the trails which equals better traction, but of course the biggest benefit for me is that I don’t need to worry about punctures and snake bites anymore, as the puncture protection liquid seals those immediately should they happen. It’s just a great feeling to know that you can ride how you want without needing to worry that you might end up with a flat tire! Finally, if you’re a friend of moving pictures then have a look at this video which is by and far the best on how to convert your tires to tubeless tires! More Information on Tubeless you can find on the Schwalbe Tubeless Website, while the Tubeless FAQ can answer additional questions you might have.
If you enjoyed this & other articles why not support me with a coffee or two? I work Full-Time on Hiking in Finland to bring you inspiring trip reports, in-depth gear reviews and the latest news from the outdoors. You also could subscribe to the rarer-than-ever Newsletter and follow along on Instagram, Twitter and Youtube for more outdoorsy updates!