Hiking in Finland

Climbing, bikepacking, skiing & packrafting in the north

The Week in Review

In no way meant as a competitor to Dave's excellent "Fresh Outtakes" (subscribe if you haven't yet!), I'll start and post links to some articles and posts which were especially worthy in the past week. Updated each Sunday, looking back on the last week, starting today.


Phil Turner started the "The Local Adventure Project" and went for a wildcamp on an island.

Joe Newton from "Thunder In The Night" followed suit and climbed a local mountain, with a view across Bergen.

Eugene Smith from The Pain Cave went to walk the beautiful canyons and forded rivers with his mates in the lonely mesas of Gila.

Dave, the Armchair Adventurer, concluded his story of his skiing trip across Oyer Fjell in Norway, and also finally ;) sent the Scandinavian Mystery Box onward - looking forward to it!

Jörgen Johansson from Fjäderlätt posted his pack list of his one week trip across Sarek National Park in Sweden, well worth a look if you're into winter camping and still look to optimize your system.

Robin from blogpackinglight wrote his Carneddau trip up, Part One and Part Two.

Roger from Nielsen Brown Outdoors went on a 24 bivy trip to one his favourite areas in Denmark.

Finally, Dondo sums up his 24 trip to Beaver Creek Wilderness Study area, home of mountain lions, yucca and cacti.


In the Gear Review department, Thomas from Going Lighter shared with us his Initial Review of the MBD Bongo HNC.

Petesy had a lot of stuff in for testing, though the Guyoutdesign bowls stood out as lightweight and compact.

Perkunas gave an old Billnäs 1133 axe a new life, very impressive.

Robin from Step by Step gives us a first look at the new Evernew alcohol stove, so if you like the Trangia stove head over and see what he says about this Titanium version.

Phil from Lightweight Outdoors also wrote an initial review on the GoLite Tumalo Pertex 2.5 Storm Jacket, so if you're in the market for something breathable for the summer, check out what he has to say about it.

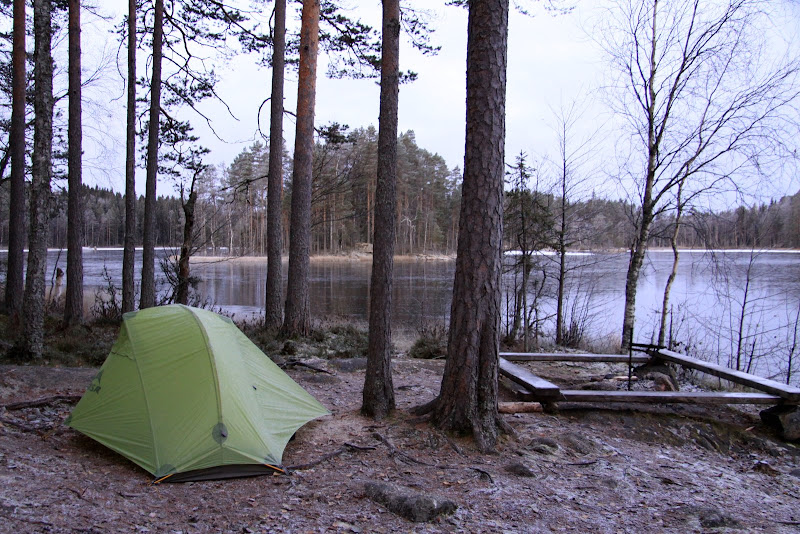
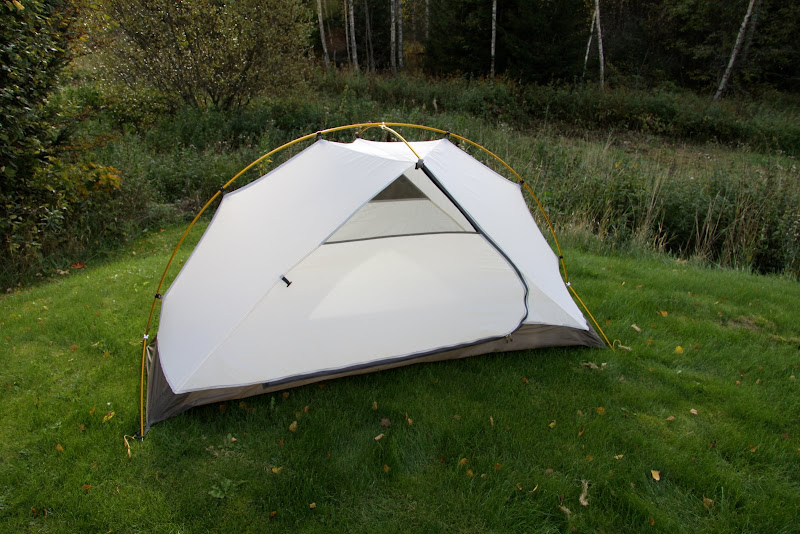
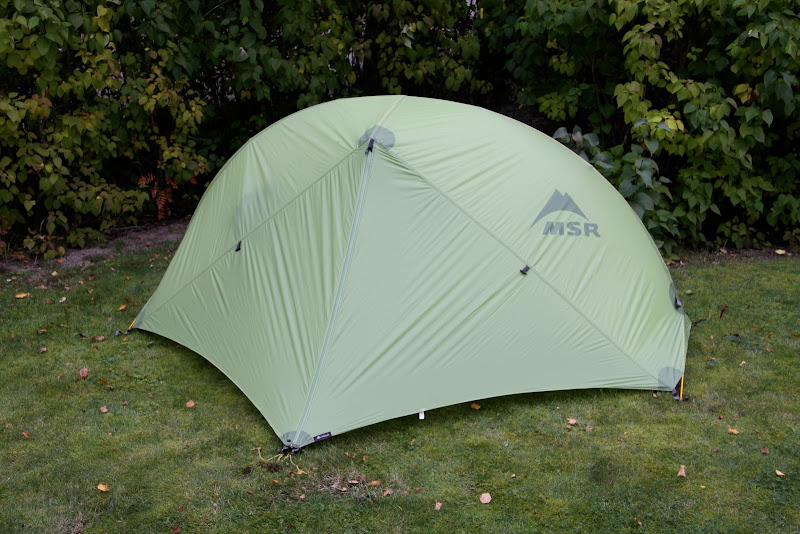
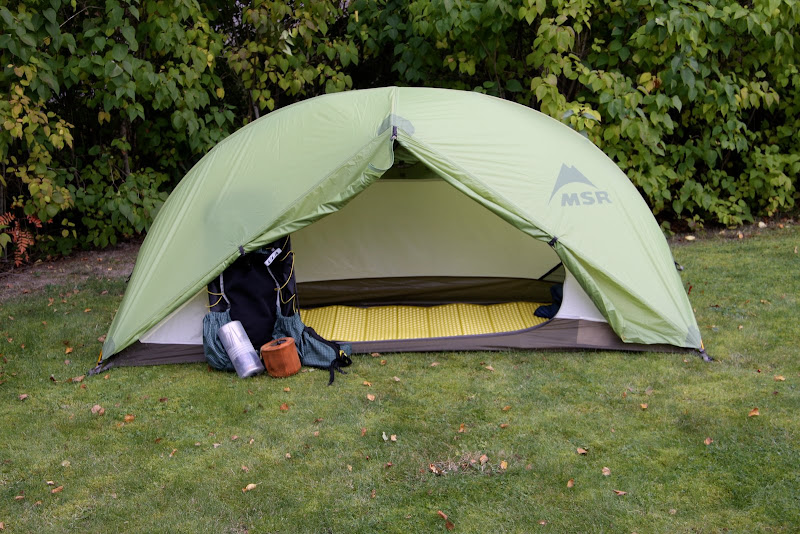
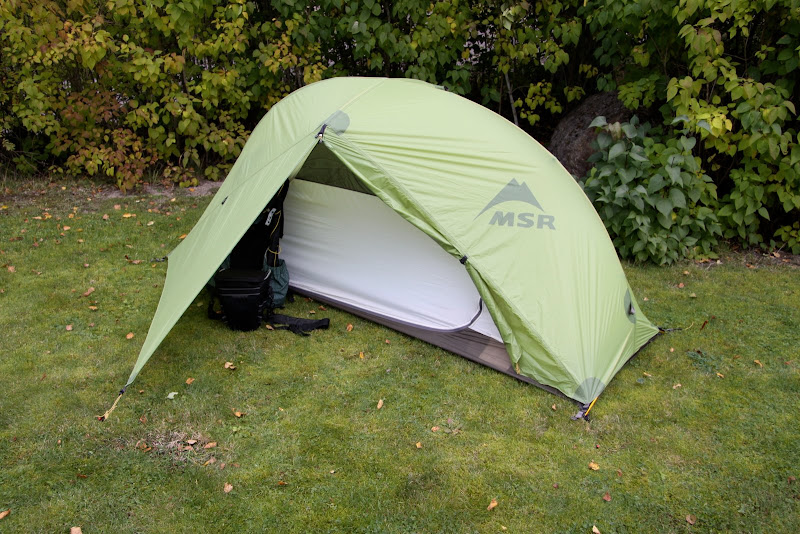
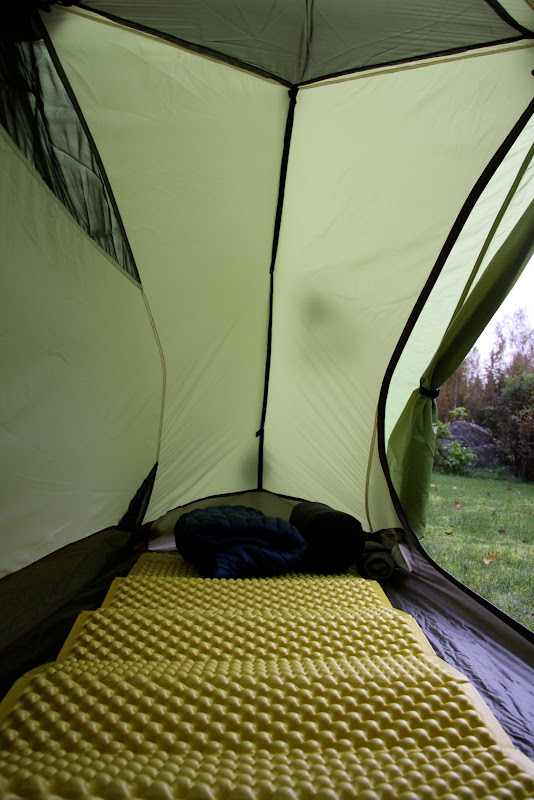
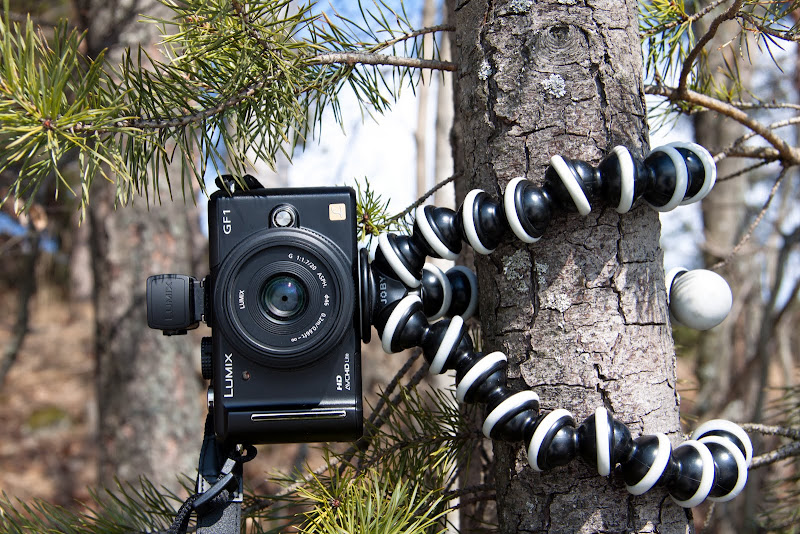
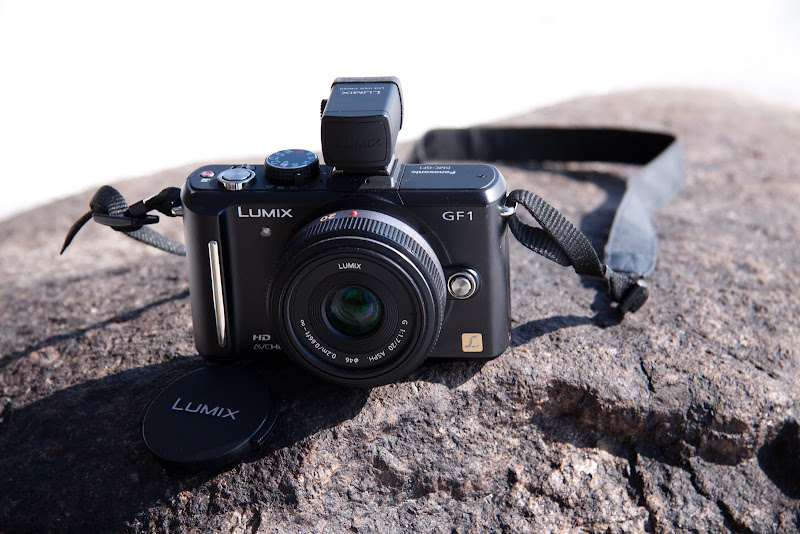
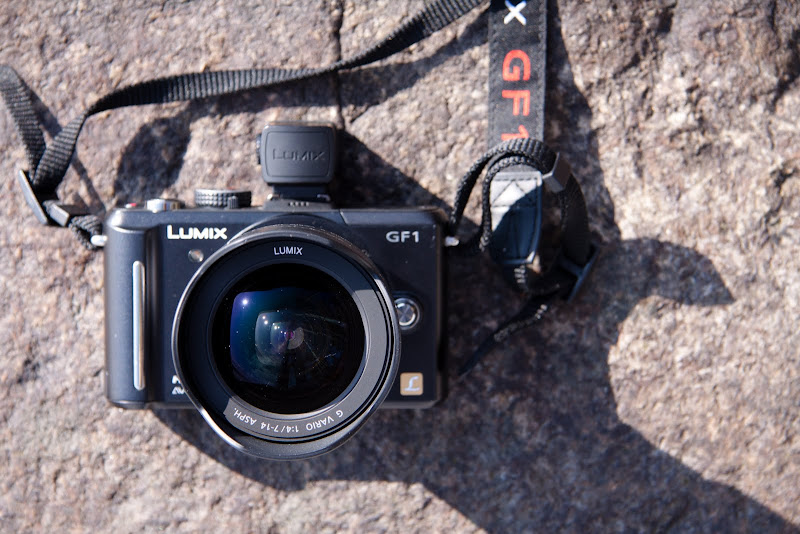
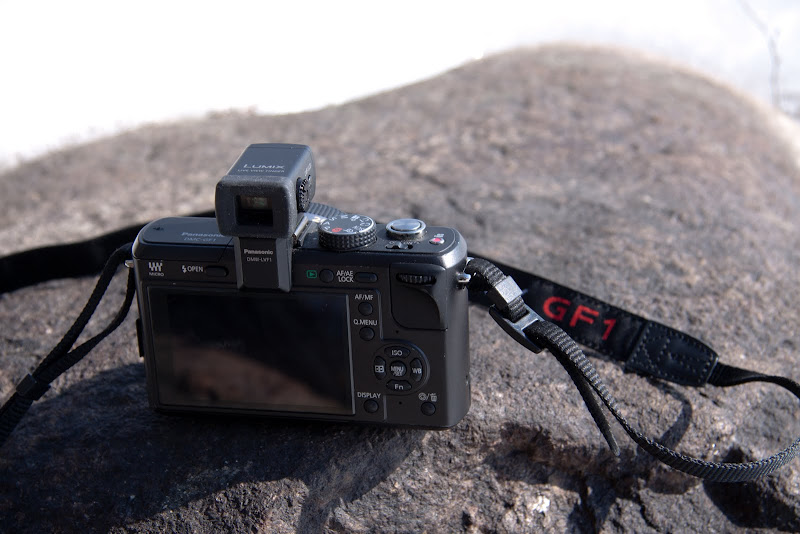
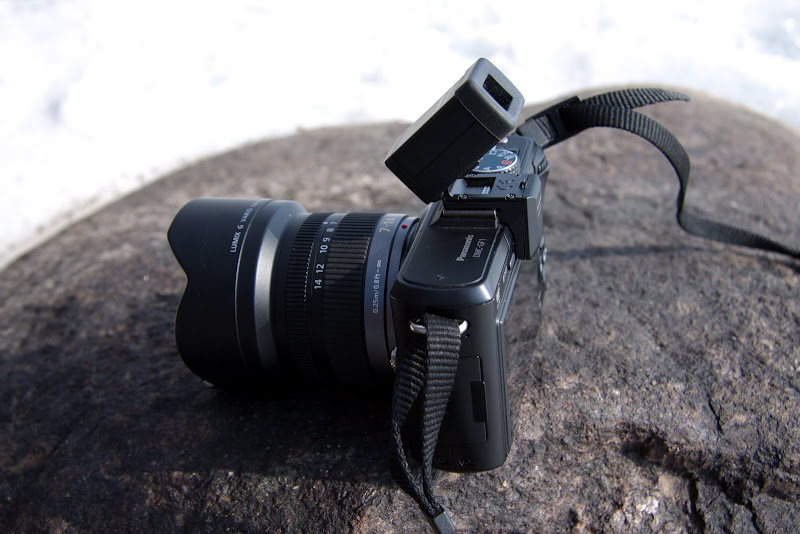
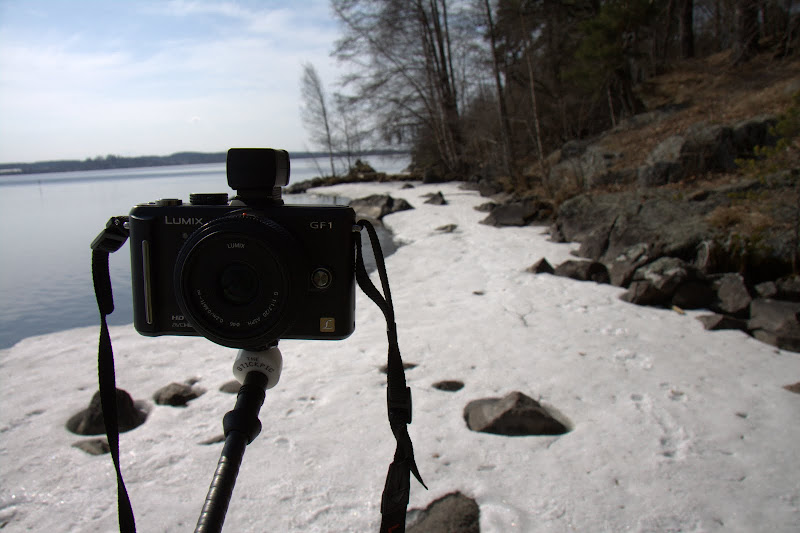
I myself reviewed the Panasonic Lumix GF1 and reported how it performs in the field, and had a look at the 2010 MSR Hubba HP.

And in other news, James from Backpackingbongos, George aka Londonbackpacker and also Martin from Summit and Valley recently added a new look to their blogs, so go check them out if you only read them in your RSS feed!

For those on Twitter and who are always on the lookout for bargains, the Outdoor News Network keeps you up-to-date about bargains to be made at UK outdoor shops.

MSR Hubba HP 2010 Review

If you have been reading my past trip reports with a keen eye and have had a close look at the photos, you surely have seen that I had the MSR Hubba HP 2010 model for quite a while already. Time for a first look at this solo tent, and what it offers to the lightweight backpacker.


MSR Hubba HP 2010 on a trip last autumn, experiencing the first minus degrees of the season.

Lets start with the important bits, a break down of the weight:

MSR Hubba HP complete: 1385 g
Stakes x 6: 59 g
Stakes stuff sack: 10 g
Repair: 18 g
Poles: 347 g
Poles stuff sack: 18 g
Outer: 429 g
Inner: 463 g
Stuff sack: 41 g

"That's a lot of stuff sacks" is what I thought, and then I ditched the one for the poles and used a lighter one for the whole set. The MSR Needle stakes which come with the tent are fantastic, I have been using them also with my other tents and tarps, good visibility and easy to get into the ground.

As you might know, the internet is a medium where you can use video to the fullest, so before I show different photos and ramble on, have a look at the HD video I made of setting it up:


It is a lightweight tent, with using a lighter stuff sack and lighter stakes (even if they're good, Titanium stakes are half the weight!) you can get a trail weight of about 1300 g. But of course the seperate set up of fly and inner also allows you to variate - only inner for summer days with mosquitos and without rain, fly for spring and autumn days with a friend or dog, and both for a winter trip. So you could get away with a trail weight of 860 g for the pole, fly and stakes, if you want.

The fly can be set up alone, and in case you take both on a rainy and mosquito infested summer night, you can set up the outer first and then clip in the inner. Personally I find the inner can take those three drops which might hit it in the time I get the fly thown over it. Those who are more afraid of the rain will think different.


The inner with a view on the closed door. It is huge.


Completely closed and pitched low.

Condensation was never an issue with this tent. Where my Scarp 1 had a wet inner on some mornings, I yet have to make that experience with the Hubba HP. Great ventilation, but not so that you think it is breezy. The extras like the top net pockets and the side pockets - for some unnecessary, for me nice to keep a tidy tent - are great, zippers are easy running and it is easy to roll up the fly and put it to the side.


And on those days where you want to enjoy the view, pull the fly back and relax.


Space for your backpack and shoes under the fly, and also cooking there is no problem.


And a look inside. Note on top again the storage net, I really love that!

While it has some nice extras, I find it a rather minimalistic tent - in a very positive way. The small footprint and the possibility to set it up with only two stakes mean it is a tent made for the mountains, where a good pitching space is hard to come by. That doesn't mean it won't perform in the forest or on our Fjells in Lapland, though.

If you are on the look out for a new solo tent which is 4-season worthy, quick and easy to set up, and of course light, then the MSR Hubba HP might just be what you're looking for. The green fly allows you to go stealth camping and it is a friendly colour to wake up to, the features are well-thought out and the inner and fly set up allows you to be variable - take only the inner when its warm and sunny and you need rest from the bugs, take only the fly when you're with a friend, and take both in winter. You will feel comfortable and safe, in rain, wind and sunshine, with this tent.

If this closes the deal for you and you want this tent for your lightweight adventures, check out Ultralight Outdoor Gear who currently offers the 2010 MSR Hubba HP for £269.

Panasonic Lumix GF1 Field Report

The Panasonic Lumix GF1 was now on a bunch of trips with me, and it is time to have a closer look at this outstanding camera.


Lumix GF1 and the Joby Gorillapod SLR.

Getting this camera I made a few decisions, which meant a bit of extra work for me: Only shooting in RAW, and getting a photo editing software to work with the files. I think if you're not ready for this step, then you're better off with one of the excellent compacts out of the Panasonic range which let you import your photos using your existing software and you can manipulate in Picasa or similar. Why such a statement? If you are not going to work with your photos, you might as well get a cheaper compact camera, because you are not using the camera to its fullest. To make it more clear: You're not buying a Landrover Defender if all you do is drive to the supermarket.

The GF 1 sits between a compact camera and a DSLR. It is as small and light like a compact, but it has many feature of a DSLR and you can use different lenses with it. To illustrate what I mean, have a look at the size of my Canon EOS 50D which I use normally:


Canon EOS 50D with EF-S 17-85 lens

The EOS 50D with the 17 - 85 mm lens is an awesome camera, but at 1394 g as you see it above it is not light. I also have a Lowepro Toploader 65 AWcamera bag I use with it, which is 722 g, bringing the whole kit up to 2116 g - that is heavy! Now lets have a look at the Lumix GF1:


Panasonic Lumix GF1 with 20 mm Pancake lens.

The GF1 with the 20 mm Pancake lens and the Viewfinder is a mere 495 g - that is nearly a third lighter than the EOS 50 D. It is also significantly smaller as the EOS 50D, and I had it on my trips without a camera bag, carrying it just under my jacket. Now those who pay attention will say "But wait, Hendrik, the 50D has a 17 - 85 mm lens, and the GF1 a 20 mm Pancake - that's quite a difference, isn't it?". Sure it is, but to be honest, the 20 mm Pancake satisfies all my needs. I can get kickass Panaorama shots with it, and beautiful Close-ups with a blurred background or foreground. And also photos of fires at night are no problem with this lens, so pretty much all I do with the bigger Canon lens is handled very well by the 20 mm Pancake as well.


Sunset in Salamajärvi.


Blurry tree stump.


Melting snow in Salamajärvi.

But one of the reasons to get the GF1 is of course because you can use different lenses. Personally I am a sucker for wide angle lenses, the wider, the better. Now the GF1 has a 7 - 14 mm lens, so you can imagine the jumps of joy which I made as I got his beauty! It is 294 g light and I usually take it along when hiking, for panorama shots like the ones underneath.


The 7 - 14 mm wide angle lens.


Mountains and ice.


Mustavuori hill panorama in Repovesi.

Because I shot in RAW, I only use the Aperture and Manuel modes on the camera. Switching to different settings is fast thanks to the small wheel at the back of the camera, just where my thumb sits; though it takes some spinning of the wheel to go from one end to the other. The trigger button sits handy slightly to the front of the camera, all within optimal reach. What I love is that the bloody flash doesn't move ever. It is like it isn't there, which is exactly the way I like it.


Back of the GF1.

The LCD screen is huge and has a very crisp resolution, I reckon you could watch a movie on it so sharp is it. I don't use it, though, that's what I have the viewfinder for. It is an electronic viewfinder, so not the real deal, but better than the display, by far. To make a proper composition of a photo I find a viewfinder absolutely necessary, and this viewfinder is ingenious as you can move it up to a 90° angel to make great compositions and unique angles. So instead going down on your knees to get that reaaaaally close up shot of some plant or insect, you switch the viewfinder up and Voilá! there you go, Sir.


Viewfinder in a 45° angle.

The GF1 also makes Videos. That should be HD Videos as in High Definition, with 720P and 30 FPS (frames per second) that is plenty to shoot a video of setting up a MSR Hubba HP or boiling some water with the MSR Reactor. Video has its own quick-shoot button, or you turn the wheel to video and choose your own settings. I go with the latter, thus for me the quick-shot button can go.


Posing with the GF1 and a StickPic - not something I could do with the EOS.

Before turning my view on the things I do not like, I want to quickly come back to my point from the beginning of shooting in RAW and editing. I use Lightroom 3 Beta 2 at the moment, and while I am a newbie at editing the software - which is currently for free as it is a Beta, btw - is very intuitive and I quickly got the hang of it. Still not on the level of Fraser or Chris but I hope that I get there. And because I was able to test Lightroom 3 for free and could see how easy to use it is, I will have no problems to buy it later on. Anyway, shooting in RAW and editing has several advantages, upmost that you really can make the photo look like you remember it and make it presentable. JPEGs are often too light or too dark, and the editing with Picasa et al. is just for the bin. If you get this camera, or any camera which can shoot in RAW, do yourself and the onlookers a favour and shot in RAW and edit.

Then to the dark side of the GF1. There are a couple of things I do not like, for one, the GF1 doesn't switch off quickly automatically when you leave the on/ off button on "on". I have the 50D always switched "on" and it goes off after a minute of no activity. That's handy because I only need to push the trigger lightly to get it on again and start taking photos. Secondly, taking self portraits with the Pancake lens is not really satisfactorily. You always get a blurry result, and need something to focus the camera on before you jump in front of the lens. I also dislike that there is no cable connection for the lens cap, so you always need to stuff it in a pocket or hold it in the hand - I much rather have it hanging from the camera.


The GF1 is compact, light and isn't in the way when walking with a backpack.

Break down of weights:

GF1 Body: 364 g
Viewfinder: 25 g
20 mm Pancake lens:100 g
7 - 14 mm Wide angle lens: 294 g

So what is the conclusion? As the GF1 is only a loaned camera and I need to return it, with all the awesome lenses et al, I am starting to save for my own. A 495 g camera with a viewfinder and a lens which satisfies all my needs, at a quarter of the weight of my EOS 50D is completely in line with my UL philosophy. It takes splendid photos, survives bumps, wetness and extreme cold, is small enough to carry the whole day around the neck but never feel it and is beautifully light. While the Pancake lens is all I need for the trail, for the city or holidays the wide angle lens or a zoom could be useful thus it is cool that switching is possible. If you want to go to the next level with your photography, or are looking for a light and compact camera which can handle your advanced needs, I believe the GF1 will make you a happy, and better, photographer.

UL means to leave at home what you don't need, and with the GF1 + Pancake lens I can leave a lot at home, but never miss anything.